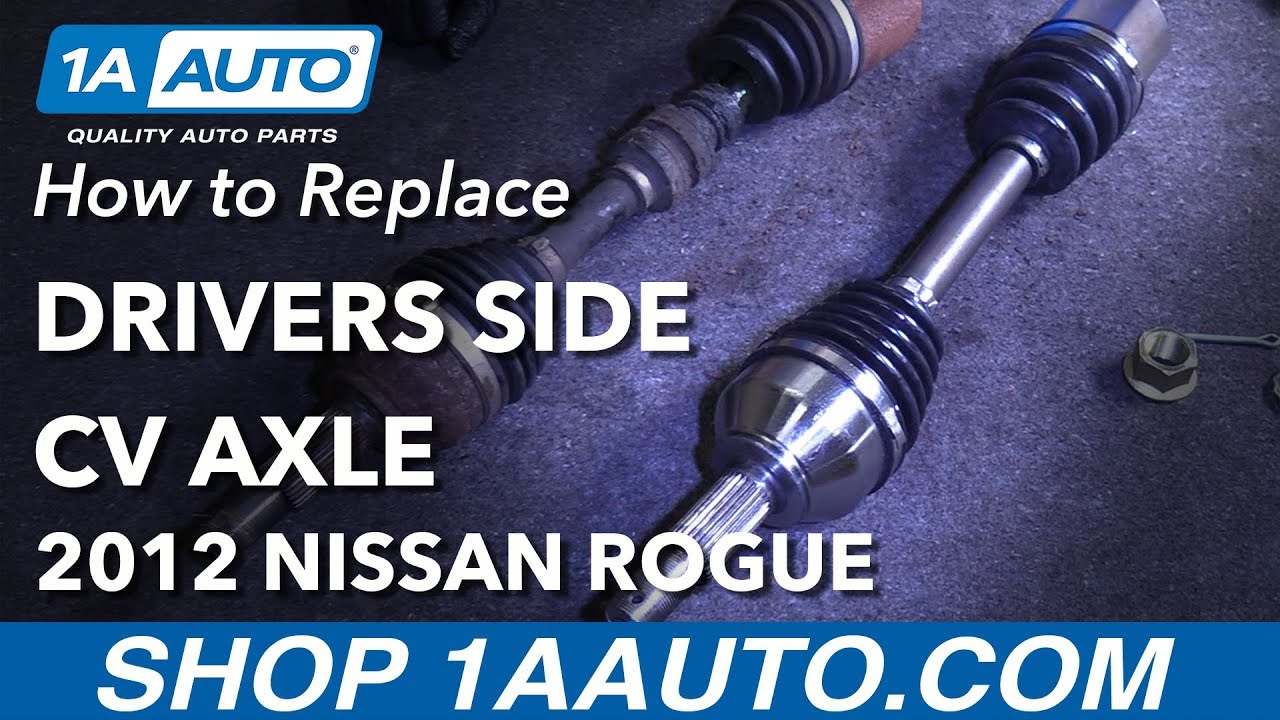
How to Replace Drivers Side CV Axle 2008-13 Nissan Rogue
Created on: 2018-07-13
How to repair, install, fix, change or replace broken, worn, or vibrating CV axles on 12 Nissan Rogue
-
step 1 :Removing the Wheel
- Pry off the hub cap by hand
- Loosen the 21mm lug nuts with the vehicle on the ground
- Bend the axle cotter pin with side cutters
- Remove the cotter pin from the axle
- Pull the cage off the axle nut
- Loosen the 32mm axle nut
- Raise the vehicle with a floor jack
- Secure the vehicle on jack stands
- Remove the lug nuts
- Pull the wheel off the hub
-
step 2 :Removing the Axle Nut
- Loosen the axle nut until it is flush with the end of the axle
- Strike the axle nut with a hammer to loosen the axle from the hub
- Remove the nut from the axle
-
step 3 :Separating the Ball Joint from the Steering Knuckle
- Turn the wheel knuckle by hand
- Pry the plastic clips out of the wheel well shield with a flat blade screwdriver
- Pull off the shield
- Disconnect the wheel speed sensor electrical connector
- Apply rust penetrant to the control arm pinch bolt
- Counterhold the control arm bolt with an 18mm wrench
- Remove the control arm nut with an 18mm socket and ratchet
- Push the bolt out of the control arm with a hammer and punch
- Apply a ball joint separator to the ball joint
- Turn the ball joint separator bolt to separate the ball joint from the wheel knuckle
- Remove the ball joint separator
- Separate the knuckle with a hammer and chisel
- Place a nut on top of the ball joint stud
- Reapply the ball joint separator to the ball joint
- Turn the ball joint separator bolt to separate the ball joint from the wheel knuckle
- Remove the ball joint separator
- Drive the ball joint out of the knuckle with a hammer and punch
- Turn the knuckle away from the ball joint
-
step 4 :Removing the Axle
- Tap the axle out of the hub with a hammer
- Have a drain pan ready
- Pry the axle out of the transmission with a pry bar
- Pull out the axle
-
step 5 :Installing the Axle
- Check the axle seal on the transmission for cuts or warping
- Slide the axle into the transmission
- Tap the axle into the transmission with a dead blow hammer
- Slide the axle into the hub
- Turn the hub to line up the splines
-
step 6 :Connecting the Ball Joint to the Wheel Knuckle
- Clean the ball joint stud with a wire brush
- Clean the wheel knuckle with a wire brush
- Insert the ball joint stud into the wheel knuckle
- Tap the ball joint into the knuckle with a dead blow hammer
- Apply copper anti-seize grease to the control arm pinch bolt
- Tap the bolt into the control arm with a hammer
- Counterhold the control arm bolt with an 18mm wrench
- Tighten the control arm nut with an 18mm socket and ratchet
- Torque the control arm bolt to 20 foot-pounds
- Connect the ABS sensor electrical connector
- Put the wheel well shield into place
- Push the plastic clips into the shield
-
step 7 :Installing the Wheel
- Slide the wheel into place
- Start the lug nuts by hand
- Thread the axle nut onto the axle
- Tighten the lug nuts preliminarily
- Lower the vehicle to the ground
- Tighten the axle nut to 138 foot-pounds
- Slide the cage onto the axle
- Insert a new cotter pin into the axle
- Bend the cotter pin over with side cutters
- Tighten the lug nuts to 80 foot-pounds in a crossing or star pattern
- Reattach the hub cap
-
step 8 :Checking the Transmission Fluid
- Run the engine until it reaches 160 degrees Fahrenheit
- Release the transmission dipstick lock with a flat blade screwdriver
- Pull out the dipstick
- Wipe off the dipstick
- Slide the dipstick into its tube
- Pull out the dipstick
- Check the fluid level
- Add fluid to the dipstick tube, as necessary, with a funnel
- Slide the dipstick into its tube
- Lock the dipstick into place
Tools needed
-
Funnel
Socket Extensions
Torque Wrench
Hammer
Ball Joint Press
Rust Penetrant
Pry Bar
18mm Wrench
18mm Socket
21mm Socket
32mm Socket
Side Cutters
Flat Blade Screwdriver
Copper Anti-Seize
Center Punch
Chisel
Drain Pan
Ratchet
Wire Brush
1/2 Inch Breaker Bar
Hi. I'm Mike from 1AAuto. We've been selling auto parts for over 30 years!
Okay, we're going to pull this hubcap off. Just grab under here and pull. You can also use the little pry bar and get in between and pry it out. Now, we're going to use a 21 millimeter socket and a breaker bar to loosen up the lug nuts before we lift the vehicle.
We're going to take this cotter pin out. We're going to use some side cutters. Just grab it right here, bend this back like that. Try to pull this out this way. You can throw that away. You don't want to reuse that. Then, we can pull this cage off, and it will just hold the nut from loosening up. I'm going to use a screwdriver to help pry it out a little bit, if I can pry up on that. Pull it up.
Now, I'm going to take a 32 millimeter socket and a breaker bar, and I'm going to loosen up this axle nut. Once it's loose, I can go back up in there. I'll take the lug nuts off. Now, take the tire off. Just give it a little hit.
I'll just use a ratchet to help me get this nut off. Once I get the nut flush with the axle, I'm going to stop, and I'm going to hit it with a hammer to break the axle free from the hub bearing. This will prevent any damage I do to the threads of the axle. That's broken free, so that's good. Now, I can take that nut off.
I’m going to turn this so it's easier to access. All right, we're going to take this shield off. I'm going to take these little push clips off. Just use a straight screwdriver. These come out and then this can come off. I'm going to disconnect this wheel speed sensor wire, just because it's going to give me a little more slack when I move the front suspension out of the way. Just use a straight screwdriver. You can use your finger too, but this one's a little tricky. Just pull that out, and just set that aside.
We're going to have to take this ball joint pinch bolt out. There's a good amount of rust right here, so I'm going to use some rust penetrant on this. Just like that. I'm going to use an 18 millimeter wrench on this side, on the bolt side. I'm going to use an 18 millimeter socket and a ratchet on the nut side, and I'm going to break this free. I'm going to use a punch so that I don't mess up the threads of the bolt, and a hammer. I'll just tap it through the rest of the way.
We want to separate this lower ball joint from the knuckle. We're going to use a ball joint separator. Slide this right here. You have to give it a little tap. Okay, so the top is going to push right there, so we can tighten this down. We need a socket and a ratchet to tighten this. I'm going to try to separate this knuckle right here. I'm going to use a chisel to get the ball joint out a little easier, so I'll use a chisel and a hammer to separate it a little bit. Just give it a little tap.
All right, so I'm going to use my ball joint separator again, but because the ball joint's further down there, the separator won't push it down any further, so I'm going to take a nut and stick it in between there. That'll be pushing the nut down, and it should bring it down a little bit more for us. The tool's pushing on the nut, which is pushing down on the ball joint. It's pushing down the ball joint. You don't wat to tighten this tool too much. If it starts feeling like it's tightening it up, then you want to stop, because you could break the tool. That brought it down a lot more. At this point, I'm going to use a punch and a hammer to hammer it down a little bit. It's coming down. There we go. Now, we're going to move this knuckle out of the way of the ball joint. I'll just pull the ball joint down, push this out.
I can take and tap the axle in. Push that out of the way. Pull the axle out this way. Now, I have to separate the axle over here. You're going to want to stick a pan underneath to catch any fluid that comes out of the transmission, and we'll do that. I'll take a pry bar, and pry up against the transmission, and just pry the axle out, just like that. There's a C-clip that holds it in. Once that's a little bit loose, you can wiggle it out. You may have to push the knuckle out of your way a little bit. The C-clip is stuck a little bit. Take the pry bar, pull it out. Here we go. Pull it out.
Here's our old axle. Here's our new driver's side axle from 1AAuto.com. As you can see, the splines are the same. The tripod joints are the same, and the boots are the same. It’s very similar to the old one. The new one comes with a new nut, a new cage, and a new cotter pin. Get yours at 1AAuto.com, and you'll be ready to rock and roll.
We're going to slide this axle in here. You want to make sure and be careful of the seal. Don't cut it. If you do feel that there is a warped section in the seal or its cut, you should replace it. Just be careful. Push it in. We can use a dead blow hammer to tap it in. There we go. Once it's in, make sure it's locked in. That feels good. We're going to put the axle back in the hub, right there, like that. You might have to spin the hub a little bit to get it to line up.
All right, once that's lined up, then we can pull down our control arm and slide our ball joint back in. Before I slide the ball joint back in, I'm just going to use a wire brush to clean some of this rust up. You can clean some up in here, in the knuckle. Now, line the knuckle up with the ball joint, right there. Be careful. You don't want to get your finger caught in there. Once that's lined up, you can use a dead blow and hammer it up. That's lined up.
I'm going to use a little bit of copper anti-seize on this bolt. Hopefully, we don't have to take it out again. In case we do have to take it out again, it'll come out easier. We'll slide that in. Tap that bolt in. I'll put the nut on. All right, so I'm going to tighten this down by hand first, and then we're going to torque it. Once it’s snug, we'll get the torque wrench. Using an 18 millimeter socket on a torque wrench, we're going to torque these to 20 foot-pounds. We actually sell these torque wrenches at 1AAuto.com. That's torqued to spec.
We're going to reinstall this ABS sensor wiring harness. It’s going to slide it into this groove right here, and then we'll reinsert the connector so it locks in.
Now, we're going to install this side cover. Just line that up. I'll take these little push tabs, push these in. Got the last one in.
In this repair, we removed the lower ball joint. It's recommended that, whenever you remove any front end components or replace any front end components, that you have an alignment checked or performed. Go to your local shop and have your alignment at least checked.
Reinstall the tire. Install the lug nuts. All right, before we drop this down, we're going to install the axle nut. When we drop it down, we're going to torque the axle nut, and then we're going to torque all the lug nuts.
All right, we're going to torque this axle nut to 138 foot-pounds. We're going to use a 32 millimeter socket and a torque wrench. All right, so that's torqued. Now, we're going to put this cage over here. You want it so that you can get the cotter pin through. You always want to make sure you replace the cotter pin. Never want to reuse an old cotter pin. That's lined up pretty good. I'll take my side cutters, just give it a little tap, tap it down. Now, I can twist this to the side a little bit, and I'll bend it out. Take the other side and bend this side out as well. Tap it down a little bit, if it's in the way. That looks good right there.
Now, we're going to torque our lug nuts down to 80 foot-pounds. We're going to torque them in a star pattern that will tighten the wheel down evenly. Now, we'll take the hubcap. You're going to line it up with the slot for the valve stem. You just hammer it down.
Okay, we're going to want to check the transmission fluid. To check it, the dipstick is right here. You're going to need a little tool to just push on the lock. We're just using a little screw driver. Push on the lock. That releases the dipstick. You can pull out the dipstick. You can wipe it off.
Here's where the level indicators are on the dipstick. You're going to want the dipstick fluid to be right about there. Now, when you're checking this, you're going to want to check it with the engine running. The transmission fluid has to be at about 160 degrees Fahrenheit, so you're going to have to warm up the car for a while and check it that way. After you wipe the dipstick off, we'll put it in. Put the lock on the other side, so you don't have to unlock it every time you check it. You can pull it out like this. We can check it again. Our fluid looks a little bit on the low side. If we warm this up of about 10 or 15 minutes, we want it a little bit higher. We will add a little bit of fluid to our vehicle.
Make sure you're using the appropriate fluid. Check your owner's manual to see what kind of fluid. Just use a funnel, and you add the fluid right there. Take the funnel out. You can recheck it. As you can see, our level is right here, so that's good. Then, we can reinsert the dipstick, and then lock it in place.
Thanks for watching. Visit us at 1AAuto.com for quality auto parts, fast and free shipping, and the best customer service in the industry.
Shop Products


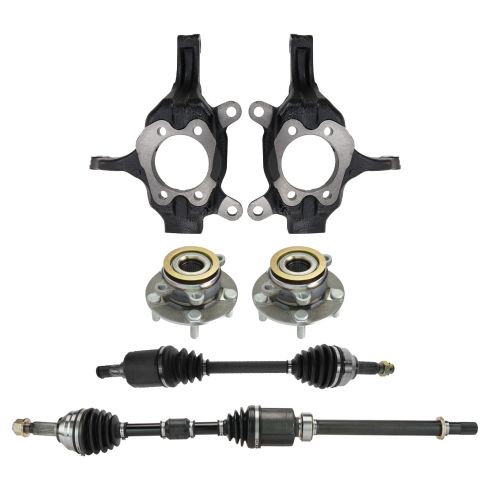
2008-13 Nissan Rogue Front Wheel Drive Front 6 Piece Drivetrain Kit TRQ PSA80886
Part Details:
- (2) Front Steering Knuckles
- 6 Piece
- (2) Front CV Axle Assemblies
- (2) Front Wheel Bearing & Hub Assemblies

How to Replace CV Axle Shaft 1998 Volvo S70
In this video, 1A Auto shows you how to replace CV joint axles in a 98 Volvo S70.
