
How to replace Drivers side CV axle shaft 2006-11 Honda Civic
Created on: 2017-12-08
This video shows how to remove and install the wheel, cv axle, and axle nut on the driver side of the 06-11 Honda Civic. Follow the steps and learn to DIY
-
step 1 :Removing the Wheel
- Loosen the lug nuts with a 19mm socket with the vehicle on the ground
- Pry off the center cap with a flat blade screwdriver
- Raise the vehicle with a floor jack
- Secure the vehicle on jack stands
- Remove the lug nuts
- Pull off the wheel
-
step 2 :Removing the Axle Nut
- Fit a flat blade screwdriver into the axle nut opening
- Tap the screwdriver with a hammer
- Secure the hub with a pry bar
- Loosen the axle nut with a 32mm socket and breaker bar
-
step 3 :Removing the Axle
- Loosen the three 17mm bolts holding the ball joints to the control arm
- Pry the control arm down with a pry bar
- Tap the axle with a dead blow mallet
- Remove the axle nut
- Pull the axle out of the knuckle
- Have a drain pan ready
- Pry the axle out of the transmission
-
step 4 :Installing the Axle
- Seat the axle into the transmission
- Tap the axle into the transmission with a dead blow mallet
- Insert the axle into the knuckle
- Reinstall the ball joint into the control arm
- Tighten the three 17mm bolts to the ball joint
- Torque the bolts to 43 foot-pounds
-
step 5 :Installing the Axle Nut
- Tighten the axle nut with a 32mm socket and ratchet
-
step 6 :Reattaching the Wheel
- Slide the wheel into place
- Start the lug nuts by hand
- Tighten the lug nuts preliminarily
- Lower the vehicle to the ground
- Tighten the lug nuts to 80 foot-pounds in a crossing or star pattern
- Tighten the hub nut to 134 foot-pounds
- Reattach the center cap
Tools needed
-
32mm Socket
Hammer
Torque Wrench
Pry Bar
17mm Socket
Center Punch
19mm Socket
Ratchet
1/2 Inch Breaker Bar
Hi, I’m Mike from 1A Auto. We’ve been selling auto parts for over 30 years!
With the vehicle on the ground, I'm going to use a 19 millimeter socket and a breaker bar to loosen the lug nuts. With the lug nuts loosened, now we're going to raise and support the vehicle. With the lug nuts loosened, I should be able to use just the socket and finish removing them. Then I can take the wheel off. All right, last lug nut removed, I can take the wheel off.
You need to remove the axle nut. It's been staked in place. Going to take an old flathead screwdriver that fits in the opening. I'm just going to tap it in to bend that metal out. If you do have someone that can help you, they can get inside the car and step on the brake and hold this to keep it from spinning while you remove it. Or you can take your wheel, pop the cap out, reinstall the wheel, lower the car back down, and then with the vehicle on the ground, we can loosen the axle nut through the opening on the wheel.
I'm just going to install the lug nuts. These don't have to be torqued, just loosely tightened down so the wheel doesn't move, because we're only going to put the car down on the ground. We're not going to drive it anywhere. Lower the vehicle back down to the ground. Alright, with the vehicle on the ground, I'm going to use this 32 millimeter socket and a breaker bar, and we will loosen the axle nut. See how loose it is.
All right, now I can put the car back up in the air and take the wheel off. With this axle nut loosened, I'm going to remove the wheel again. You can loosen the bolts and the two nuts and the studs holding the lower ball joints and control arm. Once these are loose, you can swing the whole knuckle brake suspension assembly out and away from the axle. This will allow us to remove it from the transmission.
This is a 17 millimeter socket and a breaker bar I'm going to use to loosen these. Get them all loosened first. Now I'm going to take a pry bar and just pry the lower ball joint apart from the control arm. Pop it out like that. Make sure this nut is loosened up. I want to make sure that this axle will come out of the hub assembly, so I just take a dead blow mallet and just tap it. It's going to move pretty freely.
We got lucky with this one. Just tap it some more, but it should come free. That's going to come right out. I'm going to grab hold of the knuckle assembly, and the whole suspension assembly, put one hand on the axle and just guide this off. Just push it out like that. Lay the axle aside over here. We're going to put a drain pan in place because when I pop this axle shaft out of the transmission, some transmission fluid may leak out. I'm going use a pry bar to reach up underneath the joint. You don't want to pull on the joint; you want to pry on it carefully over here. Work that in. There it is. I'm going to try to pull it out as straight as possible not to damage the transmission seal. Let's see here. There we have our axle.
Here's the original one from our vehicle, and a brand new one from 1AAuto.com. No core charge on this. It’s similar in design. Same style splines and snap ring. It has the same outer splines and same style locking nut. This should fit great and work great in our vehicle.
Take our new axle shaft and guide it up into the opening of the transmission. Bend it a little bit. Guide it in, and do not nick the seal. You can kind of turn it in a little bit. It will find the splines and slide in. Get that in place. You need to seat it in the transmission so it feels like it's caught on the splines. Yup, it's caught on the splines. I've got the axle nut out here. Take our dead blow mallet, give it some taps, and that will drive into the transmission. Then I can see it's seated itself.
I'm just going to grab our suspension assembly, just pull it aside. Lay that down for now. Take this axle nut off now. Keep it nearby. Take our suspension assembly, push it out. Take our axle, line it up. It should slide right in there. Spin this and get the splines to line up. There it is. Take out our axle nut and just capture it so it doesn't back out. Then I need to reinstall the ball joint into the lower control arm. Push this arm down, pull this over. I'm just going to use a pry bar to get in here, pry this down. Get those in place. I have to move it a little bit. Okay, caught. Tighten down.
Use a ratchet just to bring these down snug. There is an order to torque these down. The torque will be 43 foot pounds. You'll start with the front nut, the rear nut, and then the bolt. Take our axle socket and just snug this axle nut down. I'm going to spin this so this is facing up because I'm going to put the wheel on it, I'm going to torque it, and then I want to be able to punch it down where I can reach it.
Reinstall the wheel. Use the socket, snug these up. Put the vehicle back down. I'm going to torque the lug nuts first to 80 foot pounds using a cross pattern. Now we've got a torque wrench and our 32 millimeter socket. The torque wrench is set to 134 foot pounds to torque the axle nut. Now with the axle nut torqued, we need to stake it in place. I'm going to take a punch and a hammer and fold it into that little opening in the axle shaft. You don't have to go too crazy. Finally, reinstall your center cap by just pushing it in.
Thanks for watching. Visit us at 1AAuto.com for quality auto parts, fast and free shipping, and the best customer service in the industry.
Shop Products


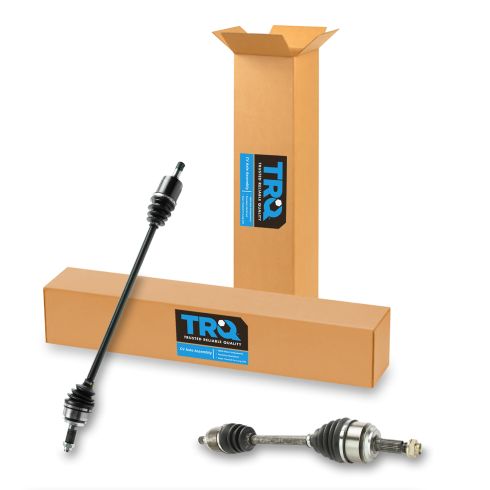
Honda Civic Front Driver & Passenger Side 2 Piece CV Axle Assembly Set TRQ CSA82446
Part Details:
- 2 Piece
- (1) Front Driver Side CV Axle Assembly
- (1) Front Passenger Side CV Axle Assembly

How to Replace CV Axle Shaft 1995-2005 Chevy Cavalier
Check out this video to learn how to replace the CV axles on your 95-05 Chevy Cavalier.
