
How to Replace Drivers Side Mirror 2003-07 Chevy Silverado
Created on: 2020-07-16
This video shows you how to install a new side view mirror on your 1999-07 Chevy Silverado.
Tools needed
-
Gloves
7mm Socket
T20 Socket
Trim Tool Set
Safety Glasses
Pocket Screwdriver
Okay. So, what we need to do first is remove our door panel. Grab yourself a nice plastic trim tool. Come right up along here or even up here, and just try to pry this away. You're going to see it's got a couple of little clippy-dos. We're going to move along to this right here. Come down along here with your trim tool, pry up on all this, disconnect all of your wiring. I'm just gonna use the smallest pocket screwdriver. If you press right here, there's a little piton, and then you can pull this down and remove this as well. Let's get this trim piece off of here as well. Now, if you look right up under your handle, you're going to see a bolt that's right there. You can either use a 9/32 or even a 7-millimeter socket, whichever you have.
Next, we're going to get this little door lock bezel out of the way. I'm just going to use my small pocket screwdriver just to kind of get this started. And I'll use my trim tool to pop it right off. That exposes our screw. Get this out of here as well. Now, we're going to remove this little cap right there. You can use anything, small pocket screwdriver, whatever you've got. Pops right off. Underneath there, you're going to see a T20. Remove this screw. There it is. On the far end, we'll go ahead and remove this push clip as well. So, now if you feel along the bottom, you're going to find this bolt right here. Once again, either use a 7-millimeter or 9/32. Get that out of there. Go ahead and grab onto your door panel, lift it straight up, and draw it away from your vehicle. Just use your small pocket screwdriver, come right underneath this area right there, and you should be able to draw the wire out. There we go. Let's go ahead and get this right out of here. That exposes our three mounting nuts. Before we go ahead and remove those though, you need to follow this wiring down and then, of course, remove that as well.
Remove this. Remove it off of there, and off of there. Okay. Let's remove all three of these. Just remember that there isn't going to be much holding the mirror in. So, usually, I'll just kind of take out two and I'll loosen one, go around the other side, hold onto it, and remove the last. There it is. Okay. Now, you're going to see right here where the wires are, there's like some little clippies. You just kind of push those and then the mirror should want to fall right out of there. There we are. We're going to go ahead and put the wiring through the door here. Push that all the way down through. Now, I'm going to carefully put my studs through. I'm being careful not to scratch any of my paint, of course. And then I'll start on one of my nuts. All right. Now that that's started, I'll come around and I'll put on the other two and snug them right up. Awesome.
All this wiring right here, you want to make sure that you tape this up onto there. If you need to remove these, you can just use a little forkey [SP] tool, pop them out, tape it up, and then make sure it's secured and plug it in. All right. So let's get this in here real quick. This is just going to kind of help with noise and whatnot. Let's get the vapor barrier back on here. The next thing I always like to do is to make sure I test what I've done before I go ahead and put the door panel on. Let's go ahead and reconnect all this stuff. Get my black, my blue. This one right here. Make sure it locks in. This one. Perfect. We'll put the key in the on position. Let's go ahead and test that mirror real quick. Side to side, up and down, that's perfect. Left directional, all right. Get this back off of here. Let's get this light reconnected. Slides right in. Coming up here, we want to make sure we grab all this wiring, pull it right through like this. Now, we've got our handle, it's going to come right through this hole.
Now, as we push in the panel, you're going to see you have hooky-dos all coming down along here. You have one here, there, there, and then a couple along the bottom. All those need to fit into their slots that are on the door. Once you have them so they're starting in there, we'll slide them all down. Get our screws here, get this one right here. Nice and short right there. The long one, goes right underneath this handle. Tight. Get this one, put in right back in there. Add our little cover, push that right on there. Get our push clip. Now it's time to put back on our lock. Make sure you've got the red area facing towards the rear of the vehicle. If you were to look at the backside, you're going to see there's a hooky-do here and then there's a couple of little ones right there. This forward end needs to go in first, and then you roll the backside in. There it is. Make sure it's unlocked, of course. Now it's time to get this back on there. If you were to look at this, you're going to see there's a little hooky-do. That needs to slide in there. So, we'll just go right over the handle, put in that forward side first with the hooky-do, and then go ahead and clip this in. Perfect. Put this back on there. Got another hooky-do, goes down, and then, of course, the pitons push right in.
Let's get this back reconnected now. If you look at the backside, you can see, of course, the colors. Black, we're going to skip one and go blue. We'll take that green. Get the big one, slide it right in. Make sure it's locked in. Grab this, put it on. Now, when you put this in, there should be like a little hooky-do here that's going to go under there. And then there should be a little clip that's going to force down in there. Both of ours are broken. So, you're just going to have to imagine I'm going in from the front, sliding it down, making sure my wiring's where it needs to be. There we are. Just retest this real quick. It opens. I'm going to lock it, unlock it. Perfect.
Shop Products


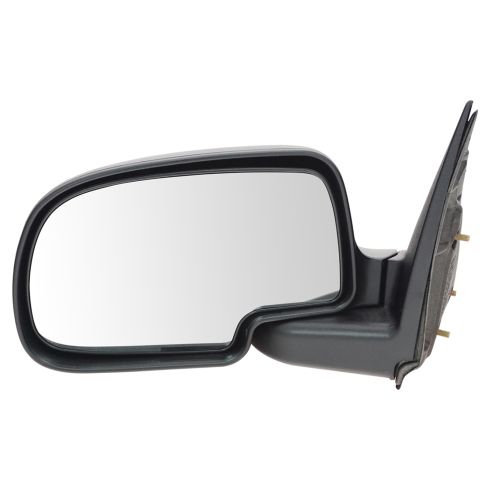
Chevrolet GMC Driver Side Mirror TRQ MRA05079
Part Details:
- Paint to Match
- Manual
- No
- No
- Clear
- No
- Textured
- Plastic
- Flat
- No
- 3
- Black
- No
- No
- No
- No
- No
- No
- No
- No
- Manual
- No
- No
- No
- Black
- Textured
- No
- No

How To Replace Broken Side Rear View Mirror VW Passat 1998-2001
Need to replace the side view mirror on your 98-01 VW Passat? Learn how in this video!
