
How to Replace Electric Fuel Pump 1997-2006 Toyota Camry
Created on: 2016-09-20
If the electric fuel pump needs to be replaced, this video will show how to remove and install the fuel sending unit and the fuel pump
-
step 1 :Accessing the Fuel Pump
- Pop out the rear seat bench
- Push the seat belts through the holes in the seat cushion
- Pull out the rear seat
- Pry up the fuel pump service cover with a flat blade screwdriver
-
step 2 :Removing the Fuel Sending Unit
- Disconnect the fuel sending unit wiring harness
- Remove the two 8mm bolts from the sending unit bracket
- Pull the fuel line off its connector
- Put the fuel hose aside
- Remove the six 8mm bolts from the sending unit cap
- Remove the fuel sending unit from the vehicle
-
step 3 :Removing the Fuel Pump
- Remove the cap from the sending unit
- Pry the lower housing off the fuel pump
- Pry the upper housing off the fuel pump
- Disconnect the fuel pump wiring harness
- Remove the pump from the housing
- Pry the metal snap clip off the fuel pump, if necessary
- Remove the filter from the pump, if necessary
-
step 4 :Installing the Fuel Pump
- Remove the top cap from the new fuel pump
- Slide the black spacer onto the fuel pump
- Slide an o-ring onto the fuel pump
- Snap on the adapter fitting
- Remove the bottom cap from the fuel pump
- Slide the new fuel strainer into the fuel pump
- Snap the wire retainer onto the fuel pump
- Put the fuel pump into the housing
- Connect the fuel pump wiring harness
- Clip the upper housing onto the fuel pump housing
- Put the bushing onto the fuel pup
- Clip the lower housing onto the fuel pump housing
-
step 5 :Installing the Fuel Sending Unit
- Put the fuel sending unit into the tank
- Rotate the sending unit into position
- Put on the fuel sending unit cap
- Insert the six 8mm bolts into the sending unit cap
- Connect the fuel line
- Put on the sending unit bracket
- Insert the two 8mm bolts into the bracket
- Connect the sending unit wiring harness
-
step 6 :Reinstalling the Rear Seat
- Push the service cover into place
- Tap down the service cover
- Pull the seat belts through the seat cushion
- Snap the seat cushion into place
Tools needed
-
Socket Extensions
Flat Blade Screwdriver
8mm Socket
Ratchet
Brought to you by 1AAuto.com, your source for quality replacement parts and the best service on the Internet.
Hi, I'm Mike from 1A Auto. I hope this how-to video helps you out, and next time you need parts for your vehicle, think of 1AAuto.com. Thanks.
In this video, we're going to be working with our 1998 Toyota Camry 2.2L 4-cylinder. We're going to show you how to remove and replace the fuel pump and screen on your fuel sending unit. Now, on most vehicles you have to drop the fuel tank in order to be able to do this, but fortunately, our Camry has a service door located under the back seat, where we can access this, and work on it without dropping our tank out of the vehicle.
Fuel pumps are what get the fuel up to the rail, where your fuel injectors send it into the engine, as well as keeping that pressure there. If your vehicle's not running, and you can't hear that fuel pump kicking on when you first turn the key, so it can build that pressure into the fuel system, your fuel pump is likely the fault if you've already checked relays and fuses. Fortunately, it's easy to replace, and it's available from 1AAuto.com. If you want that part for your vehicle you can follow the link down in the description. If you like this video, please click subscribe. We have a ton more information on this car as well as many other makes and models. Here are the items you'll need for this repair. Here are the items you'll need for this repair.
Remove the rear seat cushion by lifting up firmly and pushing the seat belt buckles through the holes in the bottom.
This is the service cover for the fuel pump. It's glued down to the floor, so you'll have to carefully work it off with a flat blade screwdriver. Try to bend the cover as little as possible while doing this, because that will make re-installing it a lot easier.
Push down on the tab. Remove the electrical connector. Start by removing these two 8mm screws with a socket, ratchet, and extension. You can also use a Phillips-head screwdriver on these, but the 8mm is much less likely to strip. Push down on these two tabs while working the fuel line off of the connector. Place this fuel hose off to the side and finish removing the remaining six 8mm screws. Pry up. Remove the sending unit assembly from the vehicle.
Remove the cap. This whole piece is referred to as the fuel sending unit. We have a few things going on in here. This float is the fuel level sensor for the gauge on your vehicle. We also have the fuel strainer, which is like a preliminary oil filter to remove any large dirt and debris particles from the fuel before it goes into the pump and gets sent into the fuel system, and we have the pump itself. All of this can be disassembled, so we can change out the pump and the screen independently. We use a flat blade screwdriver to carefully pry up on these tabs. There are three of them here on the bottom. Be sure not to lose this rubber bushing in the bottom here.
We'll remove the upper part here, so we can lower the fuel sending housing down here. Lower the whole assembly out. Remove the electrical connector for the fuel pump. Remove the pump and screen from the housing.
I always recommend you replace the pump and the screen together, but if for some reason you need to separate them use a flat blade screwdriver and carefully work out this metal snap clip on the bottom. Remove the pick up filter from the bottom of the pump.
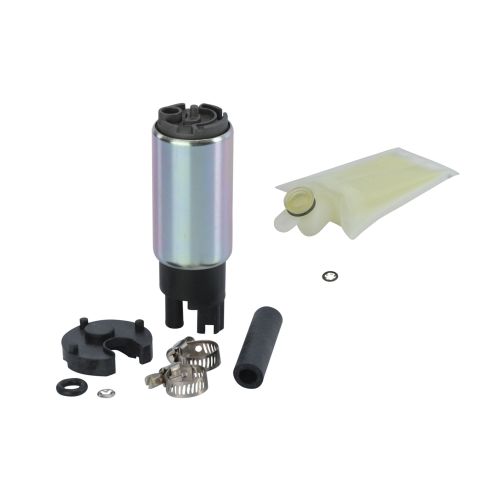
Here we have our old fuel pump and strainer that we removed from our fuel sending unit, and our new pump and strainer as well as some adapter kits here from 1AAuto.com. As you can see, these pumps, while this one has been discolored from sitting in fuel its whole life, are exactly the same with the same outlet on the bottom, the same inlet pipe, and the same connector at the top. The strainer, obviously again, has spent its whole life submerged in fuel. You can see some of the dirt and debris it picks up from inside of the tank. This is a nice clean new one we're going to through on there. While these parts are available separately as well as in a kit. We always recommend you replace the pump and strainer together to ensure that you get nice, clean flow. This kit also comes with some various bushings, adapters, hose, and clamps. Because these pumps are fairly universal, it fits several other Toyota models as well as fitting some other makes. We'll use the corresponding hardware to ensure that our pump sits in and fits just the way it did from the factory into our old sending unit. If your fuel pump has died out and is keeping your vehicle from starting, or your filter is clogged up, and creating an issue with starting the vehicle, or cutting flow and creating a lean condition, this new kit from 1A Auto is going to go in direct fit just like your original equipment and fix you up right.
Remove the cap. We're going to insert this black spacer here all the way to the bottom, followed by an O-ring. This little adapter fitting here snaps on to keep it all together. Now, it matches our old pump. We'll remove the cap here, and install our new fuel strainer. It even comes with a new hold down clip. Pop the snap retainer back into place. It may help to hold one side down with your thumb. Press the other one into place with a flat blade screwdriver.
Reinstall the fuel pump and the electrical connector. Line up the sleeve and press it back into its clips. Line up your pump. Press that back in. Install the bushing on the bottom. Snap the cover back on.
We're now ready to reinstall our sending unit into the vehicle. Carefully reinsert the fuel pump into the tank. Rotate it back into the proper position. Install the steel plate back over top. Reinstall all of your 8mm screws. Reinstall the fuel line at the top. Be sure that it snaps on to the quick release fully. Then, lay the metal cover over and reinstall those two 8mm screws. Reconnect the electrical connector.
Place the service cover back on to its alignment marks. Tap it down to reseat the fuel. Send the seat belt buckles back through the holes in the bottom of the seat cushion. Line up the labs and the front of the seat and lock them into place and you're good to go.
Thanks for tuning in. We hope this video helps you out. Brought to you by www.1AAuto.com, your source for quality replacement parts and the best service on the Internet. Please feel free to call us toll-free, 888-844-3393. We're the company that's here for you on the Internet and in person.
Shop Products

Toyota Electric Fuel Pump TRQ FPA62058
Part Details:
- Strainer Kit
- (1) Electric Fuel Pump
- (1) Fuel Pump Strainer

How to Replace Fuel Pump 2001-05 BMW 325 Xi
Watch this video to learn how to replace a fuel pump in your 01-05 BMW 325Xi and other 3 Series vehicles. 1A Auto shows you how step by step!
