How to Replace Engine Mount 1999-2007 Volvo V70
Created on: 2013-08-22
Watch this video on how to replace the upper engine mount on your 99-07 Volvo V70.
-
step 1 :Removing the Engine Cover
- Remove the eight T30 Torx screws from the engine cover
- Pull off the engine cover
-
step 2 :Removing the Engine Support Bracket
- Remove the four 14mm bolts from the engine support bracket
- Cut off the zip tie that holds the power steering return hose to the upper strut mount
- Attach an 18mm wrench to the engine mount nut
- Remove the 15mm bolt from the top of the engine mount
- Lift the engine bracket up and out
-
step 3 :Removing the Engine Mount
- Loosen, but do not remove, the four 14mm bolts from the engine mount
- Lift the engine mount up and out with the bolts in it
-
step 4 :Installing the New Engine Mount
- Transfer the bolts from the old mount to the corresponding spot in the new mount
- Put the new mount into place
- Tighten the four 14mm bolts
-
step 5 :Reinstalling the Engine Bracket
- Put the engine bracket into place
- Insert the four 14mm bolts into the engine bracket
- Insert the 15mm bolt into the top of the engine mount
- Tighten the 15mm bolt and fasten the 18mm nut onto it
- Connect the power steering return hose to the engine bracket with a zip tie
-
step 6 :Reinstalling the Engine Cover
- Put the engine cover into place
- Insert the eight T30 bolts into the engine cover
Tools needed
-
Socket Extensions
14mm Socket
15mm Socket
T30 Driver
Wire Ties
Ratchet
Wire Cutters
Brought to you by 1AAuto.com, your source for quality replacement parts and the best service on the Internet.
Hi, I'm Don from 1A Auto. I hope this how-to video helps you out, and next time you need parts for your vehicle, think of 1AAuto.com. Thanks.
In this video, we're going to show you how to replace the upper engine mount on a 2002 Volvo V70 non-turbo. It's pretty much the same operation for '01 through '07 non-turbo V70s, as well as the S60 and the S80. In order to do this repair, you'll need a 14 and 15mm socket, socket wrench and extension, a Torx 30 socket, an 18mm wrench, a zip tie and, of course, the new engine mount from 1A Auto.
On the top of the engine you're going to see a plastic cover. It's in two pieces. It covers the ignition coils and the timing belt. There are eight Torx 30 screws that go into it. Use your Torx 30 bit and a driver and remove those. Then, go ahead and pull that cover up and out of the way.
On the upper engine support bracket, on the driver's side end, you're going to find two 14mm bolts. Use your socket and socket wrench and remove those. If your vehicle has the zip tie that ties the return hose to the power steering reservoir to the upper strut mount, go ahead and cut that off and then, just as you did on the driver's side, remove the two 14mm bolts that hold the upper engine bracket into place. I'll go ahead and fast-forward through that.
The actual bolt that goes through the engine mount is a 15mm bolt and the nut is an 18mm nut. Use a combination of wrenches or socket wrenches, whatever you have, to loosen that and then take that bolt and nut out. After that bolt is out, go ahead and lift that upper engine support bracket out. Use a 14mm socket and your socket wrench and loosen up on the four 14mm bolts that go into the cylinder head. Go ahead and unscrew them entirely, but leave them in, because they are different lengths and you're going to want to swap them over to the new mount one by one. I'll fast-forward as I do that. Take the engine mount out with the bolts still in it and put it aside.
You'll see the part that we just pulled out and the new part from 1A Auto is exactly the same. Swap the bolts over one by one, going into the new part as they came out of the old one. Then go ahead and put the new mount with the bolts in it into the cylinder head, where it is located, and then, start tightening them down. Go around and tighten them equally, being careful not to over-tighten them, as you are putting steel bolts into an aluminum cylinder head.
Reinstall the upper engine bracket. Reinstall the 14mm bolts on the passenger side and tighten those down. I'll fast-forward as I do that. Now do the same for the driver side's two 14mm bolts, and I will fast-forward as I tighten those up. Reinstall the bolt that goes through the engine mount and the upper engine bracket and tighten that down. Put a new zip tie through the upper engine bracket and around that return hose on your power steering. Keep it away from the belts. Reinstall the plastic upper engine cover/coil cover there, and reinstall the eight Torx 30 screws that hold that in place.
We hope this video helps you out. Brought to you by www.1AAuto.com, your source for quality replacement parts and the best service on the Internet. Please feel free to call us toll-free, 888-844-3393. We're the company that's here for you on the Internet and in person.
Shop Products

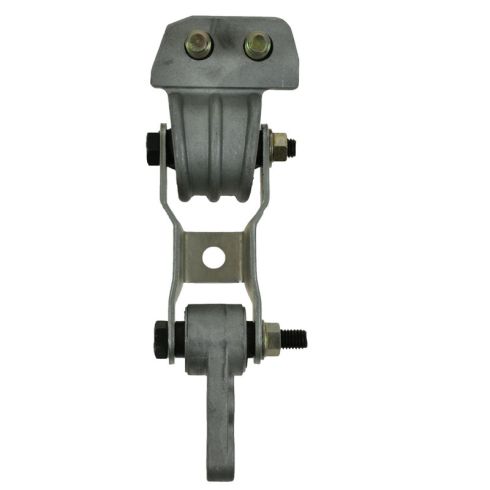
Volvo Lower Engine Torque Strut Mount TRQ MTA34470
- Highest Quality Materials
- Direct Fit Replacement - Guaranteed to fit and function for your specific application
- Quality Tested - built to a strict level of product standards.

How to Replace Engine Mounts 2007-14 Cadillac Escalade
This video shows you how to install new TRQ engine mounts on your 2007-2014 Cadillac Escalade.


