How to Replace EVAP Purge Solenoid valve 2014-19 Chevy Silverado
Created on: 2019-05-07
Watch this video to learn how to replace a leaking or broken EVAP purge solenoid valve on your 14-19 Chevy Silverado.
-
step 1 :Removing the Intake Air Duct
- Disconnect the negative battery cable with a 10 mm socket
- Loosen the worm clamp where the air duct connects to the air filter box
- Loosen the worm clamp where the air duct connects to the throttle body
- Disconnect the air hose at the driver side rear corner of the duct box
- Disconnect the air hose at the passenger side rear corner of the duct box
- Remove the intake air duct by sliding its rubber boots off the air box and throttle body connections
-
step 2 :Removing the EVAP Purge Solenoid
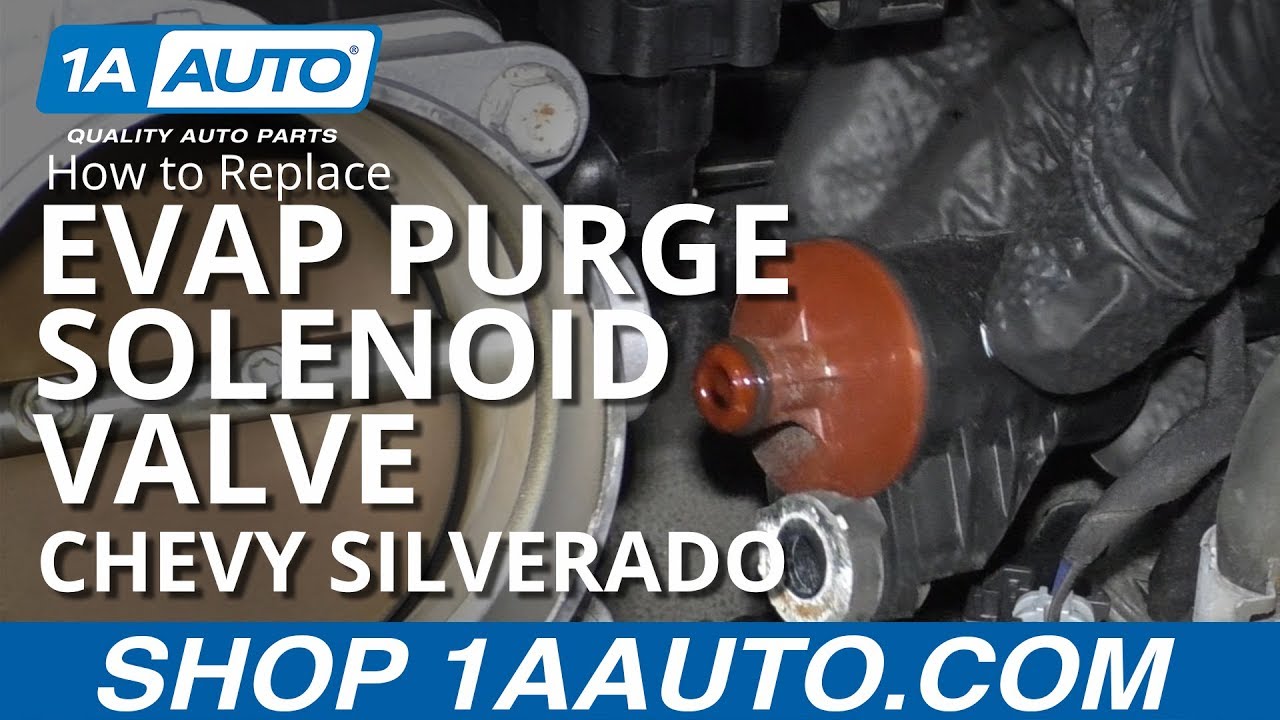
- Locate the EVAP purge solenoid to the driver side of the throttle body, below the MAP sensor.
- Disconnect the hose connected to the EVAP purge solenoid
- Remove the 10 mm bolt securing the EVAP solenoid
- Pull the EVAP solenoid out
- Disconnect the EVAP solenoid electrical connector
-
step 3 :Installing the EVAP Purge Solenoid
- Install the EVAP purge solenoid by pushing it into position
- Replace the 10 mm bolt and torque it to 89 in-lb
- Reconnect the EVAP solenoid electrical connector
- Reconnect the hose to the EVAP solenoid
-
step 4 :Replacing the Intake Air Duct
- Disconnect the negative battery cable with a 10 mm socket
- Loosen the worm clamp where the air duct connects to the air filter box
- Loosen the worm clamp where the air duct connects to the throttle body
- Disconnect the air hose at the driver side rear corner of the duct box
- Disconnect the air hose at the passenger side rear corner of the duct box
- Remove the intake air duct by sliding its rubber boots off the air box and throttle body connections
Tools needed
-
Socket Extensions
Flat Blade Screwdriver
Torque Wrench
10mm Socket
Ratchet
What's up, guys? I'm Andy from 1A Auto. In this video, I'm going to show you how to replace the Evap purge solenoid valve on this 2015 Chevy Silverado. Do you need parts for your vehicle? Click the link in the description and head over to 1aauto.com I want to disconnect the negative terminal on the battery. I'm going to use a 10 millimeter socket extension and ratchet.
Loosen this up and grab the negative terminal. Slide it off and set it aside so it doesn't arch out by accident. We'll Loosen up this worm clamp right here. Also over here is a worm clamp back here near the throttle body. Loosen this one up with the same straight blade screwdriver. Now take this snorkel off this side, off the air box.
Then over here there's two pipes on each side. There's this little gray lock that you have to push down on the lock, and then slide it out just like that. You have to do the same on the other side. This one I'm pushing up from underneath, and then slide it up. And you can grab this and just slide it back. Wiggle it a little bit, and the whole thing comes up.
We're going to disconnect this line right here. Just push on this little lock here. There we go. Push on that little tab right there, slide this line up, and put that aside. Now if you can get to this electrical connector, just try to get that out. It's going to be easier for me to get that off once I get the solenoid off.
Take a 10 millimeter socket and ratchet. Take this bolt out right here. And that bolt, take that out. Now I can grab the solenoid valve and just wiggle it back and forth. Slide it out. I'll just flip it over. So there is a lock on the back side of this. If you have to slide it out a little more, just use a straight blade screwdriver or a pick. Push down on the lock. Disconnect it.
Take the solenoid valve, and slide it in position. Once that's in position, we'll just take the bolt. Get the bolt started. Take my 10 millimeter socket and ratchet and tighten this up. Then if you can get a torque wrench in there, we're going to torque this to 89 inch-pounds. Take the connector and slide it in position.
If you had trouble, you could slide the connector on before you put the solenoid in, and then push down on the lock. Take this hose, line it up, push it on, and make sure it's locked in. You might have to push down on the lock. Yeah, that's good and locked in. Now we're going to slide this in position.
Now there's a little bracket right here that's going to slide into that slot right there. So we'll slide it on the throttle body first and get that lined up there. You can take and slide this on right here, onto the air box. That's good. I'm going to take a straight blade screwdriver. Tighten up this warm clamp right here on the throttle body, and then tighten this one up as well.
We'll take these hoses. These are going to clip in. Make sure they lock in place, and the same on this side. We'll take the negative battery cable and hook it up to the negative side of the battery. I'm going to take a 10 millimeter socket, extension and a ratchet and just snug this up. Grab the cable, just make sure it's nice and tight. Won't loosen up.
Thanks for watching. If you want the parts to do it yourself, check out 1aauto.com, the place for DIY auto repair.

Top 5 Problems Chevy Avalanche Truck 1st Generation 2002-06
This video discusses the top problems with the 1st generation Chevy Avalanche, which includes model years 2002 to 2006.
