
How to Replace Exterior Door Handle 1992-96 Toyota Camry
Created on: 2011-01-14
Watch this video to learn how to replace the exterior door handle, including a tip to change the handle's color
-
step 1 :Remove the door panel
- Pry up the door latch bezel with a flat blade screwdriver.
- Do the same to the switch panel.
- Unplug the switch panel from the wiring harness.
- Use a Phillips screwdriver to remove the screws in the door pull.
- On the edges of the door panel, remove the push clips by depressing the center and pulling the body of the clip out.
- Pull the door panel off, lifting it up over the lock and door latch.
-
step 2 :Remove the door handle
- Carefully pull back the water shielding.
- Disconnect the door handle by prying the rods off the pin connecting them to the inner door latch.
- Use a screwdriver to remove the lock mechanism.
- Pry out the child lock knob with a flat blade screwdriver.
- Remove the two 10 mm bolts securing the door handle.
- Pull the door handle out.
-
step 3 :Install the new door handle
- Clip the door handle into the door.
- Reconnect the latch and lock rods.
- Bolt the door handle into the door with your 10 mm socket and driver.
- Secure the locking mechanism with the Phillips screws and driver.
- Snap the child lock knob back in.
- Reconnect the latch and lock rods to the pin connecting them to the inner door latch.
- Replace the water shield, making sure you have a good seal.
-
step 4 :Put the door panel back together.
- Thread your wiring harness through the switch panel hole.
- Clip the door panel on, securing with the push clips.
- Depress the body of the clip and push in the center to anchor them.
- Screw in the two Phillips screws in the door pull.
- Reconnect the wiring harness to the switch panel.
- Clip the switch panel and the door latch bezel back on.
Tools needed
-
Socket Extensions
Flat Blade Screwdriver
Phillips Head Screwdriver
10mm Socket
Ratchet
Brought to you by 1AAuto.com, your source for quality replacement parts and the best service on the internet. Hi, I'm Mike Greene, I'm one of the owners of 1A Auto. I want to help you save time and money repairing and maintaining your vehicle. I'm going to use my 20 plus years experience, restoring and repairing cars and trucks like this to show you the correct way to install parts for 1AAuto.com. The right parts installed correctly that's going to save you time and money. Thank you and enjoy the video.
In this video, we're going to show you how to remove and install the rear door handle on this '94 Camry. The only tools you'll need are a Philip's screwdriver, a regular screwdriver and a 10 mm socket with ratchet and an extension. Start out, use a flat blade screwdriver, push it up in the air, pull that out and then down in here. You want to go a little further on the bottom, and then that pops off. Then the power window switch, from under the front and that slides up and out and then there's a little button right here. You press with your thumb, disconnect that. Then there's a little plug here that covers a Philip's screw, okay that. Philip's screwdriver and then another Philip's screw right under here. You kind of got to put your screwdriver up in there, feel around a little bit until you get it. Then on the back of the door, you have little pins here, push the center in. Another one down here, push the center in and then either using a screwdriver or a your fingernails just pry those out. There are two more of those on the front, one up here and one here. Then probably the best thing is use a putty knife, stick it in, slide it until something, pull out and there's three clips and then lift your door panel up and off.
To replace the door handle, what you're going to have pull that back some and you're going to use a good size screwdriver and you want to pry, this is a pin to the door here. You basically want to get the screwdriver in behind it and pry it away. I've already done it once so it came kind of easy. Now, you're going to remove three screws for the latch mechanism here. You're going to pry this black, it's like a knob, it's actually your child lock switch or knob, pry it out. Now, you want to push your lock mechanism down. That reveals two bolts, okay there is one 10 mm bolt and then the other 10 mm bolt is right there, although I think you can get to it through this hole somehow. Right there is your other 10 mm bolt. I'm going to use a driver, actually an extension with a 10 mm socket. I'm going to do this one first. You can actually see right in through this slot. There's my bolt. Then this one. Once those bolts are out then you just take your handle, lift up and out. Okay then the 1A Auto handle, is exactly the same. Now, what happens is this plastic clip can break or one of the arms here can break and obviously if you are just worried about making your door function then a black handle will do fine.
If you want to paint it to match, you can go to an automotive parts store that has a good department and they can help you find your paint code. They can mix up some paint to match and you can spray it yourself. It will be a pretty good match anyways. Obviously, reinstalling, you put it in and it's going to fit a little tighter it looks like. Put it and then tighten it and put your bolts on. Okay, take our bolts, put them into our driver, and carefully feed them in. Going to get in your way for a second. Get one started. Got that one in. Now I'll get this one started before I tighten them up. Okay, now I'm going to make them nice and firm. Now, my latch mechanism put that in place. I'm going to hold it with this finger here through the hole, start one of those little screws then I'll start the other one. Make sure I'm getting contact with the handle. Make sure this is all free and just pop this back into its hole. Replace the water shield and you can see the white right in here, just make sure that pin goes into that white. I'm just going to speed through putting the door panel back on, if you want to see this in real time, check out our other videos for the door panel installation and removal. Although since you took it apart, you should do it, you probably can put it together because it's just a reverse of the procedure. Hanging the door panel on there, put the pins in, a couple of screws and snap a couple of bezels back on and you'll be back on the road.
We hope this helps you out. Brought to you by www.1AAuto.com, your source for quality replacement parts and the best service on the internet. Please feel free to us toll-free 888-844-3393, we're the company that's here for you on the internet and in person.
Shop Products


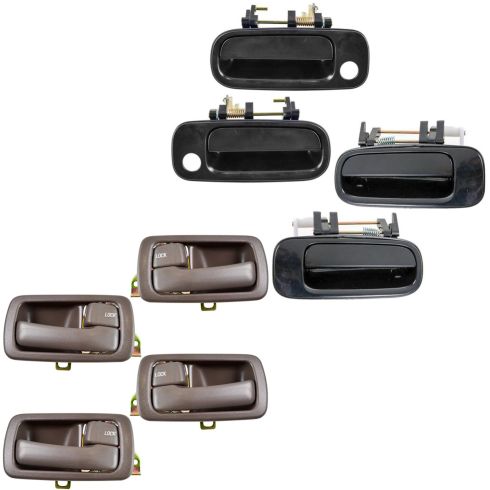
1992-96 Toyota Camry Front & Rear Interior & Exterior 12 Piece Interior & Exterior Door Handle Set TRQ DHA67469
Part Details:
- (4) Smooth Black Exterior Door Handles
- (4) Brown Interior Door Handle Bezels
- (4) Brown Interior Door Handles
- 12 Piece

1995-2004 Toyota Tacoma Outside Door Handle in Chrome Driver Side
Learn all you need to know about the Exterior / Outside Chrome and Black Door Handle part # 1ADHE00214 on the 95-04 Toyota Tacoma
