How to Replace Exterior Door Handle 1993-2000 Ford Ranger
Created on: 2011-10-18
Need to replace a broken exterior door handle on your 93-00 Ford Ranger? 1A Auto shows you how in this video.
-
step 1 :Remove the door handle
- Use a Flat blade screwdriver to pry apart the crank handle and remove the T20 screw to remove the crank handle.
- Remove the two Phillips screws in the door pull and unclip the door pull.
- With your Phillips screwdriver, remove the screw down by the bottom of the door panel.
- Pull the door panel off and gently peel back the water shield.
-
step 2 :Remove the outside door handle
- Unclip the door latch rod from the door handle.
- On the outside of the door, lift the handle to expose to rivets.
- Use a hammer and punch to punch out the rivets.
- Take your drill and 1/4 in bit to drill out the rivets.
- Remove the debris with your flat blade screwdriver.
- Take your old broken outside door panel out.
-
step 3 :Install the new outside door handle.
- Transfer the top lock rod from the old handle to the new one.
- Use two bolts and two lock nuts to install the new handle in lieu of the rivets you drilled out earlier.
- Tighten them down with a socket and ratchet.
- Clip the door latch rod back into place.
-
step 4 :Install the door panel
- Clip the door panel back on.
- Secure with the two Phillips screws.
- Replace the door pull and tighten down the Phillips screws.
- Re-install the window crank with the T20 Torx screw.
- Clip down the top of the window crank handle.
Tools needed
-
Coarse Threaded Bolts (to replace rivets)
Flat Blade Screwdriver
Phillips Head Screwdriver
Drill
Ratchet
Complete Metric Socket Set
Brought to you by 1AAuto.com, your source for quality replacement parts and the best service on the internet. Hi, I'm Mike Green. I'm one of the owners of 1A Auto. I want to help you save time and money repairing and maintaining your vehicle. I'm going to use my 20 plus years' experience restoring and repairing cars and trucks like this to show you the correct way to install parts from 1AAuto.com. The right parts installed correctly, that's going to save you time and money. Thank you and enjoy the video.
In this video, we're going to show you how to replace the outside handle on this 1996 Ford Ranger, same as any 93-97 Ranger and similar for quite a few different Fords that use the rivet on outside door handle. Tools you'll need for this repair: a flat blade screwdriver, a T20 Torx driver, Phillips screwdriver, a high speed drill with 1/4 inch drill bit, 2 bolts and lock nuts, and a appropriate size socket ratchet and wrench for those lock nuts and bolts. You're actually going to kind of go right in behind and use the screwdriver to pry out lightly. You can see this comes out. You want a T20 Torx screwdriver. We'll fast-forward as you remove that screw and take that crank handle off. Okay, underneath here you can see there's two Phillips screws. You want a smaller number 1 screwdriver. Okay, and fast-forward again as we remove those 2 Phillips screws. Okay, then you want to pull your panel right off. Then another Phillips screw right here. There's a screw at the bottom of your door panel. You might have to dig through your rug a little bit to get a it. Remove it. Now you can take your pane, lift it up and it comes right off.
Now carefully pull off this water shield. Okay, back in here you can see a rod that comes down from the handle and a little yellow clip right there ... difficult to film ... reach in with your finger, pull that clip off and pull that rod out. Okay, on the handle you can see underneath there are 2 rivets. What you want is a punch and you want to punch out the center of the rivet. Now you can see on the right hand one I've punched out the center and I'll do that one for left. I'm using a 1/4 inch drill bit. You want to drill nice and slow right in the center of each rivet. At this point I can just break the rivets right off with the screwdriver. Now your handle comes right out and that rod comes with it. Okay, old handle. New handle from 1A Auto. Now you're going to take this rod and kind of twist it and turn it at the same time to pull it out. Put it back into your new handle and down like that. Clear out ... okay this hole is clear. This hole's got a little bit of the rivet left in it. I'm just going to use a screwdriver, push that through. What I have here is a couple of bolts with lock nuts ... not ideally what I want, actually the washer are a little too big but they'll work just fine. I'm going to put this down in. Put the handle in.
Before I bolt anything together, just make sure that that rod is free and that you can get it close to the clip where it has to go. The bolts through, put them both through first. Right now I'm just putting the bolts through the handle ... then through the door. One dropped out, that's all right. Open up the door and just reach up in behind, hold that bolt through and put the nut on the other side. Start it on there. Now we can put our other bolt right through. Okay, same thing. Hold it in the door panel, start it on there. Now I'm going to put the socket and ratchet on that side, hole the inside with the wrench ... let's see, there it is ... Tighten that firm ... okay, another bolt. A little difficult to film here, but reach in ... this rod I can place ...Quick note, when you're clipping this rod in make sure you're pushing it up towards the door handle. That kind of pre-loads it. If you test your door afterwards and it doesn't open the door, first make sure it's unlocked, but then check if you haven't pushed this up far enough then your handle won't activate the latch. Put the door panel back on. Put it on up and over your door lock here first, then kind of push it into place and down. Put this screw in first. There's a little line-up tab right down here, make sure that goes in. And fast-forward through putting those 2 Phillips screws back in. Now you want to tighten those firmly, but don't over-tighten them. Okay, put the little washer on your window crank tool. Put that in place ... T20 Torx screw.
We hope this helps you out. Brought to you by www.1AAuto.com, your source for quality replacement parts and the best service on the internet. Please feel free to call us toll free 888-844-3393. We're the company that's here for you on the internet and in person.
Shop Products


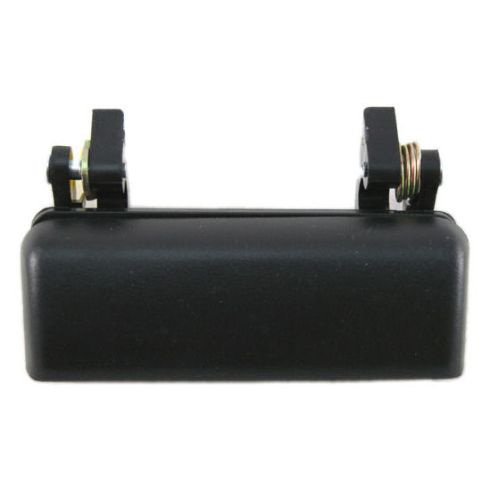
Ford Mazda Passenger Side Exterior Door Handle TRQ DHA43001
Part Details:
- Black
- Plastic
- Textured

How to Replace Rear Exterior Door Handle 2001-05 BMW 325 Xi
Check out this video if you need to replace the door handle on your 01-05 BMW 3 Series. 1A Auto shows you how to do it, step by step!
