How to Replace Fog lights 2010-15 Chevy Camaro
Created on: 2017-03-24
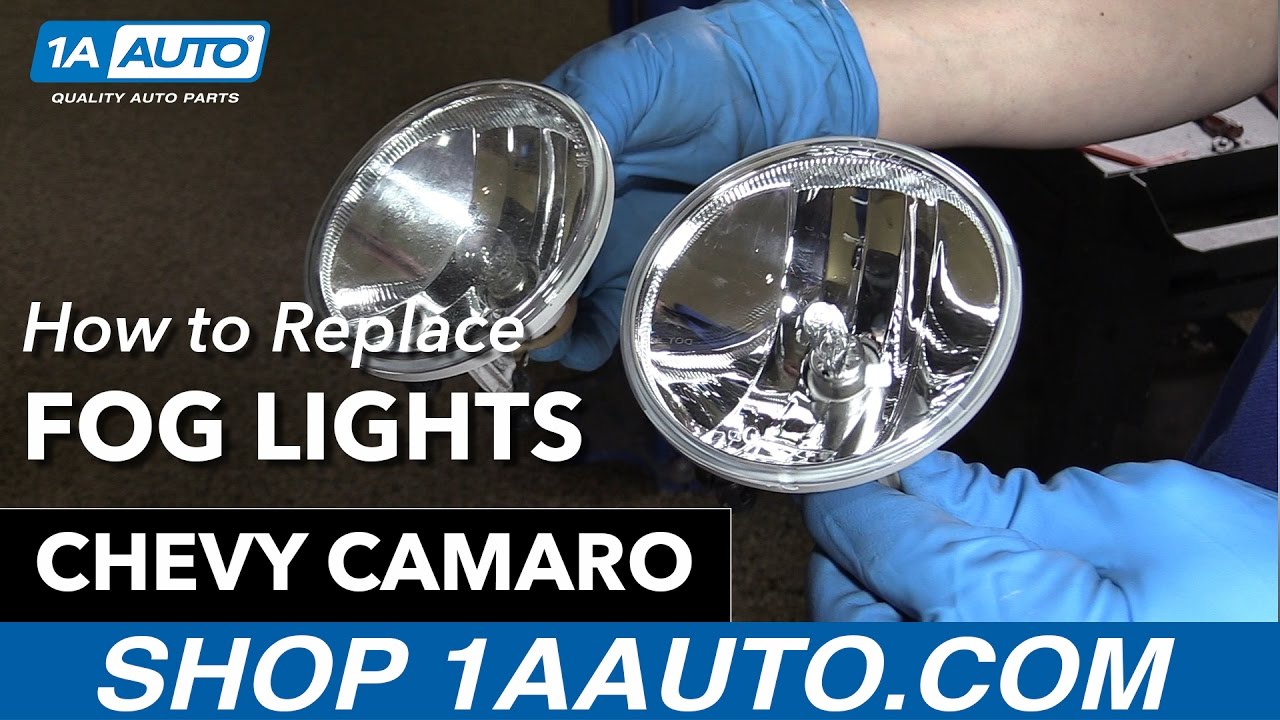
How to install, repair, fix, change, or replace a broken, damaged, burned out, cracked, faded, cloudy or chipped fog light on 11 Chevy Camaro
-
step 1 :Removing the Fog Light Bezel
- Remove the three T20 Torx bolts from the fender liner
- Pry out the clips from the top of the wheel well liner
- Release the five clips from the fog light bezel
- Remove the fog light bezel
-
step 2 :Removing the Fog Light
- Compress the clips to loosen the fog light
- Disconnect the connector
- Remove the light
-
step 3 :Installing the Fog Light
- Press the fog light in with the longer clip on the bottom
-
step 4 :Installing the Fog Light Bezel
- Press the bezel into the bumper
- Connect the connector
- Adjust the fog light with a Phillips screwdriver
- Tighten the three T20 Torx screws to the fender liner
- Clip the clips to the wheel well liner
Tools needed
-
Flat Blade Screwdriver
T20 Driver
Phillips Head Screwdriver
Hi, I'm Mike from 1AAuto. We've been selling auto parts for over 30 years! We're dedicated to delivering quality auto parts, expert customer service, and fast and free shipping, all backed by our 100% satisfaction guarantee. So visit us at 1AAuto.com, your trusted source for quality auto parts.
We took the wheel off to get a better camera angle, but you probably don't need to in your driveway. You just need to turn the wheel to the right so that you can access the three Torx bolts that are right on the inner fender liner. They're T20 bolts, and you'll want to remove those along with the two clips on the top of the fender liner so that you can push the liner out of the way.
With the trim tool that you can get from 1A Auto, you can pop it right in the clip and pull the clip right out of the fender liners. Once you have the centers out, the bottom half will come out very easily, just like that. There's one more clip right here on the back on the inner wheel well. You'll pop out the center and then the bottom half and the fender liner should be loose at that point.
The first step in replacing the fog light is removing the bezel that's on the outside of it. To do that you need to release the clips; there's five of them around the outside housing. You just basically take a small, flat tip screwdriver. You can pry in these little plastic tabs and pull them out. Then you can push down on the bezel and the bezel clips will pop right out. Once they're released you should be able to pull the bezel right out of the bumper.
The fog light itself is held in with these three push pins. Each ones has a couple of tabs on it that you need to compress. You can compress them with your fingers one at a time and pop them out of the housing or a 10 millimeter socket works pretty well. Just sliding it over there and releasing the clips and then going to the next one and release those clips. You'll want to pull the connector out like this in which case the fog light can pop right out. You can see the lenses look quite identical and the mounting on the back is the same as well. Same connector, same push pins, and it should snap right in and fit just like the original one does.
All right, you'll want the long one on the bottom, and you'll just slide it right in to the three holes that it snaps into. If you just push it right into place, the clips will lock in and the fog light will be mounted to the bumper. The bezel you're going to put the large side to the inside edge of the bumper, and it just pushes right into place. It has a couple of snaps, has five snaps around the outside edge that you'll want to double check that they click on in the backside of the bumper. As soon as they snap in, it's installed.
The last thing to hook up right here is the connector which again, it just pushes right into place. The long stud that's on the fog light actually has a Phillips head screw on the inside of it so all you do to adjust it is put a Phillips head screwdriver in it and turn it and it will adjust it on the bumper side.
The fender liner can now be put back into place. Tuck it behind the ABS sensor wire and then start putting your push pins right back into place. You'll want to reinstall your three T20 Torx screws next in the front of the fender liner.
Thanks for watching. Visit us at 1AAuto.com for quality auto parts, fast and free shipping, and the best customer service in the industry.

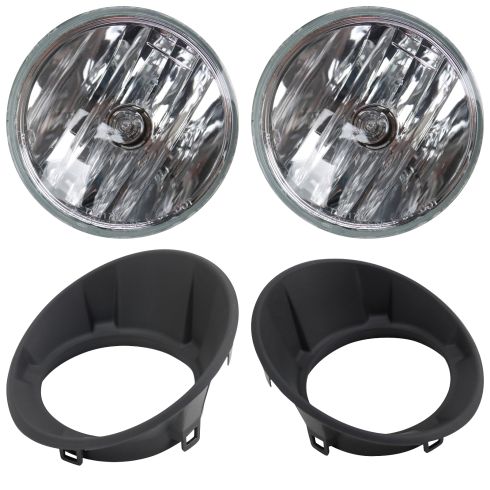
2010-13 Chevrolet Camaro 4 Piece Fog Light Set DIY Solutions LHT04344
Part Details:
- Bezel
- 4 Piece
- Features and Benefits
- (2) Fog Lights
- (2) Fog Light Bezels

How To Replace Fog Lights 2009-16 Mercedes-Benz E350
Fog lights aim low to light up the road ahead when visibility conditions are foggy, rainy, and snowy. Unfortunately, they are also positioned low to the ground, putting them in harm’s way. If your light has become damaged, you can replace it with an engineered to fit TRQ part, and drive with confidence the next time bad weather strikes. How to install a new TRQ fog light on your 2009-16 Mercedes-Benz E350.
