How to Replace Front Brake Pads Rotors 2006-09 Subaru Outback
Created on: 2018-05-23
How to repair, install, fix, change or replace your own worn, squeaky, fading old front brakes on 06, 07, 08, 09 Subaru Outback
-
step 1 :Removing the Wheel
- Loosen the 19mm lug nuts with the vehicle on the ground
- Raise the vehicle with a floor jack
- Secure the vehicle on jack stands
- Remove the lug nuts
- Pull off the wheel
-
step 2 :Removing the Brake Pads
- Remove the two 14mm bolts from the brake caliper
- Pry the brake pads into the caliper with a small pry bar to push in the pistons
- Pull the caliper aside
- Hang the caliper from the strut with a bungee cord
- Pull the brake pads off by hand
-
step 3 :Removing the Brake Rotor
- Remove the two 17mm bolts from the brake caliper bracket
- Pull off the brake caliper bracket
- Pull the rotor off the studs
- If the rotor will not come off, strike the hub area of the rotor with a hammer
-
step 4 :Preparing the New Brake Pads and Rotors
- Spray the brake pad slides with brake parts cleaner
- Clean the brake pad slides with a wire brush
- Pull the caliper pins out of the caliper
- Clean the caliper pins with brake parts cleaner
- Apply grease to the caliper slides
- Slide the caliper pins into the caliper
- Clean the wheel hub with a wire brush
- Spray the hub with brake parts cleaner
-
step 5 :Installing the New Brake Rotor
- Slide the rotor onto the studs backwards
- Clean the rotor with brake parts cleaner
- Slide the rotor off the studs
- Slide the rotor onto the studs normally
- Thread on one lug nut to hold the rotor in place
- Clean the rotor with brake parts cleaner
- Put the caliper bracket back into place
- Start the 17mm bolts by hand
- Tighten the bolts to 89 foot-pounds of torque
-
step 6 :Installing the New Brake Pads
- Apply brake grease to the brake pad slides
- Apply brake grease to the back of the brake pad
- Install the new brake pads into the bracket, with the wear tab on the inside
- Remove the bungee cord from the caliper bracket
- Put an old brake pad in the caliper
- Use a C-clamp to compress the caliper pistons
- Remove the C-clamp and old brake pad from the caliper
- Put the caliper onto the bracket
- Thread the two 14mm bolts by hand
- Tighten bolts to 20 foot-pounds
- Remove the placeholder lug nut from the rotor
-
step 7 :Reattaching the Wheel
- Slide the wheel onto the hub
- Start the lug nuts by hand
- Tighten the lug nuts preliminarily
- Lower the vehicle to the ground
- Tighten the lug nuts to 90 foot-pounds in a crossing or star pattern
-
step 8 :Testing the Brake Pedal
- Pump the brake pedal repeatedly until it feels firm
Tools needed
-
Large C-Clamp
Socket Extensions
Torque Wrench
14mm Socket
Pry Bar
17mm Socket
Jack Stands
19mm Socket
Brake Parts Cleaner
Bearing Grease
Bungee Cord
Ratchet
Wire Brush
Floor Jack
1/2 Inch Breaker Bar
Hi. I'm Mike from 1AAuto. We've been selling auto parts for over 30 years!
In this video we are removing and replacing the front brake pads and rotors in a 2008 Subaru Outback. If you need these parts or other parts for your car, click the link in the description and head over to 1AAuto.com.
I'm going to pull this left front tire off. I'm going to use a 19 millimeter socket and a breaker bar. Just crack them free while it's still on the ground.
You're going to want to raise and support the front of the vehicle. We're using a lift but you can do this with jack and jack stands in your driveway. I'm going to loosen up the rest of the lugs. Once I get all the lugs off, pull the tire off.
I'm going to use a 14 millimeter wrench on this caliper right here. Get that bolt loose. Once you break it free you can do it by hand sometimes. You can also do this with a socket and a ratchet. Do the bottom one.
You use a small pry bar and compress the caliper a little bit so it's easier to remove. Just slip it in here. You can use flat blade screwdriver as well. Just compress it a little bit. It should slide off. There you go. It pulls out. There’s a lot of rust in there. I'm going to use a bungee cord. I'm going to wrap it around the strut and on the spring. Put that in the bracket there. You put this other end in the other hole, tuck that out of the way. Pull the pads out.
Use a 17 millimeter socket, extensions, and a ratchet. I'm going to take these caliper bracket bolts out. Break that one free. We'll break this one free. Take that out. This rotor slides off fairly easily. If your rotor was stuck on, you can take a hammer and hammer right here, and here, and here. You should be able to break the rust free so it pops right off.
We're going to take a little bit of brake parts cleaner and spray it on our pad slides right here. Take a wire brush and clean this up. Use a little more brake parts cleaner. Use a rag to wipe it off. Do the same to the other side. Pull these caliper pins out. Spray them down with a little brake parts cleaner and wipe them with a rag. Spray down in the hole with a little parts cleaner. Wipe it out with your rag. Should be good. Take a little brake caliper grease, put it on the pin, put it back in. Do the same for the other side.
We're going to clean up our hub and use a little wire brush. Get in here. This one's really not too bad. A little bit of rust right there. Use some brake parts cleaner. Clean that off.
These are our old brakes and rotors, pads and rotors. This is our new pads and rotors set up from 1AAuto.com. As you can see the pads are exactly the same, same squealers, same shape of the pads, same ends. If you look at the rotors, the rotors are the same height. Same machined holes. Flip them over. Same vented. These are vented discs. Same height that way. Get your parts at 1AAuto.com and you'll be ready to rock and roll.
We're going to put a rotor on backwards because we're going to clean it. Use some brake parts cleaner and a rag as a protective coating on these rotors so that they don't rust while it's on the shelf. We'll flip it over and put a lug nut on so that it holds the rotor on. Spray some brake parts cleaner on this side and wipe it with a rag.
I'm going to install our caliper bracket. Take the caliper bracket bolts, start one, then get the other one in. Start tightening these down with a 17 millimeter socket, extension and ratchet. Then we're going to torque these bolts to 89 foot-pounds.
We're going to install our brake pads. Use a little bit of caliper grease on the slides, where the brake pad goes into the slide. Then just a little bit on the back here. The squealer goes on the inside. Caliper grease on these ears and a little bit on the back here.
I'm going to take the caliper and take the bungee cord off. You're going to take the old brake pad and you're going to use a C-clamp to compress it. You just want to do this gently, slowly. It's going to be pushing the fluid from the caliper back up into the master, brake master cylinder reservoir. Because we did not disconnect the brake hose when doing this, we do not have to bleed the brakes when we're done. You want to make sure this brake hose is not twisted when reinstalling the caliper. Slide it on.
Install our brake caliper bolts. We're going to torque these caliper bolts to 20 foot-pounds. Take this nut off.
All right, now I'm installing the lug nuts. You're going to snug it right down and we'll torque it when we put it down on the ground. I'm going to torque the lug nuts in a star pattern. We're torquing them to 90 foot-pounds. The reason why you want to do a star pattern, it is going to get the wheel flush against the rotor properly and it won't be warped. It will prevent vibration.
Before you drive away, you're going to want to make sure that you pump the brake pedal slowly multiple times because there will be an air gap between the brake pads and the caliper. When you pump it, it will push the fluid back to the caliper and then compress the brake pads.
Thanks for watching. Visit us at 1AAuto.com for quality auto parts, fast and free shipping, and the best customer service in the industry.
Shop Products


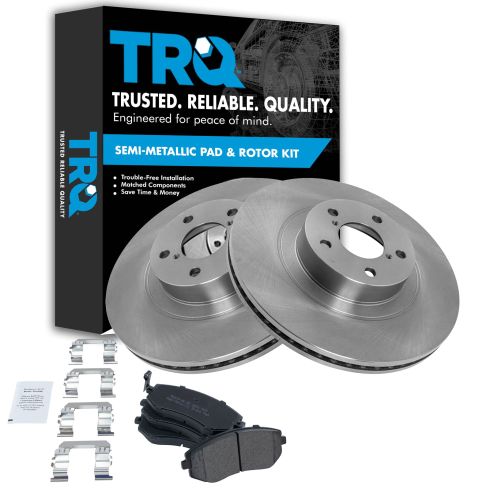
Subaru Front Semi-Metallic Brake Pad & Rotor Kit TRQ BKA10712
Part Details:
- Semi-Metallic
- Premium Posi
- Vented
- 11.50 in. (292mm)
- 5 Lug
- (2) Front Brake Rotors
- (1) Front Semi-Metallic Brake Pad Set

How to Install Front Brake Pads Rotors 2006-07 Mazda 6
How to repair, install, fix, change or replace your own worn, squeaky, fading old brakes on 06, 07 Mazda 6
