How to Replace Front Brake Pads Rotors 2013-14 Subaru XV Crosstrek
Created on: 2018-02-06
How to repair, install, fix, change or replace your own worn, squeaky, fading old brakes on 2013, 2014 Subaru XV Crosstrek.
-
step 1 :Removing the Wheel
- Loosen the 19mm lug nuts with the vehicle on the ground
- Raise the vehicle with a floor jack
- Secure the vehicle on jack stands
- Remove the lug nuts
- Pull off the wheel
-
step 2 :Removing the Brake Pads
- Pry the brake pads into the caliper with a flat blade screwdriver to push in the pistons
- Remove the 14mm bolts from the brake caliper
- Pull the caliper aside
- Pry the brake pads off with a flat blade screwdriver
- Remove the brake pad slides
-
step 3 :Removing the Brake Rotor
- Remove 17mm bolts from the brake caliper bracket
- Pull off the brake caliper bracket
- Pull the rotor off
- If the rotor will not come off, thread the lug nuts and strike the hub area of the rotor with the ball end of a ball peen hammer
-
step 4 :Preparing the New Brake Pads and Rotors
- Clean the brake pad slides with a wire brush and brake parts cleaner
- Apply grease to the caliper slides
- Clean the rotor with brake parts cleaner
- Apply grease to the brake pad tabs
-
step 5 :Installing the New Brake Rotor
- Slide the rotor on
- Thread on one lug nut to hold the rotor in place
- Put the caliper bracket back into place
- Start the 17mm bolts by hand
- Tighten the bolts to 54 foot-pounds of torque
-
step 6 :Installing the New Brake Pads
- Place brake grease on the brake pad tab
- Install the new brake pads into the bracket
- Put the caliper on
- Tighten the 14mm bolts
- Tighten bolts to 17 foot-pounds
- Tighten the brake line bracket with a 12mm bolt
-
step 7 :Reattaching the Wheel
- Slide the wheel into place
- Start the lug nuts by hand
- Tighten the lug nuts preliminarily
- Lower the vehicle to the ground
- Tighten the lug nuts to 89 foot-pounds in a crossing or star pattern
-
step 8 :Testing the Brakes
- Pump your brakes repeatedly until they feel firm
- Test your brakes at 5 miles per hour and then 10 miles per hour
- Road test the vehicle
Tools needed
-
Adjustable Wrench
14mm Wrench
Large C-Clamp
Socket Extensions
Torque Wrench
14mm Socket
17mm Wrench
Rust Penetrant
17mm Socket
Jack Stands
19mm Socket
Brake Parts Cleaner
Rubber Mallet
Flat Blade Screwdriver
Bungee Cord
Anti-Seize Grease
Ratchet
Wire Brush
Floor Jack
Cloth Rags
1/2 Inch Breaker Bar
Hi, I’m Mike from 1A Auto. We’ve been selling auto parts for over 30 years!
Use a breaker bar, 19 millimeter deep socket to loosen the lug nuts of the vehicle on the ground. This way the wheel's not turning on you. Get them nice and loose. Raise and support the vehicle. With the lug nuts loose, I'm just going to use the socket and take them off the rest of the way and remove the tire and wheel. Take the entire wheel off and put this aside. Just going to turn the wheel so the brake caliper is facing out and I can get to it easier.
Use a flat-bladed screwdriver. Just going to slide it in here. Just pry the caliper outwards. It's going to compress the piston. And do it to both, because this is a double piston caliper. So we just want to loosen it just enough. It'll make it easier to slide this off of the pads. And you remove the top and bottom caliper slide pin bolts. 14 millimeter, we'll start with the top one. Get that loose, same for the bottom one. Get that loose and take them both out. Slide the caliper off. Take our bungee cord, and let's see. That should work. Up and around the coil spring. Came undone. Hang right there. Pull our pads out. Can wedge a flat-bladed screwdriver in there and help you pry it out.
We're not reusing these. There's an upper and lower caliper bracket bolt. They are 17 millimeter. We'll start with the lower one. It's on there pretty tight, so I'll readjust the wrench here. We'll use a dead blow mallet and break it free. Do the same to the top one. Going to switch to a 17 millimeter socket and ratchet, make this go quicker. Put the bracket aside. Let's place some rust penetrate in here. And hit these threaded openings here and down the studs. Thread a lug nut on here because we're going to tap the rotor with a dead blow to break it free. Alright, doesn't want to move. I'm going to use these pusher holes here. It's an 8x1.0 thread pitch. Just find some appropriately sized bolts to thread in there. They're metric. Just going to use the socket that fits them and just evenly tighten them. And this is just going to push the rotor right off the hub. Easy.
Here's our original brake rotor from our vehicle. These are the original pads. The brand new pads from 1AAuto.com. And you can see on these, take our brake pad measurement tool. The new ones have 10 millimeter, and the worn ones have 5 millimeter. They're roughly half worn. Not too bad, but we're going to replace them anyways. These are an exact match. I've got inside and outside here. Take these, they're an exact match for the wear indicators on them. Those will fit great and work great.
We look at our rotors. The original rotor has a black coating on the hub to prevent rust. It does wear off as brakes do get hot. So the paint does eventually wear down and it will begin to rust. However, we've got these E-coated rotors from 1AAuto.com. So they do paint the hub. They paint the edge, to prevent rust. Off course, this will always rust because it's bare metal where your brake pads ride. But that is an exact match for the factory rotor, it'll fit great and work great for you. Then we also have available these drilled and slotted rotors. These have a zinc coating so they don't rust. You can kind of see the difference.
Zinc coating right now is over the entire surface. It will wear off where the brake pads ride, so these will flash rust, but you can kind of see the difference in a raw metal and a zinc coated here. So this also is to prevent rust and these will look cooler on a vehicle. But everything will fit exactly the same as factory and work great. Just going to check the slide pins. These move and out real nicely, I'm not going to mess with them. They're working perfectly. If they were sticking, you could pull them out of the rubber boots and clean and lubricate them, but since these are working great, I'm going to leave them alone.
Caliper hardware is stainless. And to be re-used, we're just going to clean it, put some brake parts cleaner and a wire brush. And just do the same for both sides of the caliper bracket. We're going to use our drilled and slotted rotors. These can go on in either direction. The veins inside are straight. They are not left and right. But you can pick which direction you want these to go. We're going to put them towards the front. I'm going to put it on backwards first. Just make sure the braking surface is clean. I'm using brake parts cleaner. Wipe down anything with a rag. Any packaging oil that might be on these. Take them off for a second. I'm just going to clean this hub up—it's not too rusty. Spray a little bit of brake parts cleaner and wipe it down. I'm going to take some copper anti-seize, just put it on the hub surface here where the rotor will touch and could potentially rust on.
So just for future service, we'll make sure the rotor can come off easily. Install the rotor the proper way, take the lug nut, and thread that down so it can't fall off. I'm using brake parts cleaner, make sure the surface stays nice and clean, free of grease and dirt. You can also buy new caliper bracket bolts from 1A Auto. This one here is really rusty and gross and the top one wasn't too bad, but we've got two brand new ones and we're going to install those. I'll put a little bit of copper never seize on these bolts, prevent corrosion. Do the top one first. So the rotor is kind of out of place, I'm going to have to push it in. I'll just slide the bracket over first and get that lined up. I'm going to reach over, move the bracket around, find where it bolts in. Do the same for the bottom one, and I have the top bolt started. Get those threaded down. Tighten these down with my socket and ratchet.
There is a lock washer that will start to compress. Go down evenly and we'll put the box wrench on here and they're already pretty tight. Put them down. Nice and tight and a quarter turn more, like that. These do have a lock washer, so once that lock washer's compressed, it won't back out. Going to make sure that these pads stay nice and clean, you don't get any grease or oil or dirt on them. Just give them a quick spray with brake parts cleaner, you don't need to soak the pad, put a little bit of caliper grease on the gears. This will help them slide on the hardware. Brake pads are curved, so that outer is going to match the outer curve on the brake rotor. You don't want to try to install them backwards. The wear indicators go towards the bottom.
Install the rear pad, the inside pad. Push it in place. Going to take our old pad, put it inside the caliper. We'll take our c-clamp, look at the set up, and you're gently compressed the pistons back into the caliper. Press these in. Get this in the middle. Those are compressed in and should slide right over our pads. Slide pin bolts do have flat sides to them, they have curved and flat. The flat's going to sit like that, same for both upper and lower.
Reinstall the slide pin bolts. Just tighten these down. Get them tight, give them a little bit more, don't want to break them, they're just small bolts. So that moves nice, in and out on the slides. Used the lug nut to keep this rotor from falling off, just make sure you take it off before you try to put the wheel and tire on.
Wheel and tire on. Start lug nuts by hand. Just going to use the socket, thread these all down, then I'll put the vehicle on the ground and torque them. Going to torque the lug nuts to 89 foot pounds and in a cross pattern. Now we need to gently pump the brakes to move the pistons out to meet the pads, not going to press it all the way to the floor. Press it about a quarter of the way, build it up. They'll start to get harder. That's perfect. Now the brake job is done.
Thanks for watching. Visit us at 1AAuto.com for quality auto parts, fast and free shipping, and the best customer service in the industry
Shop Products


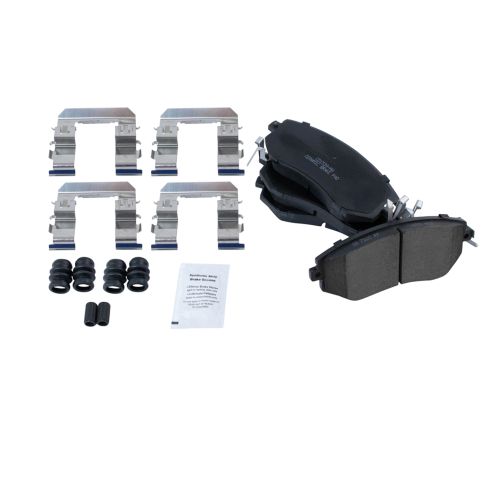
Toyota Subaru Scion Front Ceramic Brake Pads TRQ BFA73445
Part Details:
- Premium Posi
- Contact Point Grease
- Hardware
- No
- 0.67 in
- Ceramic
- Black
- Yes
- No
- Mechanical
- Yes
- Yes
- 0.63 in
- Yes
- 0.67 in
- Bonded
- Yes
- Yes
- 4
- Yes
- Standard Replacement
- 0.63 in
- 16 mm
- Black
- 16 mm
- Yes
- Steel
- 57 mm
- 57 mm
- 137 mm
- 17 mm
- N
- 17 mm
- R-S-R
- No
- 137 mm
- No
- 5.39 in
- 5.39 in
- 2.24 in
- 2.24 in
- Ceramic

How to Replace Rear Brakes 2007-11 Honda CR-V
How to repair, install, fix, change or replace your own worn, squeaky, fading old brakes on 09 Honda CRV
