How to Replace Front Brakes 2002-05 Subaru Outback
Created on: 2012-08-27
Have worn, squeaky, fading or old front brakes on your 02-05 Subaru Outback? Watch this video to learn how to replace them.
-
step 1 :Removing the Wheel
- Loosen the 19mm lug nuts with the vehicle on the ground
- Raise the vehicle with a floor jack
- Secure the vehicle on jack stands
- Remove the lug nuts
- Pull off the wheel
-
step 2 :Removing the Brake Pads
- Remove the 14mm bolts from the brake caliper
- Pry the brake pads into the caliper with a flat blade screwdriver to push in the pistons
- Pull the caliper aside
- Pry the brake pads off with a flat blade screwdriver
- Remove the brake pad slides
- If only changing the pads, continue to Step 6 and install the new pads
-
step 3 :Removing the Brake Rotor
- Remove the 17mm bolts from the brake caliper bracket with a piece of pipe
- Pull off the brake caliper bracket
- Pull the rotor off
- If the rotor will not come off, strike the rotor with a hammer to loosen it
-
step 4 :Preparing the Rotor
- Clean the brake pad slides with a wire brush
-
step 5 :Installing the New Brake Rotor
- Slide the rotor on
- Thread on one lug nut to hold the rotor in place
- Put the bracket back into place
- Start the bolts by hand
- Tighten the bolts to 90 foot-pounds of torque
-
step 6 :Installing the New Brake Pads
- Put an old pad in the caliper
- Use a large C-clamp and the old pad to push the pistons back
- Install the new brake pads into the bracket
- Put the caliper on
- Thread the 14mm bolts by hand
- Tighten bolts between 19 to 21 foot-pounds
-
step 7 :Reattaching the Wheel
- Slide the wheel into place
- Start the lug nuts by hand
- Tighten the lug nuts preliminarily
- Lower the vehicle to the ground
- Tighten the lug nuts to 100 foot-pounds in a crossing or star pattern
-
step 8 :Testing the Brakes
- Pump your brakes repeatedly until they feel firm
- Test your brakes at 5 miles per hour and then 10 miles per hour
- Road test the vehicle
Tools needed
-
A Piece of Pipe (for leverage)
Large C-Clamp
Torque Wrench
14mm Socket
Hammer
Pry Bar
17mm Socket
Jack Stands
19mm Socket
Flat Blade Screwdriver
Ratchet
Wire Brush
Floor Jack
Brought to you by 1AAuto.com, your source for quality replacement parts and the best service on the Internet.
Hi, I'm Mike from 1A Auto. I hope this how-to video helps you out, and next time you need parts for your vehicle, think of 1AAuto.com. Thanks.
In this video, we're going to show you how to take apart and put back together the front brakes on this 2003 Subaru Outback. It's the same as any 2000 to 2004. At 1A Auto, we do sell new brake kits for this, so this will go along nicely if you buy a new set of brakes from us. The brakes on this vehicle happen to be in good shape, so we just take them apart and put them back together to show you. Tools you'll need include jack and jack stands, 14mm, 17mm, and 19mm sockets, although your tire iron can substitute for that 19mm socket. You'll need a ratchet plus a breaker bar or a pipe for some extra leverage, a large screwdriver or a small pry bar, large hammer, a large C-clamp, wire brush, and a torque wrench.
If you don't have air tools, start out with your vehicle on the ground, loosen the lug nuts first, and then raise and support your vehicle. Remove the lug nuts and the wheel and tire with a tire iron or 19mm socket and ratchet. Now either grab the tie rod and the suspension and turn the wheel, or turn the steering wheel.
Now look in, behind. You can see right through this little check hole and I'll show you you can see the rotor moving there and the next is the pad. It appears the inner pad is actually in pretty good shape. What we're going to do is take the caliper off and you can actually pull on the caliper and try pulling on it a little bit which forces the piston back in. You can also use a screwdriver. I'll show you that in a minute.
You want to remove this bolt and this bolt here. I'm going to take a large screwdriver, put right in here and pry out. That forces the piston back in and loosens this up a little bit. You want to use a 14mm socket with a ratchet and these bolts should not be on too tight. They come off pretty easy. Just speed it up here as I remove those bolts the rest of the way. The bolts come out. Then the caliper comes right off. Just let it rest up there for right now.
Here are our pads. You can actually see there's quite a bit left. The brakes are in pretty good shape. The front pad comes out, the rear pad comes out. Again, the same thing. These pads have good life left. Next is the rotor. You'll want to remove two larger bolts one here and one right down here. These are 17mm. You've got a 17mm socket. I'm going to put my ratchet on there, and use a breaker bar or using a piece of pipe with my ratchet. The pipe gives me a little extra leverage. Pull up nice and easy until the bolt breaks free. Because of the position of this upper one, it's a little to get to, you're going to put a 17mm wrench on it and use an 18mm wrench and lock it on. Then again like the pipe I'm going to pull up slowly until it breaks free.
Fast-forward here again as we just remove those bolts the rest of the way. If you remove the bolts, just take the bracket right off. This plate may need a hammer. If you're replacing your rotors (and you're not too worried about it) you can just bang it from the outside. Sometimes, what you may need to do is put your lug nuts back on. What I'm doing here is using the ball side of my hammer, and you want to beat on the rotor in the hub area. You want to avoid contacting the area where the brake pads contact the rotor. You don't want to put dents and divots in that area because that can affect your braking that's if you're reusing your disc. If you're not reusing your disc, you can actually feel free to bang on it on the outside, but the reason you hit it here is that actually breaks the rotor free from the hub.
Now, you can see I'm hitting it much more lightly from the backside as it's free from the hub and now it's coming off. As soon as I see it pretty much breaking lose, you can see it move pretty well there. Now I'm going to remove the lug nuts and then remove the rotor. The pads and rotors on the car are in good shape, so we are just putting it back together with its original parts. I'm not going to waste new parts on a car that doesn't need it.
Next, you'll want to take your caliper bracket, and there's stainless steel slides, so use a wire brush and just clean out the slides where the brake pads contact them. Put this bracket in and feed the top bolt in. Speed it up as we first tighten those bolts as much as we can with the fingers, and then preliminarily tighten them with a wrench. These two bolts should be tightened to 90 foot-pounds. The bottom is easy to get a torque wrench on. The top one again, you can't really get a torque wrench on it. I'll use my wrenches to tighten it up, and I'll have to just get it nice and tight and then pull it and kind of estimate it.
The way front brakes adjust is as the pads wear down and these pistons work their way up and out of the caliper. What you need to do is force those pistons back in. I generally put the old inner pad back on like that, and then I use a large C-clamp, put that in place, and with the pad, it forces both calipers back down in. I put the C-clamp on and here I'm just readjusting it more to the center of the caliper so it pushes both pistons back in equally.
As you saw, our pads are in pretty good shape, so we're going to reinstall the other ones, I'm just showing you how to do this. You generally want to install this one with the wear indicator on the inside pointed down, so just put them right back in. All the way back in. One other thing you want to check is the caliper brackets. These slides where the caliper bolts on should move nice and easily, and they do. If they don't, you just pull them right out, clean them up, put a little grease on them, and put them back together.
Put the caliper back on. Then push these slides in so the caliper goes down into place. Speed it up here as I put the two 14mm bolts back in and tighten them preliminarily with my fingers. Then these should be tightened up to anywhere from 19 to 21 foot-pounds. Speed it up here again as I straighten out the steering, put the wheel on, put the lug nuts on by hand first make sure you don't cross thread them and then use your wrench to just preliminarily tighten them. When done with this side, we're going to torque the lug nuts to 100 foot-pounds using a star pattern. You always want to replace your brakes in pairs. The procedure is the same for the other side.
After this there is one more step. Pump your brakes to get a firm pedal, then do test stops from 5 and 10 miles an hour, and make sure the brakes are working before road testing the vehicle.
We hope this video helps you out. Brought to you by www.1AAuto.com, your source for quality replacement parts and the best service on the Internet. Please feel free to call us toll-free, 888-844-3393. We're the company that's here for you on the Internet and in person.
Shop Products

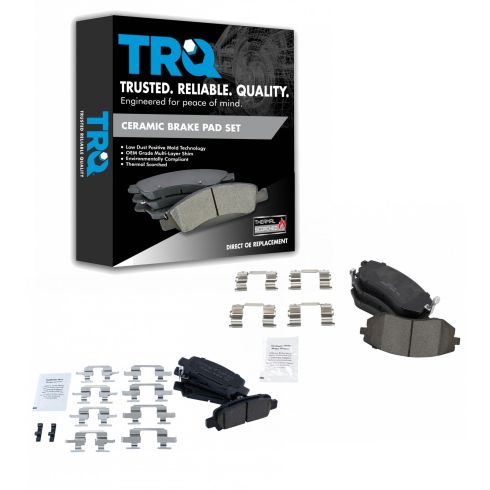
Subaru Front & Rear Ceramic Brake Pads TRQ BFA12969
Part Details:
- Premium Posi
- Ceramic
- Ceramic
- (1) Front Ceramic Brake Pad Set
- (1) Rear Ceramic Brake Pad Set

How to Replace Front Brakes 2002-05 Dodge Ram 1500
Watch this video to learn how to fix squeaky or fading front brakes. The experts at 1A Auto show you how to replace the brake pads and rotors on your 02-08 Dodge Ram.


