How to Replace Front Brakes 2002-06 Suzuki XL-7
Created on: 2014-02-28
How to repair, install, fix, change or replace your own worn, squeaky, fading old front brakes on 01, 02,03, 04, 05, 06, Suzuki XL-7
-
step 1 :Removing the Wheel
- Pry off the center cap with a flat blade screwdriver
- Loosen the 19mm lug nuts with the vehicle on the ground
- Raise the vehicle with a floor jack
- Secure the vehicle on jack stands
- Remove the lug nuts
- Pull off the wheel
-
step 2 :Inspecting the Brakes
- Turn the rotor by hand or turn the steering wheel to turn the rotor
- Check the thickness of the brake pads
- Check the brake pad wear indicator
- Check for gouges on both sides of the rotor
-
step 3 :Removing the Brake Pads
- Remove 14mm and 17mm bolts from the brake caliper
- Pull the caliper aside
- Pry the brake pads off with a flat blade screwdriver
- Remove the brake pad slides
-
step 4 :Removing the Rotor
- Remove the 17mm bolts from the brake caliper bracket
- Pull off the brake caliper bracket
- Pull the rotor off
-
step 5 :Installing the Rotor
- Clean the rotor with brake parts cleaner or mineral spirits
- Apply grease to the brake pad tabs
- Slide the rotor on
- Put the bracket back into place
- Insert and tighten the 17mm bolts by hand
- Tighten the bolts between 80 and 85 foot-pounds of torque
-
step 6 :Installing the Brake Pads
- Install the new brake pads into the bracket
- Use a large C-clamp to push the pistons back
- Put the caliper on
- Tighten the 17mm and 14mm bolts
- Tighten the 17mm bolts between 50 and 55 foot-pounds of torque
- Tighten the 14mm bolts between 40 and 45 foot-pounds of torque
-
step 7 :Reattaching the Wheel
- Slide the wheel into place
- Start the lug nuts by hand
- Tighten the lug nuts preliminarily
- Lower the vehicle to the ground
- Tighten the lug nuts to 100 foot-pounds in a crossing or star pattern
- Reattach the center cap
-
step 8 :Testing the Brakes
- Pump your brakes repeatedly until they feel firm
- Test your brakes at 5 miles per hour and then 10 miles per hour
- Road test the vehicle
Tools needed
-
A Piece of Pipe (for leverage)
Large C-Clamp
Torque Wrench
14mm Socket
17mm Socket
Jack Stands
19mm Socket
Brake Parts Cleaner
Flat Blade Screwdriver
Brake Fluid
White Grease
Mineral Spirits
Ratchet
Floor Jack
Brought to you by 1AAuto.com, your source for quality replacement parts and the best service on the Internet.
Hi, I'm Don from 1A Auto. I hope this how-to video helps you out, and the next time you need a part for your vehicle, think of 1AAuto.com. Thanks.
In this video, we show you how to service the front brakes on this 2002 Suzuki Xl7. We show you on the passenger's side, but the driver's side is a similar procedure. The items that you're going to need for this include a new front rotor from 1AAuto.com, 14mm, 17mm, 19mm sockets and a ratchet with a piece of pipe for leverage, flat blade screwdriver, large C-clamp, torque wrench, brake grease, mineral spirits or brake cleaner, and jack and jack stands.
Start off by prying off your hubcap. Then you want to remove those 19mm lug nuts. If you don't have air-powered tools, you're going to want to loosen them up while the vehicle's on the ground and then jack it up and remove them the rest of the way. Then the wheel pulls off.
Now, you want to inspect your brakes. You want to check the rotor, making sure there's not too big of a lip at the top there. Then, to check your brake pads, you just look in through here, and you can see how much life's left on them. Now, you want to remove this 14mm bolt and this 17mm bolt right here. We'll fast-forward as Don does this. Now pull the caliper up and off and set it aside, and pull your brake pads free.
Next, you want to remove these two 17mm bolts. Yours will look a lot more normal than this. Your caliper bracket will pull free, and your rotor will slide off. On the left is the old rotor and brake pads; on the right is the new rotor from 1A Auto and some new brake pads. You can see they're identical, and they'll fit exactly the same.
Using mineral spirits or brake cleaner, you want to just wipe down your new rotor. Using brake grease, just apply some brake grease to either side of those brake pads. Push your new rotor into place. Then put your caliper bracket back into place, and replace those two 17mm bolts. Tighten them up. Torque these bolts to 80 to 85 foot-pounds.
Push your brake pads into the bracket. Now, using a large C-clamp, you want to push you caliper piston back in. Then fit your caliper down over the brake pads and into the caliper bracket. Replace that 14mm bolt and the 17mm bolt that hold the caliper into place. We'll just fast-forward as Don does this. Torque the 17mm to 50 to 55 foot-pounds, and the 14mm to 40-45 foot-pounds.
Replace the wheel and those 19mm lug nuts. You want to tighten them preliminarily, then lower the vehicle and tighten them the rest of the way. Torque each of these lug nuts to 100 foot-pounds in a crossing pattern. Before taking the vehicle out on the road, you want to pump the brakes until they firm up. Then do a stopping test from 5 miles per hour and 10 miles per hour.
We hope this video helps you out. Brought to you by www.1AAuto.com, your source for quality replacement parts and the best service on the Internet. Please feel free to call us toll-free, 888-844-3393. We're the company that's here for you on the Internet and in person.
Shop Products

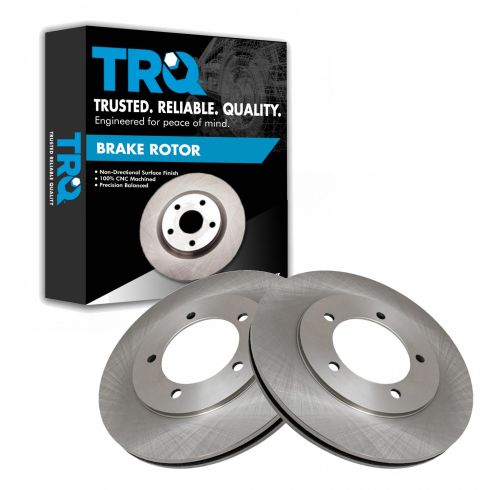
Suzuki Grand Vitara XL-7 Front Driver & Passenger Side 2 Piece Brake Rotor Set TRQ BRA77421
Part Details:
- 12.20 in. (310mm)
- 5 Lug
- 2 Piece
- Vented
- (1) Front Driver Side Brake Rotor
- (1) Front Passenger Side Brake Rotor
- 20 mm
- 1.14 in
- 29 mm
- 140 mm
- 13 mm
- 5
- 310 mm
- No
- No
- Smooth
- 22 mm
- No
- Vented
- 0.87 in
- 12.20 in
- 107 mm
- Cast Iron
- Conventional
- 4.21 in
- 0.51 in
- 5.51 in
- 0.79 in
- Standard Replacement

How to Replace Front Brakes 2011-14 Honda Odyssey
How to repair, install, fix, change or replace your own worn, squeaky, fading old front brakes on 11, 12, 13, 14 Honda Odyssey
