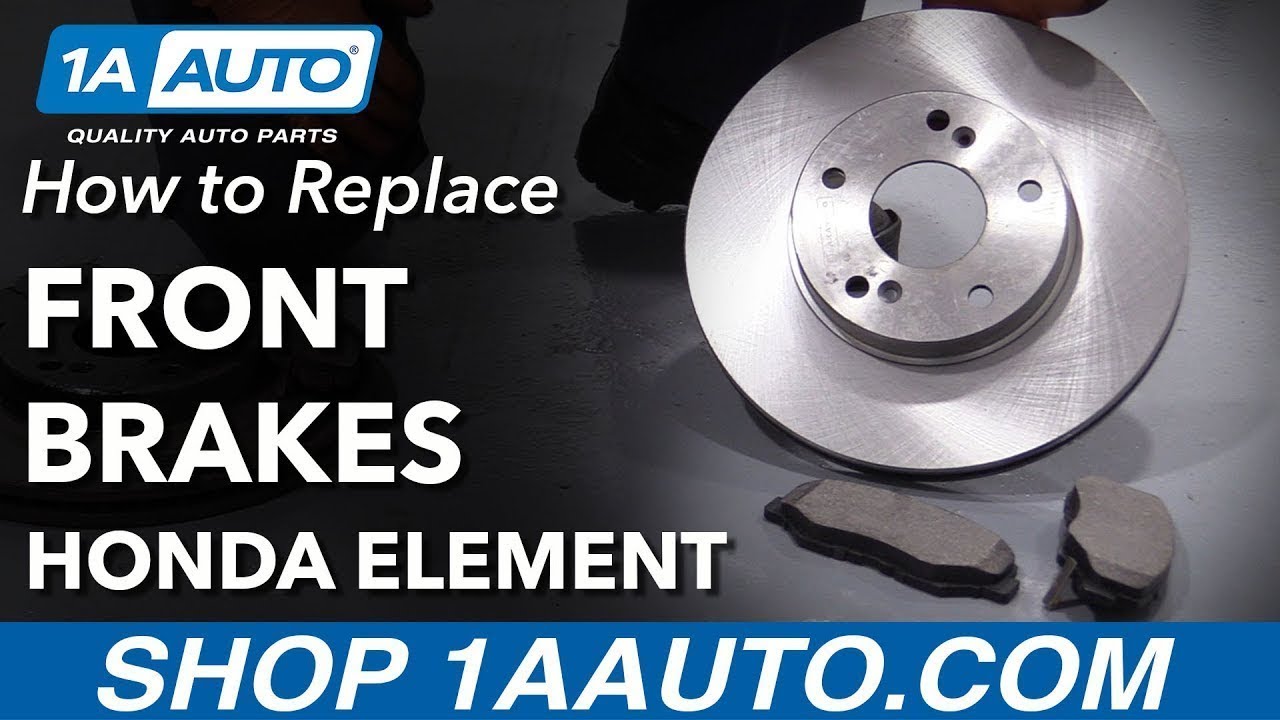
How to Replace Front Brakes 2003-11 Honda Element
Created on: 2019-07-11
Check out this video from 1A Auto to learn how to replace the front brakes on your 03-11 Honda Element.
-
step 1 :Removing the Wheel
- Loosen the 19mm lug nuts with the vehicle on the ground
- Raise the vehicle with a floor jack
- Secure the vehicle on jack stands
- Remove the lug nuts
- Pull off the wheel
-
step 2 :Removing the Caliper
- Pinch off the brake hose with the hose pinch off tool
- Open the 10 mm brake bleeder screw to ensure it is not seized, then close the bleeder screw
- Remove the two 12 mm caliper slider bolts
- Remove the brake caliper and hang it to keep tension off the brake line hose
- Remove the two 17 mm brake caliper bracket bolts
- Remove the brake caliper bracket
- Open the brake caliper bleeder screw
- Compress the brake caliper piston
- Close the bleeder screw
- Return the caliper to the hook
- You do not need to remove the caliper from the brake hose unless it needs to be replaced.
-
step 3 :Removing the Brake Rotor
- Remove the two Phillips rotor screws with an impact screwdriver
- Hammer around the hub section of the rotor to break it free of rust
- If the rotor is very stuck, and being replaced, it can be hammered on the rear braking surface to help remove it
- Remove the rotor
- Clean the wheel hub surface of rust and debris with brake parts cleaner and a wire brush
-
step 4 :Servicing the Brake Caliper
- Remove the brake pads from the brake caliper bracket
- Remove the brake pad retainers from the brake caliper bracket
- Clean the brake pad retainer grooves of the caliper bracket
- Remove the caliper slider pins
- Clean the caliper slider pins, boots and channel, and apply new brake grease
- Reinstall the caliper slider pins
- Clean the pad retainers with a wire brush and brake parts cleaner
- Apply brake grease to the pad retainer grooves in the caliper bracket
- Reinstall the pad retainers
-
step 5 :Installing the Brake Rotors
- Seat the rotor backwards on the wheel studs to more easily clean the rear surface
- Spray the rear braking surface with brake parts cleaner
- Remove the rotor and apply anti-seize grease to the wheel hub
- Mount the rotor on the wheel hub
- Reinstall the rotor screws
- Clean the front surface of the rotor with brake parts cleaner
-
step 6 :Installing the Brake Caliper
- Mount the caliper bracket and secure it with the two 17 mm bolts
- Torque the 17 mm caliper bracket bolts to 80 ft-lb
- Install the brake pads and pad return springs into the caliper bracket
- Install the brake caliper and secure it with the two 12 mm caliper slider bolts
- Torque the caliper slider bolts to 25 ft-lb
- The video shows connecting a new caliper to the brake line, which is not necessary if the caliper was not disconnected from the hose earlier.
- Remove the brake hose pinch-off tool
- Open the 10 mm brake bleeder screw
- Allow fluid to flow until there is a solid stream with no bubbles
- Close the bleeder screw
- Pump the brakes in the vehicle to seat the brake pads
- Inspect the brake fluid level, and add DOT3 fluid as necessary
- Gravity bleed the brake caliper again
-
step 7 :Installing the Wheel
- Slide the wheel onto the wheel studs
- Replace the wheel cover
- Install and tighten the lug nuts by hand
- Lower the vehicle with minimal weight on the wheel
- Torque the lug nuts in a star pattern to 80 ft-lb
- Lower the vehicle completely
Tools needed
-
14mm Wrench
12mm Socket
Large C-Clamp
Socket Extensions
Torque Wrench
Hammer
Pry Bar
17mm Socket
Jack Stands
19mm Socket
10mm Wrench
Brake Parts Cleaner
Impact Screwdriver
Hose Pinch-Off Pliers
Flat Blade Screwdriver
Brake Caliper Hanger
Anti-Seize Grease
Brake Grease
10mm Socket
Drain Pan
Ratchet
Wire Brush
Floor Jack
1/2 Inch Breaker Bar
Hi, I'm Mike from 1A Auto. We've been selling auto parts for over 30 years.
Hi everyone, Sue here from 1A Auto and today we're going to be doing front brake service on a 06 Honda Element. If you need these parts or any other parts for your car, click on the link below and head on over to 1aauto.com.
To remove the tire you need a 19 millimeter socket. I have the vehicle, has weight on it so that I can loosen up each lug nut as I go around. I'm using a two post lift. At home you can use jack and jack stands. Now I have it up in the air. I'm just going to remove all the lug nuts. Now we can discard the hubcap.
I'm going to install our tool that we sell here on 1A Auto and it is a hose crimper. So if you're doing a brake job and you don't want your bleeder screw, once you open it, you don't want to leak brake fluid, it just collapses with the wingnut. That's going to stop the fluid from coming through. So the first thing I do on any brake job is obviously break open the bleeder screw to make sure it comes ... It'll free up for when we open it up to push our brakes back. I got a catch bucket underneath. So I know the bleeder screw opens up so I'm just going to snug it down. This will be ready to open up easily. 12 millimeter socket on the caliper slider bolts. Break that free. Now take both of them out.
Now I'm going to take a pry bar and pry that caliper off the bracket. There's our bracket. I'm going to use my caliper hanger which I did get at 1A Auto and that way I can hang it up here and out of the way. Now I have exposed the caliper bracket and I've got two mounting bolts here. Going to use a 17 millimeter socket. I'm going to break the caliper bracket free. Break the top one free. And there we have the caliper bracket with the pads in it. So now I'm going to grab the caliper and I'm going to check it to see if it's any good. I got to push the piston back just like you do with every brake job, push the piston back after I open up the bleeder screw. So I'm going to put my little C-clamps in there that I have, and I'm going to break open this bleeder screw before I push the piston back in. Okay, now with the bleeder screw open, you'll hopefully aim that correctly at the bucket.
Oh this thing is going back really hard. As you can see, it won't go all the way in. It is frozen right there. I am squeezing that and we know it's not because the flex hose has collapsed, I have the bleeder screw open. So with that bleeder screw open, that piston should go seat itself all the way back, flush in the piston because it has no way but to come out this way. So it's not going to retract back in there. So I know that my caliper piston is seized. So I do need new calipers now. So now I have to order a caliper and I do them as a pair always. So I'll be doing a caliper on the other side. So I'm going to take the front flex hose off. Now that I know that I have to replace the caliper, let's see if I can break it free without it attached to the bracket. Okay, got to get my catch pan underneath.
I'm going to keep my banjo bolt for the hose aside because that is going to have to get reused. Most of the time the calipers do not come with new bolts. They'll come with new washers. So now I'm going to get the rotor off and you can see that this factory rotor is held on with two flat ... They've got a cone shape to them, seat little bolts. So we use a pneumatic screwdriver, which is a hammer type. So you put the pressure on it and it spins and unlocks it. We'll get this bottom one. Perfect. You do not have to replace these. Some people will, they break or they strip off and you have to drill them out. It's just a luxury to have the rotor sit flush while you're working on the brakes. So I'm going to hit the hub with a hammer, try to break it free.
We're not going to use the rotor, so feel free to hit the surface. There you have it. Wow. Look at those hard spots. I'm sure they had a brake pulsation. I'm going to clean up the hub surface. First, I'm going to spray it with a little brake parts cleaner. Then I'm going to use my wire brush. Get any surface rust off. I just like to make sure I get inside, closest to the hub, the center where the rust really forms. And as you can see how it held a rotor on pretty good. So even though we were going to replace the caliper, I'm going to show you quick way of what I would do if I was to reuse this old caliper. So I'm taking that hardware out because I've got to make sure that I bought some, because I'm going to have to reuse that if I didn't.
So I take the outer pad out, take the inner pad out and then I've got good sliders here. Nope, that one's frozen. So if I had two good sliders here, look at the surface rust on this. I would remove these tens and I would strongly, if you're not going to replace the caliper, if you don't need to. I would strongly get new hardware because these tens are thin and I would take the caliper pins out, clean up the caliper grease, clean in there the best I can and reapply new caliper grease to that slider and make sure that they sit good. Make sure you examine the boots and there's no holes, no tears. And of course we know this one's frozen. Clean the surface here. Get rid of all the surface rust. Put caliper grease on the bottom. If you get the new hardware, just install it. If you use the old one, take a wire brush to all of this. Only apply caliper grease to the bottom side. Do not apply caliper grease or slider grease to the top, and then you should be ready to go.
Here we have our new rotors for our 06 Honda Element from 1A Auto. Got the new pans and they've got the nice down cut angle on the edges to stop the squealing and the brake dust build up. It also helps cool down the pad, there's slotted holes from the manufacturer so that you can put the anti-rattle clips in. It also comes with the indicator and already has the shims mounted on the back. The rotor is a nice cross-cut rotor on front and back. It's got the quality mounted cooling fins that come from the factory, same amount that the manufacturer requires. It's got the two seated screw holes for the hub. If you need this part or any other part for your car, click on the link below and head on over to one 1aauto.com.
So now I'm going to install my new rotor and it comes with that shipping oil on it. So I just put it on the hub backwards like this so I can spray it and now I can flip it around. And before I do that, I'm going to put some ... This anti-seize so that it's, hopefully the next time someone doesn't have to hammer as hard as I just did. Just spread it out. I put it thick on around the hub and then I just go outward with it. Line up those awnings screw. Let's put those on first and then we'll spray it down and clean it. I use the pneumatic screwdriver also to install it and I just bottom them out. Give it a nice spin and hit it. See how that ... It was almost at an angle, so I'll double check both sides. Perfect. Now I can clean the surface.
So I've got a new caliper and I'm going to put some caliper grease on the bottom part of the caliper bracket, where the tins are going to sit. And hopefully in the future, stops it from rusting and corroding the tins. And what happens if you don't put new hardware on or if you don't take care of underneath where the pins sit, water gets in there, salt from the New England roads and the metal starts to flake in, it puts pressure on the tins and it slides them up. And what that will happen is makes the pads stop being able to slide on a nice smooth surface. It's like it becomes a actual frost heave in a sense.
And if the pads don't move smoothly, when that happens, you have premature wear on the pads. Okay. Once those are all seated, I'm just going to take and slide open, pull one of the sliders out or both of them just to see if they put an ample amount of silicone taste on there. I'm going to put a little more because when I pulled that out I could actually feel it rubbing against the metal. I like to add mine right to the boot. I'm going to put some more on this pin. Make sure that I get it on the inside of the line, these wrinkle parts, the folds. That way that silicone will always be in there. You can work it, push it all the way down and let the air come out. So I'm just going to take a little, this pocket screwdriver and I'm going to hold that open. There we go. Yeah, I got the air out. That's what I'm looking to do. I'm just going to do the same thing to this side.
Now I'm going to install the new caliper bracket on the knuckle. We have the two mounting bolts, I'm going to start them by hand. So now I'm going to torque the caliper bracket to the knuckle in the 17 millimeter socket and it is 80 foot-pounds. I'm going to install the pads now. So the one without the indicator is the outside one. So I'll slide that right in the spot and then I'm going to put the inner one in. Sometimes you have to just take a little screwdriver and push the pin back into place. There we go.
So we're going to put the anti-rattle pins, clips, butterflies, springs, whatever you want to call them. They go in those slots that are provided in the pads and you collapse them, line them up. Now I strongly recommend you hold on to the pad because it will just push them right out. So now I can install the actual caliper. Now piston's already back, it's pushed back from the factory when they rebuild it. Let's see, it comes with a nice new piston and seal. I'm going to slide that right on so that the pad doesn't pop out again. You got to turn the bracket, the slider pin has gotten a flat spot on it. I'm going to put the top bolt in. Now I've got to put the lower bolt in and you'll see what I mean by the flat spot. See, there's one right there and one right there. So they angle it like that. They have a spot to sit on the caliper. That's a 12 millimeter socket.
I'm just going to snug it down because I'm going to torque it to the specs, which is 25 foot-pounds. Now it comes time to install the flex hose. This caliper did come with a new banjo bolt, so make sure you get no dirt on the threads, and new copper washer that it supplies with. And we're going to look at this hose and make sure that the old copper washer is not stuck on it. Confirm it several times and it is right there. So the way I like to do is take the old bolts, sometimes you can put it right through there, pop that washer right off. Take a rag and just clean the surface, make sure there's no debris. Take the new bleeder screw bolt, banjo bolt, slide it through. New copper washer on this side.
So you got a new copper washer here, new copper washer there. This gives you a nice guide where the hose is going to sit and you're just going to turn that bolt in. That is a 12 millimeter also. I want those copper washers to seat so once it bottoms out, I'm going to tighten this to a good taut feeling. And I know that those couple washers have been seated properly. There you go. Now we can undo our tool that collapses the hose, stops it from leaking. Take that off. You can see the rubber bounces right back, and now I'm just going to open this bleeder screw. I've got my catch pan still there and I'm going to gravity bleed this. Once the fluid is coming through and it's coming through in a good, nice stream, there's no air bubbles. I can shut that bleeder screw off.
Now that the calipers and pads were installed in the front. I'm going to seat the pads and pump up the brakes. Let's check the brake fluid. So the manufacturer recommends DOT 3 which I'm going to put in, and this is the diaphragm, it goes down by suction when the brake fluid is low. So I just push it gently back into place. Make there's no chunks of dirt or anything or debris. So it's DOT 3 brake fluid, I'm going to fill it up to the full line, which is on the side here. You can see it starting to come up. I'm going to reinstall the cap. It's got these offsets, see how they're angled, so they lock them down and then it just kind of sucks it down. It's in there good. I'm going to gravity bleed one last time. I'm going to open up the passenger front bleeder screw. See if I can get in there. I'm going to make sure there's no air bubbles.
Like I said, I've already, gravity bled this when I first assembled it before I pumped it up. Steady drip coming out. No bubbles. So I'm going to tighten this up, clean it. Make sure you get with a banjo bolt, make sure that's nice and clean because you're going to want to recheck it after you pump the brakes up one last time. Make sure you don't have any leaks on the gasket. I'm going to install the bleeder screw cover. Now we're ready to go to the driver's side, do the same. Get a wrench, open that up. A couple of air bubbles there. I've got no more air bubbles. I've got a steady drip coming, so I'm going to close up the bleeder screw. Make sure that's tight. Clean it up and put my cover back on. Now I'm ready to install the wheels.
I'm going to mount the tire again. Grab your hubcap because this particular Honda does not have extra wide cutouts for three lug nuts. Set the rim up on the hub and put your lug nuts on. So the wheel torque, I got the weight of the vehicle down on the tire and I'm going to torque up the wheels and the wheel torque manufacturers spec is 80 foot-pounds.
Thanks for watching. Visit us at 1aauto.com for quality auto parts, fast and free shipping, and the best customer service in the industry.
Shop Products


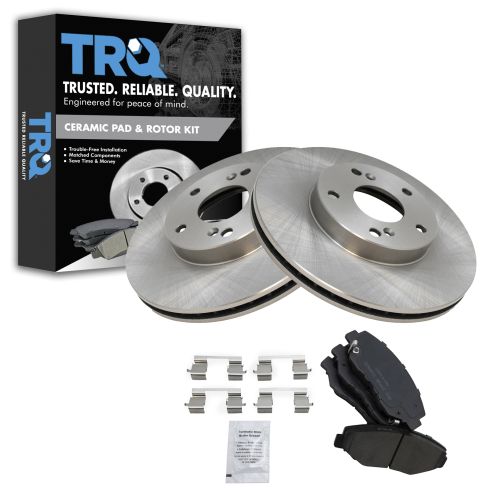
Honda Acura Front Ceramic Brake Pad & Rotor Kit TRQ BKA10850
Part Details:
- Ceramic
- Premium Posi
- (2) Front Brake Rotors
- (1) Front Ceramic Brake Pad Set

How to Replace Rear Brakes 1994-2002 Dodge Ram 1500
Watch this video to learn how to replace the rear drum brakes and hardware on your 94-02 Dodge Ram.
