How to Replace Front Brakes 2005-08 Audi A4
Created on: 2016-04-06
If the old brakes are worn and squeaky, this video can help you replace them.
-
step 1 :Removing the Wheel
- Remove the center cap with a cap removal tool or pick
- Loosen the 17mm lug nuts with the vehicle on the ground
- Raise the vehicle with a floor jack
- Secure the vehicle on jack stands evenly on both sides
- Remove the lug nuts
- Pull off the wheel
-
step 2 :Inspecting the Brakes
- Turn the rotor by hand or turn the steering wheel to turn the rotor
- Check the thickness of the brake pads
- Check the brake pad wear indicator
- Check for gouges on both sides of the rotor
-
step 3 :Removing the Brake Pads
- Press the tab and disconnect the brake sensor
- Remove the two rubber caps
- Remove 7mm Allen bolts from the brake caliper
- Pry out the clip on the caliper
- Pry the brake pads into the caliper with a flat blade screwdriver to push in the pistons
- Pull the caliper aside and wire tie it to the knuckle to relieve brake hose stress
- Pry the brake pads off with a flat blade screwdriver
- Remove the brake pad slides
-
step 4 :Removing the Rotor
- Remove the T30 bolt from the rotor
- Remove the 21mm bolts on the backside of the rotor
- Remove bolts from the brake caliper bracket
- Pull off the brake caliper bracket
- Pull the rotor off
-
step 5 :Slide the Rotor On
- Line up and press the rotor in place
- Tighten the T30 bolt to the rotor
- Tighten the 21mm bolts to the backside
- Clean the rotor with brake parts cleaner or mineral spirits
- Put the caliper bracket back into place
- Find out if you have M12 or M14 bolts on the backside
- Tighten the M12 bolts to 96 foot-pounds of torque
- Tighten the M14 bolts to 148 foot-pounds of torque
-
step 6 :Installing the New Brake Pads
- Put an old pad in the caliper
- Use a large C-clamp and the new pad to push the pistons back
- Install the second brake pad
- Put the caliper on
- Reconnect the brake sensor wire
- Thread 7mm Allen bolts
- Tighten bolts to 18 foot-pounds
- Insert the spring to the caliper
-
step 7 :Reattaching the Wheel
- Slide the wheel into place
- Start the 17mm lug nuts by hand
- Tighten the lug nuts preliminarily
- Lower the vehicle to the ground
- Tighten the lug nuts to 90 foot-pounds in a star pattern
- Reattach the center cap
-
step 8 :Testing the Brakes
- Pump your brakes repeatedly until they feel firm
- Test your brakes at 5 miles per hour and then 10 miles per hour
- Road test the vehicle
Tools needed
-
Large C-Clamp
Socket Extensions
Torque Wrench
17mm Socket
Jack Stands
Brake Parts Cleaner
7mm Allen Wrench
21mm Socket
Flat Blade Screwdriver
T30 Bit
Wire Ties
Ratchet
Floor Jack
1/2 Inch Breaker Bar
Brought to you by 1AAuto.com, your source for quality replacement parts and the best service on the Internet.
Hi, I'm Mike from 1A Auto. I hope this how-to video helps you out, and next time you need parts for your vehicle, think of 1AAuto.com. Thanks!
In this video we're going to show you how to remove and reassemble your brakes. This is a 2007 Audi A4. This procedure is the same for a lot of different Audi and VW vehicles. Actually, this car has pretty good brakes on it,.so we'll just be taking this stuff off and putting it back on and showing you the procedure. Items you'll need: new brakes from 1AAuto.com, new pads and rotors, 17mm socket, ratchet and a breaker bar or your tire iron to get the wheel off, 7mm Allen bit, T-30 Torx bit, large flat blade screwdriver, 21mm socket, brake clean and wire tires, jack and jack stands, torque wrench and a large C-clamp.
Remove the wheel. Use a special center cap removal tool, available at 1AAuto.com, or you can use a 90 degree pick. Put it into the center of the cap and pull and loosen your lug nuts; they're 17mm. Loosen with your vehicle on the ground. Raise and support the vehicle. Remove the lug nuts the rest of the way. Obviously, if you have the benefit of air tools you didn't need to loosen them up on the ground, but you can loosen them now with either a wrench or I'm going to use an impact gun. Now remove the wheel.
With the wheel and tire off you can kind of check the condition of your brakes. Just run the back of your fingernail up and down the rotor. You're feeling for any deep grooves or ridges at the edge. This is pretty smooth. You can see on my outer pad there's plenty of life here. And then you can check the condition of your inner pad right here next to the rotor, plenty back there as well. These brakes are in good condition, but we're going to take them apart and put them back together to show you.
Disconnect and remove the pad sensor connection. Push the connection tighter and then push down on this tab and release, and then you'll need to pull this tab out of the little detent, twist, pull that up and out of bracket. And then there's two 7mm Allen bolts: one up here, one down here that protect the caps. Remove the cap and again it's a 7mm Allen; remove those. You remove this retaining clip and you can do it by using a large flat blade screwdriver. Pry out one side, then you apply the center up and out. Sometimes if you have a large ridge on your rotor and your pads are worn down, you may need to just use a screwdriver and pry, which forces the piston back in. Then you should be able to lift your caliper up and off.
Use a plastic wire tie and secure the caliper up so that you don't stress the brake hose. Move the pads, the outside one, you might want to use a screwdriver, pry it out. Your inner pad has a wear sensor on it, so you just want to note how that wiring is routed and then pull it out. To remove the rotor, there's a T30 bolt here and then there's two 21mm bolts on the backside.
Again, the brakes on the vehicle are in good shape, so we're just putting them back together. Put this on here, line up that hole. Sometimes it's easier just to use a lug bolt to hold things in place. Use some brake cleaner and clean off the front and back of your rotors.
Reinstall the caliper bracket. Put some thread lock on the bolts and torque these bolts. If you have M12 bolts they should be 96 foot-pounds. This has the M14 bolts, so they're 148 foot-pounds. We want to push the piston back into the caliper, so reinstall your old pad, then use a large C-clamp, make sure you're not pushing on the brake line or anything on the back of the caliper, and tighten it up and that will force that piston back in. Then you'd remove your old pad.
Since on this vehicle the old pads are still almost brand new, we're going to leave it in there. Make sure we route this wire up and around, and then reinstall your outer pad, basically put it in place and then squeeze it in. Then just cut your caliper loose and bring it down into place. Okay, just check and make sure your sensor wire is free and you can put it back in place and reconnect it.
The caliper guide bolts, just make sure before you put them in that they slide back and forth nice and easy. If not, pull them out and put some grease on them. Get them started and torque these to 18 foot-pounds.
Replace your plastic covers. Put your spring back in. Put one side down in here and then this tab you want to get into this carrier, kind of put it in like that and then use a big screwdriver and pry down this way. That's going to hold that, hold that with my body, press in with this hand while I kind of pry down a little bit with this one. Make sure this tab goes down in.
Whenever you do work on brakes, make sure you pump your brakes, get a nice firm pedal and do test stops from 5mph and 10mph before road testing your vehicle. Install the wheel back up in place, kind of a pain because no lug studs. Twist it to line up the holes. Tighten the lug bolts preliminary. Lower the vehicle.
Now torque your lug bolts to 90 foot-pounds using a star pattern. Put your center cap back on, just note the largest space here, find the largest space between the tabs on your cap and peek in behind.
Thanks for tuning in. We hope this video helped you out. Next time you need parts for your car, please visit 1AAuto.com. Also check out our other helpful how-to and diagnosis videos.
Shop Products


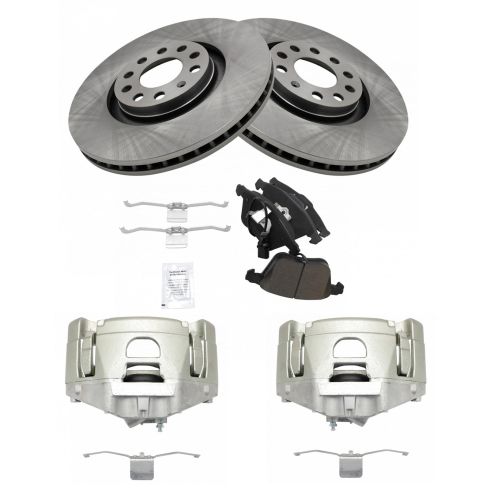
Audi A4 A4 Quattro Front Ceramic Brake Pad & Rotor Kit with Calipers TRQ BKA19107
Part Details:
- Ceramic
- (2) Front Brake Rotors
- (1) Front Ceramic Brake Pad Set
- (2) Front Brake Calipers

How to Replace Front Brake Pads Rotors 2012-19 Nissan Versa
Front Brake Pads - How to repair, install, fix, change or replace your own worn, squeaky, fading old front brakes on 14 Nissan Versa
