How to Replace Front Brakes 2006-14 Volkswagen GTI
Created on: 2018-05-01
How to repair, install, fix, change or replace your own worn, squeaky, fading old brakes on 06, 07, 08, 09, 10, 11, 12, 13, 14 Volkswagen GTI
-
step 1 :Removing the Wheel
- Loosen the lug nut covers with the supplied lug nut tool
- Loosen the 17mm lug nuts with the vehicle on the ground
- Raise the vehicle with a floor jack
- Secure the vehicle on jack stands
- Remove the lug nuts
- Pull off the wheel
-
step 2 :Removing the Brake Pads
- Remove the spring retainer from the caliper with a flat blade screwdriver and needle nose pliers
- Pry off the cap from the caliper bolt
- Remove the 7mm allen bolts from the caliper
- Disconnect the brake pad sensor
- Pull the caliper off
- Secure the caliper with a bungee cord
- Remove the brake pads
-
step 3 :Removing the Brake Rotor
- Remove 21mm bolts from the brake caliper bracket
- Pull off the brake caliper bracket
- Remove the T30 Torx from the rotor
- Pull the rotor off
-
step 4 :Preparing the New Brake Pads and Rotors
- Clean off the caliper bracket with a wire brush
- Clean off the hub with a wire brush
-
step 5 :Installing the New Brake Rotor
- Clean the rotor with brake parts cleaner
- Slide the rotor on
- Tighten the T30 Torx to the rotor
- Put the caliper bracket back into place
- Start the bolts by hand
- Tighten the bolts to 155 newton meters of torque
-
step 6 :Installing the New Brake Pads
- Put an old pad in the caliper
- Use a large C-clamp and the old pad to push the pistons back
- Clean the pad surface with brake parts cleaner
- Apply grease to the brake pad tabs
- Install the new brake pads into the bracket
- Put the caliper on
- Connect the brake pad sensor
- Apply brake grease to the slide pin bolts
- Thread the 7mm Allen slide bolts
- Tighten bolts to 15 newton meters of torque
- Press the Allen bolt cover on
- Tighten the spring to the caliper with needle nose pliers
-
step 7 :Reattaching the Wheel
- Slide the wheel into place
- Start the lug nuts by hand
- Tighten the lug nuts preliminarily
- Lower the vehicle to the ground
- Tighten the lug nuts to 120 Newton meters in a crossing or star pattern
- Tighten the lug nut covers
-
step 8 :Testing the Brakes
- Pump your brakes repeatedly until they feel firm
- Test your brakes at 5 miles per hour and then 10 miles per hour
- Road test the vehicle
Tools needed
-
Hammer
Socket Extensions
Flat Blade Screwdriver
Torque Wrench
T30 Driver
Channel-Lock Pliers
Jack Stands
Bungee Cord
Anti-Seize Grease
Ratchet
Floor Jack
1/2 Inch Breaker Bar
Hi, I’m Mike from 1A Auto. We’ve been selling auto parts for over 30 years!
All right, so we're going to take the tire off. On most Volkswagens, there's little caps that go over these lugs. The caps, you're going to need the tool from the spare tire kit. You'll put it in and grab. It's like a hook, and you'll pull the cap out, but this vehicle does not have those on currently. We're just going to loosen up the lugs with a 17 millimeter socket and a breaker bar, one at a time, just a little bit. When raising, jacking this vehicle, you're not going to want to use a jack or jacks stands on here on the control arms or on this aluminum, because you may break the aluminum or there. Some places, you can jack up from. It's over here where the pinch weld is.
On this Volkswagen, you can see there is specific spots where you're supposed to jack the vehicle or support the vehicle. These little arrows indicate that and right on the pinch weld. It's the strongest part to be jacking and supporting, and the same over here, this side. There's a little arrow pointing down. This one, it looks like it got smashed a little bit.
We're going to take off the lug, the lugs. Volkswagen has lug bolts, not lug nuts or lug studs. You need to be careful when pulling off the wheel. Then you grab the wheel, and it comes right down. Next, we're going to take off this retainer that holds the caliper to the bracket. You can use needle nose or a straight screwdriver. Pull that part out first, and it comes right off.
Now we're going to pull off the caliper slide bolts, but before we do that, there is these caps that go over. I believe this one has one missing, but we can just take a small screwdriver. Pry it out, and pull it off. Next we're going to use a 7 millimeter Allen and a ratchet to take out the caliper bolts. If it doesn't come out completely, that's okay. It just needs to be backed off so we can pull the caliper off. All right, on this vehicle, on the driver's side, sometimes they have pad sensors. This is the connector for the pad sensor. Before you pull the caliper off on the driver's side, you're going to want to disconnect this one. This one is actually broken, as you can see. But to release it, you could just slide that out. You can put a little screwdriver in here straight. Just bend it back slightly. You need to be careful, because the plastic might break. There we go. It clicked, and it's good.
Now we're going to pull off the caliper. You're going to pull straight back. You pull off the pad, one at a time. This pad comes out straight like that, because there's clips on it. There's the sensor. Then we're going to hang our caliper with a bungee cord so it doesn't fall. You don't want to put any strain on the brake line. Next, we're going to take this caliper bracket off. We're going to take off these two 21 millimeter bolts with a socket and a breaker bar. Get the two bolts loose. Once they're loose, you can do it by hand, or you can pull them out. You're going to take the bracket, slide it out towards the front of the car. Now we're going to want to separate our rotor from the hub. There is this little T30 screw. You're going to use a T30 bit, a Torx, and a ratchet. We're going to loosen it, holding the rotor. This one's pretty solid.
What we're going to do is we're going to put a lug nut in there. All right, because the rust has built up on the hub, it has caused the rotor to stick to the hub. What we're going to do, we're to break that rust free. We're going to use a hammer. We can hammer all around this area. If you are reusing your rotor, you would not want to be on the surface of the rotor. Sometimes they're tricky. Sometimes they're harder than that. In worst case, you use a bigger hammer or sometimes some rust penetrant. You can spray it in the holes and let it sit for a while. Then pull off the rotor.
Here you can see the old part versus our new part from 1AAuto.com. You can see the pads are the same. This is the driver's side. The driver's side has a sensor in it. As you pull this out, you can see it’s the same as on the car. Pull this little tab. The connector slides out, the cover. As you can see, if you compare the two connectors, they're the exact same. If you look at the two brake pads, the brackets where they go into the caliper bracket are the same.
The two rotors, you can see the size. They are the same. If you compare them, these ones are drilled and slotted for added cooling and performance. On the website, you can see which side goes on which. They are different, right to left. This one happens to be a driver's side.
All right, so we're going to clean up our caliper bracket. You're going to take a wire brush, and just get in here. This is where the pads will slide on the bracket. All right, before we put the new rotor on, we're going to have to clean this area of the hub. We're going to use a wire brush and make sure to get a good amount of the rust. All right, we're going to put the new rotor on and take a little Torx bolt. Screw that in.
Now we're going to reinstall our caliper bracket. Slide it over the rotor. All right, now we're going to install our caliper bracket bolts. Now we're going to torque our caliper bracket bolts to 155 newton meters on this vehicle. Now we're going to use some channel locks to compress the piston. We're going to do this very gently. You don't want to squeeze too hard. As we were squeezing this, we didn't have to go very far. Normally, if your brakes were really bad, this piston would be out further. When you compress this, this is pushing brake fluid up back into your master cylinder reservoir.
When doing this job, because we're not cracking any lines or taking off any components that have to do with that system, we do not have to bleed the brakes after finishing this job. You want to double check to make sure. You can check on our website. This is a driver's side rotor. As you can see, the fins are digging into the wind when the wheel is rotating.
That is how this rotor is supposed to be on this vehicle, but you can double check our website, 1AAuto.com. We're going to put a little brake grease on the sliding components of the brake pads and on the pad that's already in there. Good.
Then we're going to take our caliper. Keeping the pad sensor out of the way, we're going to slide on our caliper. You're going to take your caliper connector. It's the warning. When the brakes get thin, it will break the connection, and it'll tell you your brakes are thin. You plug that into there until it clicks. Then it'll slide right back onto the bracket.
All right, so we're going to put the caliper slide bolts in. What we want to do is take a little bit of brake grease and grease them up. I'm going to insert our caliper slide bolt. We're going to use a ratchet and our 7 millimeter Allen socket. We're going to torque these slide bolts to 15 newton meters. We're going to install this dust cap. It goes over where the caliper bolt goes in. Next, we're going to put this retainer that goes on the outside of the caliper. It keeps the caliper down where it's supposed to be on the pads. What I like to do is push down into the hole using needle nose. It seems to work best. We'll get it in that hole. Then you can push this spring on. Make sure you push it down.
Now we're going to install the tire, lining up with the holes, and hold it. We'll use our 17 millimeter socket to put our lug studs on, or lug bolts, whatever you want to call it. Put our center cap on. Now we're going to torque the lug studs to 120 newton meters in a star pattern. When you do it in a star pattern, it makes the wheel go flush to the brake loader properly.
Make sure that after you do a brake job, you make sure that you pump the pedal, because there is going to be an air gap between the caliper and the brake pads when you first start out. You want to make sure you get that caliper piston to go in. Whenever you change front end components or remove front end components and reinstall them, you always want to go to a local garage and have an alignment performed, because you are going to change the geometry of the wheel and tire going down the road. You do not want premature wear on your tires, so you want to make sure you do that. You'll be all set.
Thanks for watching. Visit us at 1AAuto.com for quality auto parts, fast and free shipping, and the best customer service in the industry.
Shop Products

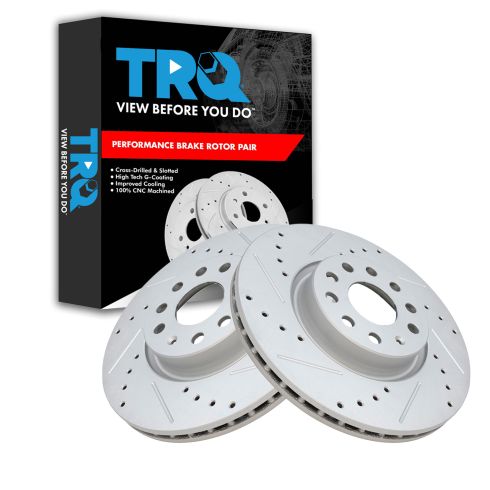
VW Audi Front Driver & Passenger Side 2 Piece Premium G-Coated Performance Brake Rotor Set TRQ Performance BRA74749
Part Details:
- Performance
- Premium G-Coated
- 2 Piece
- 5
- 12.28 in
- Vented
- 25 mm
- Cast Iron
- Slotted X Drilled
- 4.41 in
- 112 mm
- 0.98 in
- 22 mm
- 0.87 in
- Yes
- Performance
- (1) Passenger Side G-Coated Performance Brake Rotor
- (1) Driver Side G-Coated Performance Brake Rotor
- 312 mm
- No
- Conventional
- No
- 2.56 in
- 0.59 in
- 1.96 in
- 15 mm

How to Replace Rear Brakes 1994-2002 Dodge Ram 1500
Watch this video to learn how to replace the rear drum brakes and hardware on your 94-02 Dodge Ram.
