How to Replace Front Brakes 2010-16 Buick LaCrosse
Created on: 2020-12-15
This video shows you how to install new, quality TRQ brake pads and rotors on your 2010-2016 Buick LaCrosse.
Tools needed
-
Torque Wrench
Gloves
Hammer
Brake Caliper Hanger
Rust Penetrant
Pry Bar
Wheel Chocks
Brake Grease
Floor Jack
Wire Brush
Brake Parts Cleaner
Safety Glasses
Okay, friends, one of the first things we need to do is safely raise and support the vehicle. After you've done that, remove your five lug nuts and then remove the wheel. Let's go ahead and spray down the rotor with some penetrant, and, of course, this mounting screw right there. At this point, let's continue on with the nice pry bar. Come in between the caliper and the rotor itself, and we're just gonna try to pry. And that's gonna push back this caliper piston. Push it in all the way.
Next, we're gonna go ahead and remove our two caliper slider bolts. Remove your caliper and inspect around the piston area. You wanna make sure that you don't see any fluid coming out. If you do, it's brake fluid. And if that's the case, you need a caliper. Hang that caliper so there's no way I can put any pressure on the flex hose. ...out of here.
Now it's gonna be time to remove our caliper bracket bolts. There's our bracket. Let's remove that bolt. Remove your rotor. Now over on a bench, let's continue on by removing our caliper bracket tins. After you've done that, you wanna remove your sliders. Usually, you can give them a little twist. And then, of course, if you were to break the boot free from the actual slider itself, you can remove them.
At this point, what you'd wanna do is clean off any existing grease, and, of course, clean the channel where the boot's supposed to ride so it's nice, and free, and clear. And then we'll continue. Something to pay attention to when you remove them, you wanna pay attention to which one goes where because one of them will have a nice rubber boot on this. I'm just gonna use a little bit of parts cleaner. And I'm gonna use a bore brush and clean out this internal aspect.
All right. The next thing we need to do is clean up the areas where those tins are gonna ride. You're gonna notice here, across there, up there, over here, and there. Do the same on all four corners. All right. Now that we have those cleaned up, let's continue on by lubing our caliper sliders. You wanna make sure you get the entire shaft of it and then, of course, up and into this ridge right here. That's gonna be super important to help keep moisture out. Slide it into its corresponding hole, and then, of course, give it a couple of nice twists. That's gonna help make sure that the grease is fully inside there. Do the same to both.
Now that we have the slider pins in there, let's continue with the areas that the tins are gonna be mounted onto. Now let's get our tins on here. Let's go ahead and clean up the mating surface on the hub. Once it's sanded, clean it down. Now we're just gonna apply a thin coat of copper Never-Seez, especially into that little mounting hole there. Let's clean down the braking surface on the rotor. Let's put the rotor on and, of course, our mounting screw.
Now it's gonna be time to install our caliper bracket and, of course, our two nice and clean bolts with some red thread locker. Start them in, bottom them out, and then we'll torque them to 111 foot-pounds. Now let's take a little bit of caliper grease, go right along this caliper piston here, essentially just lubricating the mating points between the caliper and, of course, the pad themselves.
Okay. It's gonna be time for the brake pads now. When we install these, you wanna pay special attention to this right here. That's called your wear indicator. You want that to be on the inner pad and you want it to be in the facing upward position. Go ahead and slide that in. Same for the outer pad. Slide it in, grab your caliper, slide it right over those pads. Let's install our caliper slider bolts, and then torque them to 21 foot-pounds.
Now we're gonna install the wheel. Start all the lug nuts, and then we'll torque them to 110 foot-pounds. Torqued. Hey friends, so now all you've got left is to do the other side of the car. After that, go ahead and pump up the brake, check your brake fluid, and then take it for a road test.
Shop Products

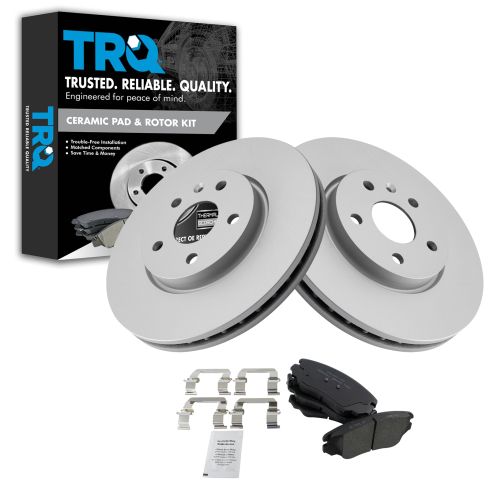
Chevrolet GMC Buick Front Ceramic Brake Pad & Rotor Kit TRQ BKA14820
- Vented
- Premium G-Coated
- Premium Posi
- 5 Lug
- Ceramic
- 12.64 in. (321mm)
- (1) Front Ceramic Brake Pad Set with Contact Point Grease & Hardware
- (2) Front G-Coated Brake Rotors

How to Replace Drum Brakes on Any Vehicle
The common features of drum brakes so that you can learn how to replace the brakes on your specific vehicle.


