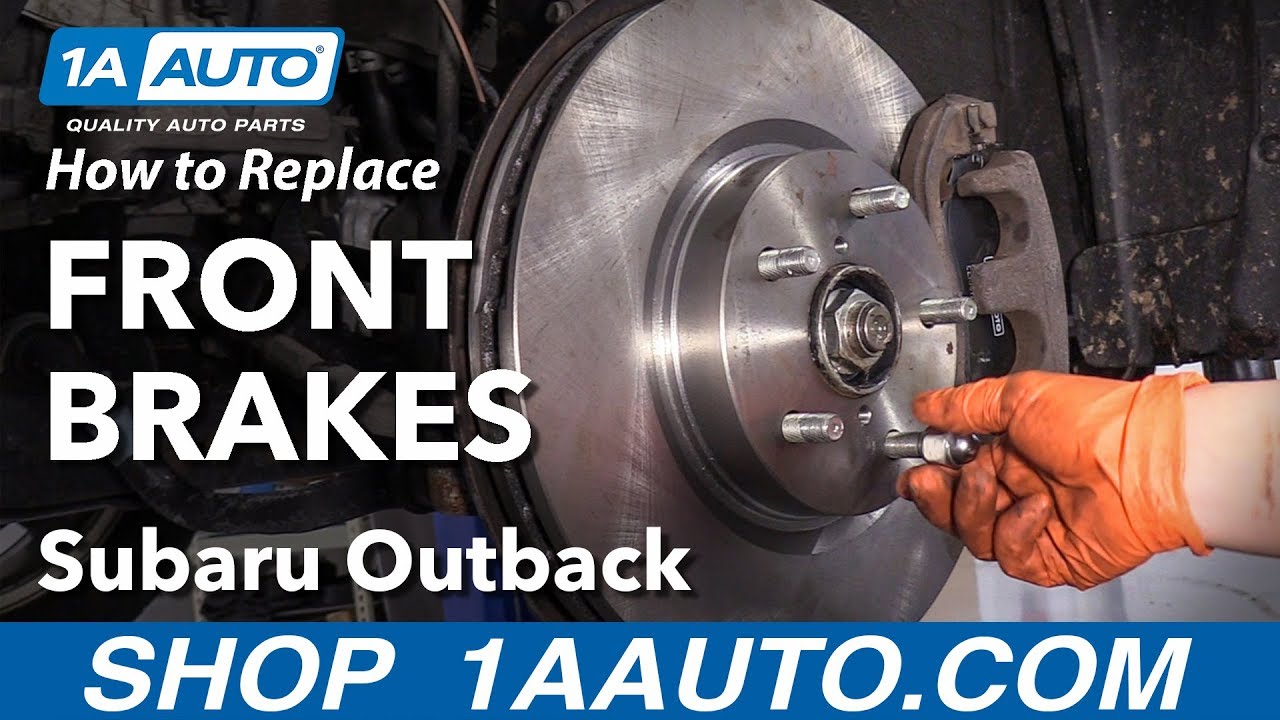
How to Replace Front Brakes 2015 Subaru Outback
Created on: 2018-11-29
How to repair, install, fix, change or replace your own worn, squeaky, fading old brakes on 15 Subaru Outback
-
step 1 :Removing the Wheel
- Loosen the lug nut with the wheel lock key
- Loosen the lug nuts with the vehicle on the ground
- Raise the vehicle with a floor jack
- Secure the vehicle on jack stands
- Remove the 19mm lug nuts
- Pull off the wheel
-
step 2 :Removing the Brakes
- Loosen and tighten the bleeder valve with a 10mm wrench
- Pry the brake pads into the caliper with a flat blade screwdriver to push in the pistons
- Remove 14mm bolts from the brake caliper
- Open the bleeder valve with a 10mm wrench
- Compress the caliper piston with a brake pad and c-clamp
- Close the bleeder valve with a 10mm wrench
- Pull the caliper aside
- Remove 17mm bolts from the brake caliper bracket
- Pull off the brake caliper bracket
- Tighten two 13mm bolts to the slots on the rotor if stuck
- Pull the rotor off
-
step 3 :Preparing the New Brake Pads and Rotors
- Clean the hub with a wire brush
- Apply anti-seize to the hub
- Clean the rotor with brake parts cleaner
- Secure the rotor with a lug nut
- Apply grease to the caliper slides
- Clean the brake pad slides with a wire brush
- Apply grease to the brake pad slide mating surface with grease
- Press the brake pad slides into place
-
step 4 :Installing the New Brakes
- Place grease to the brake pad tabs
- Place the brake pads into the caliper bracket
- Put the caliper bracket back into place
- Start the 17mm bolts
- Tighten the bolts to 88 foot-pounds of torque
- Install the new brake pads into the bracket
- Put the caliper on
- Thread 14mm bolts by hand
- Tighten bolts to 19.9 foot-pounds
- Open the bleeder valve with a 10mm wrench
- Let the brake fluid bleed until there is a steady stream with no bubbles
-
step 5 :Reattaching the Wheel
- Slide the wheel into place
- Start the lug nuts by hand
- Tighten the lug nuts preliminarily
- Lower the vehicle partially to the ground
- Tighten the lug nuts to 89 foot-pounds in a crossing or star pattern
Tools needed
-
13mm Socket
Socket Extensions
Torque Wrench
14mm Socket
Rust Penetrant
Pry Bar
17mm Socket
Jack Stands
19mm Socket
Brake Parts Cleaner
M8x1.25
Anti-Seize Grease
10mm Socket
Ratchet
Wire Brush
Floor Jack
1/2 Inch Breaker Bar
Hi, I'm Mike from 1A Auto. We've been selling auto parts for over 30 years.
Got to break the wheel free. I have the vehicle with the weight of the vehicle on the tire and this vehicle has a wheel lock key, so that's what what a wheel lock key looks like if you don't know. And you line up the little squiggly lines internally. I'll just spin it until it goes right there. 19 millimeter socket and I'm going to break them all free. I'm not going to take them completely off, not until the the tire is up in the air. I'm using a two post lift. At home, you can use a jack with jack stands.
Now with the vehicle up in the air, I can just use my hands to take the lug nuts off. So, I turned the wheel so I have easier access to the back caliper brackets. First thing I'm going to do is take the bleeder screw cover off. Set that aside. I'm going to spray a little rust inhibitor spray in there because I've got to open that bleeder screw. Let's see if it breaks free, nice. So, now I'm just going to let just snug it because I am going to open it up later. 14 millimeter socket or wrench to take the caliper slider bolts off, break that free. I'm going to break the top one free.
Let's see if we can turn around, here we go. Now, I'm going to take the caliper off of the actual bracket, here we go. Dual piston caliper. I'm going to take my caliper tool that pushes the piston back. Ratcheting tool. If you have to use a pair of locking pliers or pliers, just put the old brake pad in the actual spot against the pistons here so that you can pry against that. So, it pushes both pistons back equally at the same time, so never push the piston back without the bleeder screw open if you have an AVS system. That's why I broke that bleed a screw free, open free before.
Now going to open that up and aim it at my drain bucket I got down below. I'm going to retch these pistons back. I'm also checking out the a feel of the caliper, make sure I don't have any piston drug, frozen pistons or leakage. The dust boots seem to be nice and dry, so that tells me I have no seal seepage. And the fluid condition, this car has around 65,000. The fluid's pretty clean, but before I add fluid to the system, I am going to check it with my brake battery operated tool I bought from 1A Auto, and it'll check the moisture level in the brake fluid. And I can close that bleeder screw.
I'm going to grab a bungee cord and I'm going to set this caliper aside. I would like to let the flex hose take any pressure and let it hang down. It's not common practice. I'm just going to use the coil spring and let that dangle right there. There we go. Now, I'm going to take the caliper bracket off the knuckle and the two mounting bolts or a 17 millimeter socket or wrench. So a socket won't clear the strut bolt, so I'll have to use a wrench on the top.
Just grab the bracket and slide it off of the rotor. The pad's still in the bracket. You can see the wear by how far down they are. They're probably at four 30 seconds and three 30 seconds. Now I'm going to spray the rotor surface where it mounts on the hub. Let that soak. I don't know if you know and maybe you do, maybe you don't, but if you've ever seen rotors with threaded holes like this and you're wondering what they're for, manufacturer puts them in there so you can take a bolt. In this particular case, most of them are 8 by 125 pitch bolt and they'll get rusty from sitting obviously on the rotor and in the weather.
So, just hand start them. And what this does, it acts like a puller and it pushes against the hub. So I've got a 13 millimeter socket and I'm going to slowly turn that until it fits. And you just go back and forth evenly. And if you don't have a hammer or the hammer is not working, sometimes this will strip out where we're placing our rotors. So, it doesn't really matter, but I wanted to show you what those are for and how they work and there it comes.
Now, I've done no damage to the surface of the rotor or to the hat. If I'm reusing this rotor and I needed to take it off to do a wheel bearing or any other repairs behind, makes it be able to be reused. Just remove them after you've removed the rotor. I like to keep them, so this'll be another tool in my toolbox. So, now I'm going to take the pads out of the caliper bracket and I just take a hammer or in this case my pry bar handle. Pop them out. Now, when I do left to right breaks, you do driver's side, passenger side. In this case we always do them in pairs. So at home, if you're doing them, do one side at a time. I like to keep the pads that I took off on that side so when I go to reinstall the second set of pads. I make sure that the tensioner springs or any pad indicator where it sensors, I'm going back in the same exact way the factory shipped it.
There is a science to that. It has to do with the rotation of the tire where the indicator mounts. You can put it on the wrong side, you won't notice the performance, but as far as the angle of the wear and the indicator for you, the manufacturer puts it in a certain spot for a reason. Here we have our new brakes from one 1aauto.com, and these rotors and pads, and here is the factory rotor and pads for the Subaru. They are so identical, it's actually kind of crazy. So I'm really like in these pads from 1A Auto. The clips are identical--obviously you can see the thickness. This is worn. This pad might not have come with the cut-down for the coolant. The cooling of the pad and the anti squeak noise does have the cutout for the cooling also.
The rotor is really cool here. It comes balanced. You'll see the balancer. That's right. That's perfect. That's what you want to look in a quality rotor, make sure they're balanced. Here's the factory rotor. You could count the fins and the exact same amount of fins are in the factory rotor as it is in the 1A rotor. The hats are the same design, both sides in the dismounting screw holes that I showed you how to use earlier. If you need these parts or any other parts for your car, click on the link below and head on over to 1aauto.com.
Now, I'm going to clean up the hub surface before I put my new rotor on. I take a wire brush and just work it. You want a clean surface so that you have zero pulsation. You want it to line up correctly too, and believe it or not, that will help on pad wear for the future. So just clean up really best you can. I'm going to clean it with parts cleaner, get all that rust off, make sure it dries. Now with it all clean and drym I'm just going to apply a thin coat of anti-seize around where the hub and the rotor meet to stop the rust buildup and then I'll just do a little thin coat all the way around.
So I just set the new rotor on the hub so that I can clean off the packaging oil with some parts and brake clean. So before I place my rotor on, I want to pay attention to the old bolt markings for the holes, where you use the bolts to pry the rotor off the hub. And I want to re-line those up that way because that's an indent in that hub and I don't want it to cause a brake pulsation. So now I know that that's where the old holes were for the bolt holes and it just saves me from a possibility of a brake pulsation.
Now, I'm going to put a lug nut on the bottom just to stop the rotor from completely popping off so I can line up the bracket easier. Now it comes time to clean the caliper bracket and I'm going to clean the tins with them still in on the outside, it's just easier for me to hold it. Take a wire brush and I'm going to just brush away any rust buildup that I can see and the brake dust buildup. Then I'm going to take it off and do the same on the back side of it. This is to help with all braking and premature wear. So now I'm going to take this tin off, I just use a pocket screwdriver to pry it up. There we go.
Now you see the surface? See the chunks of rust underneath there and on the backside? You want to get rid of those. That's important because that will build up pressure and push the pads up so then the pads won't slide properly when you let the caliper off, the pressure off. You want those pads to slide back so they don't wear premature. Sometimes you'll see brake pads are worn at an angle and that's usually because they're not sliding properly. Now I'm just going to take a brush and quickly brush the backside of these tins.
I personally like to buy the hardware or the caliper from reusing the caliper. I don't sometimes, so that I can show you guys. I knew that this hardware looked like it was in good shape. It wasn't dented. It wasn't over-rusted. But for the few dollar difference, it's kind of worth it sometimes just getting the hardware. It's less labor involved also. I don't know about you, but I'd rather be inside watching a football game. So now I'm going to take the caliper grease and I'm going to put some grease underneath the caliper bracket so I can stop the water buildup in rust buildup. Just a real thin coat.
I'll snap it back into place. There you go. So, the last thing that I'm going to do is take the caliper slider off. I'm just going to take the pin out, clean it up, and examine the slider boot for any tears. So you want to pull it like an accordion and make sure there's no tear marks. There isn't. It's perfect. I'm going to take some new caliper grease. You don't want to glob it, but you just want to coat the inside there. Sometimes it will work its way down in there, if it doesn't, then coat the pin.
I just do a quick thin coat and then put some on the inside. See how there's already some in there? That's fabulous. That's the manufacturer, I'm just going to add to that. Reattach this boot to the caliper. Install my pin. I just like to spin it down in a plunger style. It works in the arrow. Now I'm going to do the same thing to the other side of the caliper bracket.
So now I'm going to install the new pads on the bracket that I just cleaned and this is why I like to keep the old pads per side as I do breaks. So I can see that the one with the indicator, so you have the brake indicator right there, that one on the inside pad because there's the markings for the caliper piston. So now I know that the inside pad is where the bolts are and I'm going to put my new brake pad right in there. Now this spring is a exactly what that is. It's a spring, it's an anti-rattle clip. So let's put that in this angle. Okay.
Okay. See how I put that clip in first? You want that to have pressure up against inside that bracket so it acts like a spring to keep this from chattering, making a rattle sound. I'm going to put the outside pad on and like I said, I kept the pad so I know that the anti-rattle clip for this side is there, so same thing. Slide that in first and bring the bottom one down. Put it right in. Now I'm ready to install. I can slide it in there and line up the bolt holes to the bracket on the knuckle, just going to hand thread them.
The torque on the inner bolts is 88.5 foot-pounds, and this is a 17 millimeter socket. Just going to get my torque wrench and torque it down. So, I've got my torque wrench set up, and I'm just going to talk it right down. See if I can on that top one. Now, I'm just going to grab the caliper that I placed up there, grab my bungee cord out of the way. Place it on the pit, just got to push the slider pins back a little bit, make sure it goes on and you grab your mounting bolts and put those in finger tight.
So now that I've got my caliper bolts, slider bolts down in, I'm going to take my 14 millimeter and torque these to 19.9 foot pounds. It's not that crazy tight. Last thing I do is loosen up this caliper bleeder screw, and I'm going to just let gravity bleed because I have opened it to push that piston back--dual pistons in this case. Once I see a steady stream of brake fluid and no air bubbles coming out, I'm just going to close that, snug it up, make sure it's nice and tight, clean it up and don't forget to re-put the bleeder screw cap on. That stops it from rusting up.
Don't forget to take the lug nut off that we use for support on the rotor and then we're going to install the tire. Put all five lug nuts back on by hand before we lower the vehicle down. And now with the vehicle on the ground and the weight of the vehicle on the tires, I'm going to torque these lug nuts to manufacturer specs, which is 89 foot-pounds. And I'm going to do it in a star pattern. Last check. Don't forget to take your lock key off. And I'm going to pump the brakes up
Without the car running, it should take like three or four pumps, you'll feel it stop in a nice solid space. I'll check our fluid. Here's our master fluid. Now before I take that brake master cover off, I want to take all that dust and kind of brush it off. I don't want that going inside the brake fluid. You want to always keep your master cylinder, your brake fluid as clean as possible. You don't want debris. So before I take the cover off, I can see here that it does tell me what kind of brake fluid. It says Dot 3, so I'll make sure I have that style.
Take the cover off, this is where I can check for moisture to see if I need to do a brake flush. So we have this nifty tool here from 1A Auto. It'll indicate the water percentage inside the brake fluid. It's battery operated. You have a button on the top. So, once you put the two prongs in the fluid, just press the button and it will tell me that it's in the okay. it's around 1% so we have some more mileage to put on before we need to do a brake flush. So my fluid level is full. It's right at max. So that means I don't need to add any. I'm just going to lock my cover back on and I'm ready to go.
Thanks for watching. Visit us at 1aauto.com for quality auto parts, fast and free shipping, and the best customer service in the industry.
Shop Products


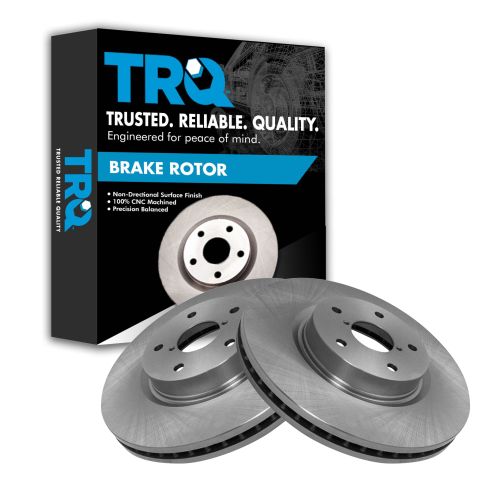
Subaru Front Driver & Passenger Side 2 Piece Brake Rotor Set TRQ BRA78002
Part Details:
- 5 Lug
- 2 Piece
- Vented
- (1) Front Driver Side Brake Rotor
- (1) Front Passenger Side Brake Rotor
- 1.10 in
- 12.44 in
- 1.18 in
- 2.28 in
- 13 mm
- 5
- 4.49 in
- No
- No
- Smooth
- No
- 58 mm
- Vented
- Cast Iron
- 30 mm
- 2.23 in
- Conventional
- 114 mm
- 0.51 in
- 316 mm
- 28 mm
- Standard Replacement

How to Replace Rear Brake Backing Plates 2002-09 Chevy Trailblazer
Watch this video to learn how to replace the rear brake backing plates on your 02-09 Chevy Trailblazer or GMC Envoy.
