How to Replace Front CV Axle 2003-08 Toyota Matrix
Created on: 2020-08-25
This video shows you how to install a new CV axle on the driver side of your 2003-2013 Toyota Matrix. • Check here for more videos on the 2003-13 Toyota Matrix: http://www.youtube.com/playlist?list=PLJVpHWuCEUX8JFuxCtFNmWTRYEasrWmSp
Tools needed
-
Torque Wrench
Hammer
Socket Extensions
Pry Bar
Jack Stands
18mm Socket
Liquid Thread Locker
21mm Socket
Rubber Mallet
Socket Driver
Copper Anti-Seize
Wheel Chocks
Center Punch
Bungee Cord
Drain Pan
Ratchet
Floor Jack
30mm 12-Point Socket
1/2 Inch Impact Gun
Okay, friends. One of the first things we need to do is safely raise and support the vehicle with the suspension hanging. Once we've done that, we're gonna remove our five 21-millimeter lug nuts. Let's get the wheel off of here. Now that we have the wheel off, let's just go ahead and put one of those lug nuts on just to hold the rotor so it can't flop around. Now it's gonna be time to remove our axle nut. You're gonna want to use a 30-millimeter and you want it to be a 12 point. If you're working on the ground and you're trying to use a ratchet, you're gonna notice that this likes to turn. If that's the case, go ahead and use a nice long pry bar. Come in between the studs like this, put it against the ground so you have some leverage and then continue to remove your nut. Put this on there a little bit. Now we're just gonna give this a couple loving bonks just to break it free from the wheel bearing. Tiny bit of penetrant, loving bonk, that's moving freely. Let's get this off of here.
Let's go ahead and remove these under here with a 17-millimeter to separate the control arm from the ball joint. This one right here is gonna be a bolt. Just be careful because it is gonna be under a little bit of tension so you want to make sure that you're safe as possible. Now let's take a nice pry bar, we're gonna come through the holes in the top of the control arm just so we can pry down. Turn this so it doesn't resituate itself and then you can release. The next thing we need to do is go ahead and pull back on this. As you pull away, you want to make sure that the axle is gonna be coming out of the knuckle area. There we are. Set that right aside. So now that we have the axle out of the knuckle area, let's go ahead and make sure that we tie it up so once we pop it out of the transmission there's no way it can potentially fall down and hurt us.
The next thing we need to do is come from underneath the vehicle with a pry bar. We're gonna go up against the axle and up against the transmission. Once we pop this out, there's a possibility that fluid could come out so you want to make sure you have a nice collection bucket to recycle any fluid. Awesome. Let's get our safety strap off of here. There it is, friends. All right. Now that the axles are out, it's a perfect time to inspect your seal. Go ahead and feel around it, make sure that there's no cracks, clean it off, make sure it's not damaged. It's always a good idea to replace the seal anytime you're replacing the axle. Either way, if it looks like it's in good enough condition, you do you, boo-boo.
Okay, friends. Now it's gonna be time to install our brand new axle. Let's go ahead and get it up behind this shield. Now we're gonna line the splines up into where the transmission hole is and carefully push it in. Obviously you don't want it to cause any damage to your boot, so be careful for anything you might get stuck on, and of course, be careful on that seal. Get it lined up. That feels pretty good.
The next thing we need to do is try to hold the axle as straight as possible. We're gonna take a nice rubber mallet and we're gonna bonk right on the end. If for some reason you don't have a rubber mallet, you should just put the nut on there and make sure it's as flush as possible to the end of the axle before you start bonking. The last thing you want to do is destroy your threads.
All right. I can hear an audible difference as I try to drive this in, take a peek, make sure it's flush with your transmission. That looks great. Now I like to use a little bit copper never seize along the backside of the bearing where the axle is gonna be going into. Pull your knuckle away, line up the axle and then carefully try to put it in there. Once again, be careful for your boot, make sure it's not gonna get caught on anything. Let's line up the lower ball joint with the control arm. Could do that by pulling down. Okay. Grab your mounting hardware.
I like to use a little bit of thread locker on these, just throw them on there. Next we're gonna bottom these out and then we'll torque them to manufacturer specifications. Let's torque these to 66 foot-pounds. Let's go ahead and put on our axle nut. We'll bottom it out and then we'll torque it to 159 foot-pounds. So now we need to get the vehicle a little bit closer to the ground. I'm gonna take a nice long pry bar and I'm gonna come across my lug studs just like this. Once I've done that, I'm gonna torque my axle nut to 159 foot-pounds. Remove this. The next thing we need to do is peen over this area right here into that slot, that's gonna be the part that locks in this nut so it can't move. If you forget that it's a very dangerous situation.
So I'm just gonna take a nice flat punch like this, come right here and then I'll give a couple loving bonks to peen that down. As you can tell, there's definitely a dimple there, and there's no way that this nut could spin. If you want to go a little bit further, it's up to you. I'll give it a couple extra whacks because that's my favorite part. Perfect.
Let's get our lug nut off of there, get the wheel up on here. We'll bottom out the lug nuts and then we'll torque them to 76 foot-pounds. All right. Let's torque them in a crisscross manner. Torqued.
So you saw when we were replacing the axle that a whole bunch of that fluid came out. You need to make sure you fill your manual transmission. Looking down along the front, you're gonna find a 24-millimeter headed bolt or plug. Go ahead and remove that, fill it up with 75W-90 gear oil until it just barely starts trickling it out and then go ahead and snug it back up. After you've done that, take it for a road test.
Shop Products


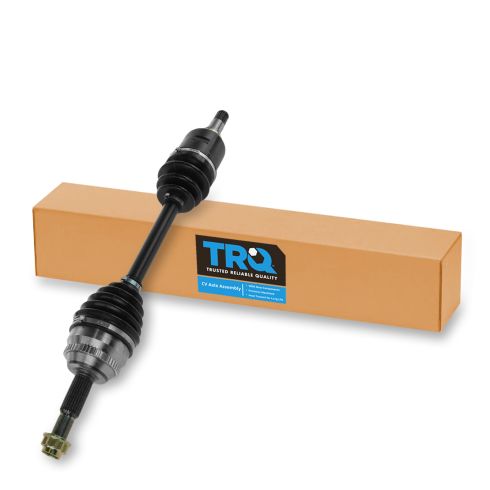
Toyota Matrix Pontiac Vibe Front Driver Side CV Axle Assembly TRQ CSA82266
Part Details:
- 26
- 48
- 20
- 648 mm
- Male
- 25.51 in
- Standard Replacement
- Yes
- M22x1.5
- Yes
- 30 mm
- 1.18 in
- Male
- Neoprene
- Neoprene
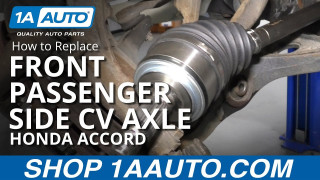
How to Replace Front Passenger Side CV Axle 2003-07 Honda Accord
Watch this video to learn how to replace the passenger side CV axle on your 03-07 Honda Accord. The driver side is covered in another video!
