
How To Replace Front Exterior Door Handle 2006-12 Chevy Impala
Created on: 2013-08-22
This how-to video will show how to remove the door panel and the exterior door handle and how to reinstall if it needs to be replaced
-
step 1 :Removing the Door Panel
- Pry off the trim piece inside the door handle with a flat blade screwdriver
- Pry off the trim piece inside the door pull with a flat blade screwdriver
- Pry off the reflector with a flat blade screwdriver
- Remove the 8mm bolt behind the reflector
- Remove the two T30 Torx bolts inside the door pull
- Remove the T30 Torx bolt inside the door handle
- Pry off the mirror base trim piece with a flat blade screwdriver
- Pry out the door panel by hand
- Lift the door panel up and off
- Disconnect the latch cables from the door handle with pliers
- Disconnect the window switch wiring harnesses
- Carefully peel off the water shield
-
step 2 :Removing the Door Handle
- Unclip the latch rods from the door handle
- Pull off the lock rod grommet
- Remove the three 10mm bolts from the door handle
- Pull the door handle out from the outside of the door
-
step 3 :Installing the Door Handle
- Remove the lock from the old handle
- Push the lock onto the new handle
- Push the new handle into the door from the outside
- Insert the three 10mm bolts into the door handle
- Clip the latch rods to the door handle
- Push on the lock rod grommet
-
step 4 :Installing the Door Panel
- Reinstall the water shield
- Connect the wiring harnesses
- Insert the latch cable to the door handle
- Lift the door panel into place
- Push in the door panel clips
- Insert the two T30 Torx screws in the door pull
- Insert the T30 Torx screw in the door handle
- Insert the 8mm bolt behind the reflector
- Push on the reflector
- Push on the mirror base trim piece
- Replace the door handle trim piece
- Replace the door pull trim piece
-
step 5 :Installing the Door Panel
- Put the water shield into place
- Lift the door panel into place
- Connect the latch cables to the door handle
- Connect the window switch wiring harnesses
- Lift the door panel into place
- Push in the door panel clips
- Insert the two T30 Torx bolts inside the door pull
- Insert the T30 Torx bolt inside the door handle
- Insert the 8mm bolt behind the reflector
- Push on the mirror base trim piece
- Push on the trim piece inside the door handle
- Push in the door pull trim piece
- Push on the reflector
Tools needed
-
Socket Extensions
T30 Driver
8mm Socket
10mm Socket
Ratchet
Needle nose pliers
Brought to you by 1AAuto.com, your source for quality replacement parts and the best service on the Internet.
Hi, I'm Don from 1A Auto. I hope this how-to video helps you out, and next time you need parts for your vehicle, think of 1AAuto.com. Thanks.
In this video, we're going to show you how to remove and reinstall a front door handle on this 2006 Chevy Impala, pretty much the same as any 2006-2011. We'll show you the front driver's side, pretty much the same procedure for the front passenger side. Tools you'll need for the job are a small flat blade screwdriver, 8 and 10 millimeter sockets, ratchet and extension, a T30 Torx driver, and a pair of pliers.
Start by pulling up on the door handle and there's a little panel that you just use a small screwdriver to pop out. It pries right out. Then, there's another small panel at your door pull that pulls up and out. Using the same small screwdriver, pry out on the reflector at the bottom corner. We'll fast forward here. Behind where you took the reflector off, there is a 8 millimeter screw to remove and then there are three T30 Torx screws. Two of them are at the door pull and then one of them is behind where the inside door handle is. Remove all three of those. Use a small flat blade screwdriver or some other flat tool to carefully pry on the triangle at the top of the door.
Starting at the top front corner, pull firmly and you'll start to release the clips and you just slide your hand in all the way around and keep pulling the door panel until it's free from the door. Once the clips around the outer perimeter are free, then you can pull the door panel up off the window ledge and out some more. Now, using a pair of pliers, there's little tabs on the cable housing. Pinch the tabs and pull the cable housing though the back side of the door handle and then pull the cable up and out. Then, there is a lock. You pull the white part of the lock back, which unlocks the connector and then you can pull the connector free and take the panel off. Carefully remove the water shield. You want to avoid tearing this, because you are going to re-use it.
Reaching inside the door, you'll find a yellow clip. Pull on that with your fingers. It comes apart and then pull that rod out. You actually do want to remove that rod from the upper door handle as well. There's also another rod in the red clip up there. I can't really film it that well, but push back on it and snap it out.
There are three 10 millimeter bolts: one pretty easy to see there and then two others are further back. The best way to see them is to remove the little grommet around the door lock knob board and then you can see the two additional 10 millimeter bolts back in there. I'm using a 10 millimeter socket with a ratchet to remove that first bolt. Then, we'll actually use an extension and go through that hole where the door lock comes up through and remove the two bolts. Pull out on the door handle and then it comes out of the door. To reinstall, you'll want to make sure you switch the lock over to the new handle, pull out on the handle, and reinsert it into the door.
Fast forward here as we resecure all three bolts. You'll notice we start the bolts by hand first. You can reach right in. Start the bolts by hand first and then tighten them up nice and firm with the 10 millimeter socket and ratchet. Reconnect that rod and, like I said, we didn't show it earlier but you do pull that rod out. Reconnect it up at top and then put it back into the yellow clip and lock that clip in place. Then, again not very easy to film, but you want to put the rod for the door lock back up into the red clip and pull it in place.
Reinstall your water shield. To reinstall the door panel, bring it close to the door, reengage the ball into the door handle, and then, snap the cable housing in place. Now, reach down in and re-connect your harness. You push the two connectors together and then flip the white clip up and over to lock it in place. Be sure to line up the door lock hole with the door lock knob, and then, push the door panel down onto the window sill. Make sure it goes on there correctly. Then, set the clips around the outside edge. Now, reinstall the three T30 Torx screws, one in behind the door handle, and then, the two behind the door pull, and then, once you have those done, re-install the 8 millimeter bolt or screw that goes in behind the reflector on the back of the door. Finish up by reinstalling the triangle trim piece up at the top, the little trim piece that goes in behind your door handle, the trim piece that goes into the door pull cup, and finally the reflector on the back side.
We hope this video helps you out. Brought to you by www.1AAuto.com, your source for quality replacement parts and the best service on the Internet. Please feel free to call us toll-free, 888-844-3393. We're the company that's here for you on the Internet and in person.
Shop Products


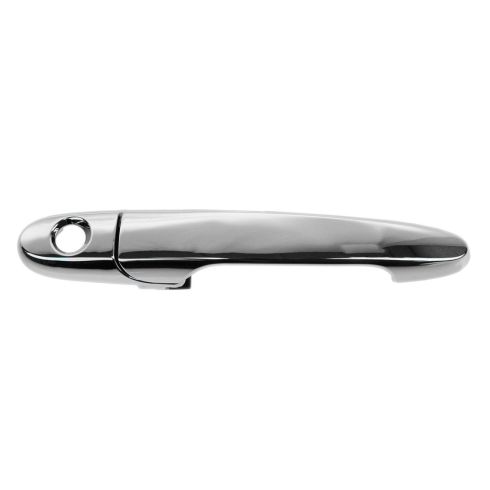
Chevrolet Buick Pontiac Saturn Passenger Side Exterior Door Handle TRQ DHA48670
Part Details:
- Chrome
- Plastic

How To Replace Front Exterior Door Handle 1998-2011 Lincoln Town Car
How to repair, install, fix, change or replace a broken or snapped off exterior door handleon 98, 99, 00, 01, 02, 03, 04, 05, 06, 07, 08, 09, 10, and 11 Lincoln Town Car models.
