How to Replace Front Lower Ball Joints 2007-11 Toyota Camry
Created on: 2017-10-24
Need to replace the ball joints? This video will show you all the steps to do it yourself, including torque specs
-
step 1 :Removing the Wheel
- Pry off the hub cap with a pry bar
- Loosen the lug nuts with a 21mm socket and breaker bar
- Raise and support the vehicle
- Remove the lug nuts
- Pull the wheel off the hub
-
step 2 :Removing the Ball Joint
- Apply rust penetrant to the ball joint nuts and bolt
- Loosen the two ball joint nuts with a 17mm socket and breaker bar
- Loosen the ball joint bolt with a 17mm socket and breaker bar
- Remove the cotter pin from the ball joint castle nut with needle nose pliers and side cutters
- Drive the cotter pin out of the castle nut with a hammer and punch
- Loosen the castle nut with a 19mm wrench and a dead blow hammer
- Strike the wheel knuckle with a small sledge hammer
- Remove the two 17mm nuts from the ball joint
- Remove the 17mm bolt from the ball joint
- Separate the ball joint from the control arm
- Pry the ball joint out of the wheel knuckle with a pry bar
- Remove the castle nut from the ball joint
- Pull the ball joint out of the wheel knuckle
-
step 3 :Installing the Ball Joint
- Remove the cotter pin and castle nut from the new ball joint
- Clean any grease from the wheel knuckle
- Slide the ball joint into the wheel knuckle
- Start the castle nut onto the ball joint by hand
- Slide the ball joint studs into the control arm
- Start the two 19mm nuts onto the ball joint studs by hand
- Start the 17mm bolt into the control arm
- Tighten the castle nut with a 19mm wrench
- Line up the castle nut with the cotter pin hole
- Insert the cotter pin into its hole
- Fold over the cotter pin with pliers
- Tighten the 17mm bolt
- Tighten the two 19mm nuts to 55 foot-pounds of torque
-
step 4 :Installing the Wheel
- Slide the wheel onto the hub
- Start the lug nuts with the tapered side facing the wheel
- Tighten the lug nuts preliminarily
- Lower the vehicle to the ground
- Torque the lug nuts to 76 foot-pounds in a star pattern
- Line up the hub cap with the valve stem
- Push the hub cap onto the wheel
- Pump the brake pedal until it feels firm
Tools needed
-
Socket Extensions
Torque Wrench
Hammer
Ball Joint Press
Rust Penetrant
Pry Bar
17mm Socket
Jack Stands
19mm Wrench
19mm Socket
21mm Socket
Side Cutters
Rubber Mallet
Flat Blade Screwdriver
Dead Blow Hammer
Sledge Hammer
Center Punch
Ratchet
Floor Jack
Cloth Rags
Needle nose pliers
1/2 Inch Breaker Bar
Hi. I'm Mike from 1AAuto. We've been selling auto parts for over 30 years!
Use a large pry bar or a flat-bladed screwdriver to remove the wheel cover. Just kind of slide it between the wheel and the plastic and pop it off. These lug nuts are a 21mm socket. I’m going to use that and a breaker bar to loosen them while the vehicle's on the ground. Raise and support the vehicle. We're using a two post lift, but you can use a jack and jack stands. The lug nuts are loose, so you can take the socket and finish removing them. I’m just going to hold onto the wheel. When I take the last lug nut off it's going to be loose. I don't want to drop it. If you drop the lug nut that's okay; you just don't want the wheel to fall.
The ball joint is bolted to the lower control arm and has two nuts and studs and one single bolt, and of course the ball joint goes through the knuckle. We're going to spray some rust penetrant on here before we try to remove these. While this is mostly together, I just want to loosen these three 17mm – well, there are two 17mm nuts and one 17mm bolt. I’m going to use a 17mm socket and a large breaker bar to get these free.
Now I want to remove this cotter pin that's up here. So we take some needle nose pliers, bend it up, get them straight, and wiggle it back and forth, push it back out of the castle nut. Then take some side cutters, and I think what I'm going to do is just cut these off because they're real, real rusty. I’ll fold them as flat as I can and push them together. Take a punch and a hammer. The punch typically fits through the ball joint hole once it's opened up. And just do my best to pop that back out the other way.
This is 19mm. I'm going to put the box wrench on here and try to just break whatever's left of the cotter pin by turning the nut off. It's pretty stiff so I'm going to hit it with a mallet. Put some more rust penetrant on there. Just keep turning it off. Normally you'd try to pull that cotter pin out, but it was so rusty we had to break it. Then you’ve got to be careful you don't get the box wrench part of there stuck in here. I'm going to turn this on just a few turns. Just work it down and then I can slide the box wrench out. Because now I've got it free, I'm going to switch to the open end, and luckily the ball joint is stuck in the taper of the knuckle so it's not spinning as I'm trying to remove it. If the ball joint started to turn inside of the knuckle into the taper, it was just turning with the nut, you can try to put a floor jack up in here and put pressure onto the ball joint to try to hold it tight, and that's really about all the options you have.
Use the open end. So if this happens, and the CV axle is in the way, you don't have to take the CV axle out. I'm going to thread this back down because I know it'll come free. Get back down until just enough room there. If you don't have a ball joint removal tool or a separator tool, you can use a metal sledge hammer, a small one. You want to hit right here on the knuckle. Be very careful because you can break the knuckle this way, but you can give it a couple good strong whacks. Yeah. See, I don't like doing that because you have to hit it really, really hard, and I'm always worried that we're going to break a knuckle that way. So, since I've got a ball joint separating tool, I'm going to use that instead.
I think it's going to be easier for me to get in here if I remove these fully. Just pull this control arm down. Pull that down out of the way. It gives me a lot more space to work. So I'm having trouble getting the ball joint tool in here because it's super tight, and doesn't want to fit. The nut can't quite come off because the axle is in the way. I've put a couple little dents in the knuckle from trying to hit it with the mallet, so I don't want to keep doing that. I've kind of decided that if I took a pry bar and just very carefully pry it against the CV axle and pry it down, I could actually get it to pop out of the knuckle. It's not the most ideal method, but it worked. The ball joint will just come right out of here. If the shield is in the way, that's fine. Just put our pry bar in here, just pry the dust shield back, and pull the ball joint out.
Here's the old ball joint from our vehicle. You can see where the cotter pin broke off. It's still inside the little cotter pin hole. Here's a brand new one from 1AAuto.com, the same exact style. It comes with two new locking nuts for the studs, and a new bolt to go underneath. It also comes with a new castle nut, and a brand new cotter pin. This should fit right in and work great in your vehicle.
I’ve just got to wipe down all the extra grease that squeezed out of the old ball joint while I was trying to remove it, and slide our new ball joint up into place. You just need to pry the dust shield back a little bit. It's going to be squished right up in there. Get the nut caught.
Put this down and under. Just catch these two lower lock nuts so it doesn't pop out. Pull this down so it's flush and install the bolt.
We'll take a 19mm wrench, tighten this down. I’m going to switch to the longer wrench. You just want to make this nice and tight as possible. That feels pretty tight. I also want to make sure -- a we'll go a quarter turn more just to line up the hole with the castle nut. Take some pliers, bend this one up and over. Cotter pin is locked in there, it's not going to come out.
Snug down the 17mm bolt. Nuts on the replacement ball joint are 19mm. Snug these down. They have a nylon locking portion to them. Torque these lower nuts and this bolt to 55 foot-pounds. These are the 19s. Switch sockets. The ball joint is replaced.
Reinstall our wheel. It's important to note, these lug nuts have a taper. The taper meets the wheel, matches the inside of the wheel. Don't install them with the flat side like this; that is incorrect. Install them with the taper to the wheel. It helps locate the wheel on the lug nut side. I'm just using the socket and ratchet to bring these down snug before I put the car on the ground. Torque the lug nuts to 76 foot-pounds, going in a cross pattern.
Reinstall the hub cap. You're going to line up the opening for the valve stem with the valve stem on the wheel. Just push it in place.
Before we start the car, just going to gently press the brake pedal down; not all the way to the floor, maybe about a quarter of the way, and just pump it. This will bring the brake caliper piston out to meet the pads because we compressed it, and you'll start to feel it get more solid as it pumps up
Thanks for watching. Visit us at 1AAuto.com for quality auto parts, fast and free shipping, and the best customer service in the industry.
Shop Products


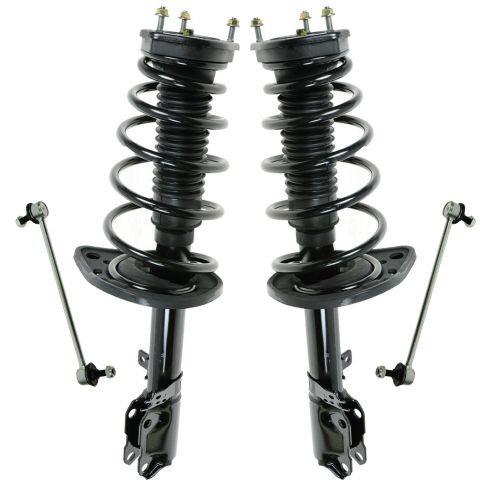
Toyota Avalon Camry Lexus ES350 Rear 4 Piece Suspension Kit TRQ SCA66211
Part Details:
- 4 Piece
- (2) Rear Sway Bar Links
- (2) Rear Strut & Spring Assemblies

How to Replace Lower Ball Joint 2007-14 Toyota FJ Cruiser
Watch this video to learn how to replace the lower ball joint in your 07-14 Toyota FJ Cruiser. 1A Auto guides you through the job step by step!
