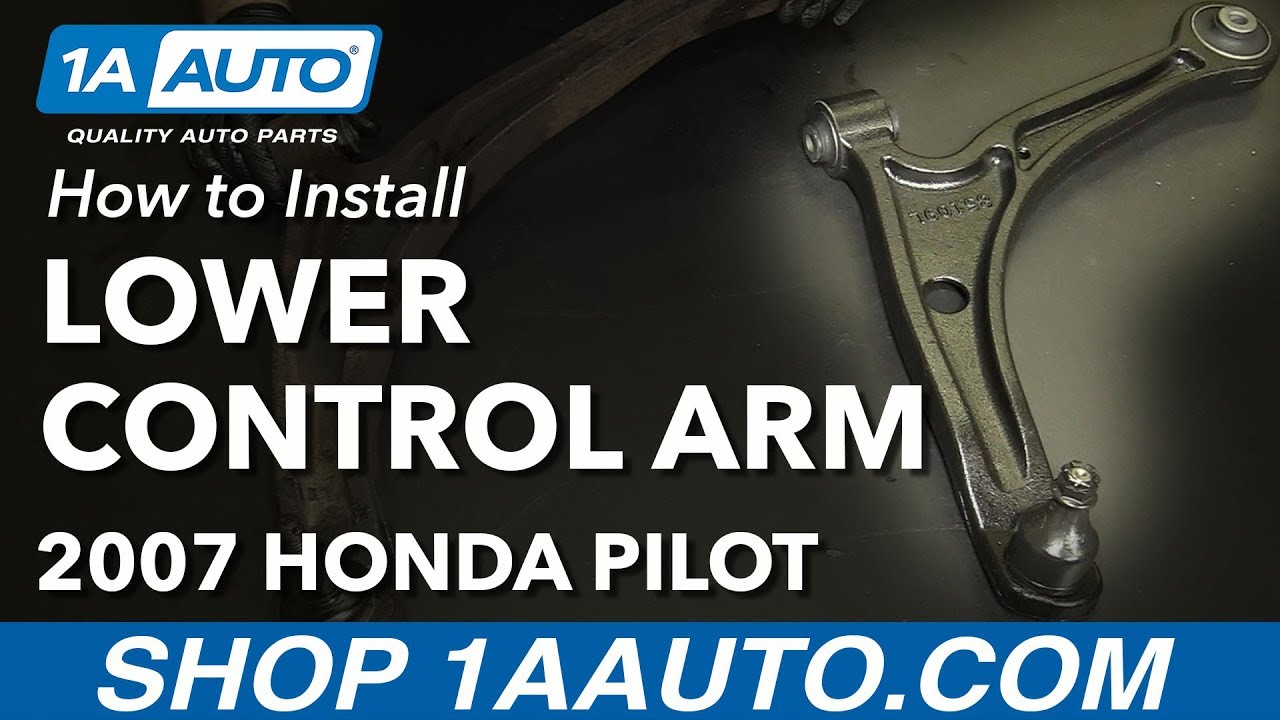
How to Replace Front Lower Control Arm 2003-08 Honda Pilot
Created on: 2017-08-04
How to repair, install, fix, change or replace failing, rusted, rotted, or damaged front lower control arms on 03, 04, 05, 06, 07, 08 Honda Pilot.
-
step 1 :Removing the Wheel
- Loosen the wheel lock lug nut with the wheel lock key and breaker bar
- Loosen the other lug nuts with a 19mm socket and breaker bar
- Raise and support the vehicle
- Remove the lug nuts remove the wheel and tire
-
step 2 :Removing the Lower Control Arm
- Have new control arm hardware ready
- Turn the wheel knuckle by hand
- Remove the cotter pin from the ball joint castle nut with a flat blade screwdriver
- Apply rust penetrant to the castle nut
- Loosen the castle nut with a 19mm wrench and a rubber mallet or dead blow hammer
- Remove the castle nut
- Attach a ball joint press to the ball joint stud
- Turn the ball joint press with a ratchet to separate the stud from the wheel knuckle
- Remove the ball joint press from the ball joint
- Thread the castle nut partially unto the ball joint stud
- Apply rust penetrant to the 19mm bolt on the rear frame side of the control arm
- Loosen the 19mm bolt from the control arm with a 19mm wrench and a rubber mallet or dead blow hammer
- Remove the 19mm bolt from the control arm
- Apply rust penetrant to the 22mm nut on the front frame side of the control arm
- Hold the 22mm nut with a wrench
- Loosen the 19mm bolt with a breaker bar and socket
- Remove the 19mm bolt with a socket and ratchet
- Remove the castle nut from the ball joint stud
- Pull the control arm down and off
-
step 3 :Installing the Control Arm
- Twist the castle nut off the new control arm
- Remove the plastic cover from the ball joint
- Lift the control arm into place
- Start the 19mm bolt into the rear frame side of the control arm
- Fit the control arm into the frame bracket
- Insert the ball joint stud into the wheel knuckle
- Thread the 19mm bolt into the front frame side of the control arm
- Start the castle nut onto the ball joint
- Tighten the 19mm bolt at the rear frame side
- Support the ball joint with a jack
- Tighten the castle nut onto the ball joint
- Turn the castle nut to line up with the cotter pin hole
- Insert the cotter pin through the castle nut
- Tighten the two 19mm bolts on the frame side to 69 foot-pounds
-
step 4 :Installing the Wheel
- Lift the wheel onto the wheel studs
- Start the locking lug nut by hand
- Start the remaining lug nuts by hand
- Tighten the lug nuts preliminarily
- Lower the vehicle to the ground
- Tighten the lug nuts to 80 foot-pounds in a star pattern
Tools needed
-
Wheel Lock Key
Hammer
Dead Blow Hammer
Torque Wrench
Ball Joint Press
Rust Penetrant
Jack Stands
19mm Wrench
19mm Socket
22mm Wrench
Ratchet
Floor Jack
Hi, I'm Mike from 1A Auto. We've been selling auto parts for over 30 years. We're dedicated to delivering quality auto parts, expert customer service, fast and free shipping, all backed by our 100% satisfaction guarantee. Visit us at 1AAuto.com, your trusted source for quality auto parts.
If your vehicle is equipped with a wheel lock key, you want to make sure you have this before you start. We're going to use a breaker bar. These are 19 millimeter. Start with the wheel lock key one. You should always use a breaker bar on the wheel lock key. Don't use an air impact because you can easily break the key. Just get them loose about half a turn. You should always loosen the lug nuts with the vehicle on the ground. Once you loosen your lug nuts, raise and support your vehicle. We're going to use a lift for this, so it'll make it easier for you to see what we're doing. But you can do this on jack stands in your driveway. Be careful as you loosen the last one because the wheel might start to slide off the wheel studs. Put the wheel aside.
Before you replace this lower control arm, we'll need to have a new bolt for here and a new nut and bolt here on hand before you start. Now move the knuckle out. I need to remove this cotter pin here, that we can remove the lower castle nut. Take a small flat bladed screwdriver, pry it out. Then pull it out with the castle nut. Take some rust penetrant oil and spray it on the ball joint nut, a 19 millimeter nut. If this is really tight, you can use a rubber mallet or a dead blow to free it.
Probably have to use a regular wrench. Clearance is a little tight to get a socket in there or the ratchet. If you've got a ratcheting wrench, that would work great. You can try to remove the lower ball joint from the knuckle by hitting it with a small metal sledgehammer. If you put the nut on here, so it doesn't drop too far, you have to hit right here on the knuckle. It's pretty hard to get in there. The best way to do it is use a ball joint tool. You can rent these or buy them. It's really the preferred method to do this. That loud crack means we've freed the lower ball joint from the knuckle. Remove our tool.
Now that this is loose, I'm just going to thread the nut just on there. So when I undo these other bolts, if it comes loose it won't drop to the floor.
Spray some rust penetrant on the top of this long bolt. Looks to be we can go on. This is a 19 millimeter. I'm going to use my mallet to help me break it free. With that free, I can switch to a ratchet, the 19 millimeter socket.
Spray rust penetrant on the 22 millimeter nut on the backside of this bolt that goes through the front of the control arm. Try to slide the wrench in from the top here. Now I can counter hold it and take breaker bar with a 19 millimeter socket. It's loose, I'm going to switch to a ratchet. Just spray some more rust penetrant in here. You may have to just lift up on the arm to get the bolt out. Take our wrench out and the nut. It turns out this nut is actually welded to the sub frame. Kind of looked like it, I wasn't sure. If you're not sure, it's not a bad idea to put the wrench on there and counter hold it because if the welds somehow break while you're trying to remove it. You will still be able to remove the bolts from it. It's actually a decent design that they gave you a spot to put a wrench on it.
I'm going to undo the lower nut that I threaded back on and the ball joint. I'm going to grab the arm and try to pull it out this way. There it is. Work it out this way, straight out of the sub frame.
Here's our old control arm from our vehicle. I see this bushing’s a little dry rotted. This one looks okay. Ball joint's decent, but we're going to replace it with our new one from 1AAuto.com. Rubber's nice and brand new. On the ball joint side, when it ships to you, it's going to come with a new castle nut and this plastic on here needs to come off before you install it. All this plastic does is protect the rubber boot during shipping from getting ripped or torn. When you go to install it, it does come with a new cotter pin. That's going to go through the castle nut. It's the same exact size as the original. It should work nicely as a replacement part.
Install the new control arm in the reverse of removing the old one. Place it in the rear sub frame out. I'm going to take the bolt just lightly thread it in, so it's not very tight. But I don't want it to fall out. I could move this over more. That's got some play to it. There it is. I'm going to take a small pry bar and just pry up on this arm of it. Just kind of wiggle it around to get the bolt started. Take my 19 millimeter, start to thread this in. I've got this bolt captured, it's not fully tightened yet. I'm going to put our new castle nut on, so that this ball joint doesn't slip out somehow, just to be sure.
Now I'm going to thread this bolt in more. I’m just going to bring this until it gets tight. Then we'll torque it afterwards. Finish installing this bolt. Using a floor jack or, because we're on a lift, we're going to use this stand jack. I'm going to push up on the ball joint to help seat it. Just put a little tension on it.
Take my 19 millimeter wrench. I’ll just do this by, getting it started with your fingers. Bring this nut down as tight as you can get it. I can't see the through hole, the cotter pin yet. I might have to go a little bit tighter. If you have to, you can back off just a little bit. The hole is actually here on the back side. Reinstall your cotter pin.
Using the jack to load the suspension with vehicle weight, I will torque these two bolts to 69 foot-pounds. With these torqued, the arm has now been replaced. We can remove the jack.
Now we're finished with the brakes. Put the wheel back on. Start with our locking lug because it's got a nice little tool you can hold it with, the key. Get the wheel seated on the hub. Put on the rest of our lug nuts. You have all your lug nits started by hand. You can snug them up with your ratchet. Just want to get them seated. I will torque the wheel when it's on the ground. Put the wheel lock key on. You just have to spin it around until it lines up. Take our torque wrench set to 80 foot-pounds. When it's just a five lug, you can do it in a cross pattern. Go like this.
Thanks for watching. Visit us at 1AAuto.com for quality auto parts, fast and free shipping, and the best customer service in the industry.
Shop Products
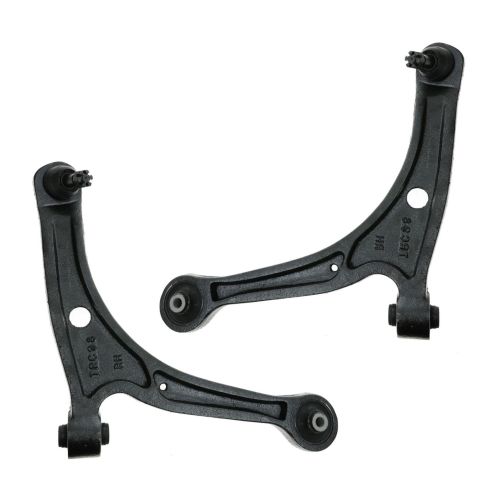
Honda Pilot Acura MDX Front Driver & Passenger Side 2 Piece Control Arm with Ball Joint Set TRQ PSA62347
Part Details:
- 2 Piece
- (1) Front Driver Side Lower Control Arm with Ball Joint
- (1) Front Passenger Side Lower Control Arm with Ball Joint

How to Replace Upper Control Arm 2009-14 Ford F-150
How to repair, install, fix, change or replace failing, rusted, rotted, or damaged control arms with ball joint on 11 Ford F150
