How to Replace Front Lower Control Arm 2006-10 Ford Explorer
Created on: 2017-05-16
How to repair, install, fix, change or replace a broken, busted, bad, loose, or damaged lower control rod on 06, 07, 08, 09, 10 Ford Explorer or Mercury Mountaineer.
-
step 1 :Removing the Wheel
- Loosen the lug nuts with the vehicle on the ground
- Raise the vehicle with a floor jack
- Secure the vehicle on jack stands
- Remove the lug nuts
- Pull off the wheel
-
step 2 :Removing the Sway Bar Links
- Hold the upper link stud with a 16mm wrench
- Remove the lower nut from the link with a 16mm socket and ratchet
- Remove the sway bar link
- Tap the sway bar link out with a hammer if it's stuck
- Remove the bushings and washers
-
step 3 :Removing the Control Arm
- Remove the 24mm bolt from the strut
- Remove the 24mm lower ball joint nut
- Strike the side of the steering knuckle with a hammer
- Remove the 24mm nut fixed in the subframe on the rear of the lower control arm
- Loosen the 30mm axle socket with a socket and 24mm wrench
- Tap out the bolt
- Pry the control arm down
- Pry the control arm out of the steering knuckle
-
step 4 :Installing the Control Arm
- Install the lower ball joint into the knuckle
- Hand-tighten the 24mm nut to the ball joint
- Set the control arm into the frame
- Set the rear bolts into the frame and control arm
- Push down on the spindle
- Line up the bottom strut bolt
- Tighten the 24mm strut bolt
- Tighten the 24mm bolt on the backside
- Tighten the 30mm bolt on the backside
- Torque the lower ball joint nut to 111 foot-pounds
- Jack up underneath the knuckle to simulate the ride height
- Torque the strut bolt to 248 foot-pounds
- Torque the 30mm bolt to 296 foot pounds
- Torque the back 24mm rear control arm to 148 foot-pounds
-
step 5 :Installing the Sway Bar Links
- Place a washer onto the link
- Then a bushing
- Place the link up through the control arm
- Install a bushing with the tapered end down
- Then a washer
- Then the sleeve
- Then a washer with the cup facing up
- Then a bushing with the tapered end up
- Insert the link into the sway bar
- Install a bushing
- Install a washer
- Then tighten the nut with a 17mm wrench and a 16mm socket and ratchet
- Lower the jack/weight from the suspension
-
step 6 :Reattaching the Wheel
- Slide the wheel into place
- Start the lug nuts by hand
- Tighten the lug nuts preliminarily
- Lower the vehicle to the ground
- Tighten the lug nuts to 100 foot-pounds in a crossing or star pattern
Tools needed
-
24mm Socket
Socket Extensions
Hammer
17mm Wrench
Rust Penetrant
Pry Bar
16mm Socket
Jack Stands
19mm Socket
Safety Glasses
Gloves
30mm Socket
Ratchet
Floor Jack
1/2 Inch Breaker Bar
Hi, I'm Mike from 1AAuto. We've been selling auto parts for over 30 years! We're dedicated to delivering quality auto parts, expert customer service, and fast and free shipping, all backed by our 100% satisfaction guarantee. We've created thousands of videos to help you install our parts with confidence. That saves you time and money, so visit us at 1AAuto.com, your trusted source for quality auto parts.
In this video, we're going to be working with our 2006 Ford Explorer. We're going to show you how to remove and replace your vehicle's lower control arm. Our new part comes with a ball joint in it.
If you like video, please click subscribe. We have a ton more information on this and many other vehicles. If you need this part for your truck, you can follow the link down in the description over to 1aauto.com.
Here are the items you'll need for this repair: full metric socket set, metric wrench set, ratchet, breaker bar, pry bar, hammer, rust penetrant, safety glasses, gloves, jack, jack stands
Using a 19mm socket and a breaker bar, loosen the lug nuts on your tire. Raise and support your vehicle. We're doing this on a lift to make it easier to show you what's going on, but this job can be done at home on a jack and jack stands. Finish removing your lug nuts. You should be able to do this by hand at this point. You can use a ratchet if you need to. You can then remove your wheel and tire.
It may be a good idea to apply some penetrating oil to whatever parts you're going to be working with. With a 16mm, put a 17mm wrench on the nut on the topside of your sway bar link and brace it against the frame of the vehicle. You can then use a 16mm socket and ratchet on the bottom to loosen it. The sway bar link on these vehicles is essentially a series of bushings and washers with a sleeve all held together by one long bolt, as opposed to being a one-piece unit like some other vehicles. You can see ours is pretty rough here, because there's usually not this much slack. That's actually what your bushing is supposed to look like on all four pieces, one on each side. You can see the old ones are worn down or cut there. It looks like they've actually fallen off over time. Once the nut's out, you can try to remove the bolt from the center of the sway bar link. This can be pretty difficult, so if it doesn't come out by hand, don't be afraid to get on there and give it a good hit with a hammer. The sway bar link will disassemble just like that when you pull it out, so just make sure you have all the old bushing material and all the old washers off of it.
Using a 24mm socket and ratchet, remove the bolt and the lower portion of the strut. This has a wing nut on it inside of the control arm that's going to rotate and jam up against the bottom, so you don't need to put a wrench on it. Just be ready to catch that when it does come out. The 24mm socket will loosen and remove the lower ball joint nut. Strike the side of the steering knuckle with a large hammer. Be sure to use this proper safety equipment. It should pop the ball joint free from the knuckle.
With a 24mm socket and ratchet, remove the 24mm nut on the rear of the lower control arm. This bolt is fixed in to the subframe. We'll loosen the nut until it's flush with the end of the bolt. Move the nut and slide that rear bolt out of your control arm. Using a 30mm axle socket and a breaker bar, loosen the nut on the front of the lower control arm. Once you get it moving, you'll probably need to brace the bolt side. That's going to be a 24mm wrench. Leave the nut flush with the end of the bolt so you can help tap it loose. Then you should be able to remove it by hand and pry your control arm down. Now at this point, as long as you have the lower ball joint released from the knuckle, you should be able to sneak everything out and remove your lower control arm from the vehicle.
Install the lower ball joint of your new lower control arm into the knuckle. You'll need to find the right angle to sneak this in at. Then just for safety, we'll start the new nut. Set the strut into the lower control arm and then line up the backs. Set the bolts into place and start the nuts. Now you could do this yourself with a pry bar, but to make things easier to line up, I'm going to have a helper push down on the spindle while we install the strut bolt. You may be able to use a pry bar to help line up that bottom bolt. You're going to want to send just the tip of the bolt through and install that flag nut on the backside by lining it up and trying to thread that strut bolt into it. Once you've got everything started, you can bring all your bolts down close before we preload the suspension and torque everything into place.
It's a 24mm socket and ratchet for the strut bolt. Again, we're just going to get that close for now. It's also a 24 on the backside of the rear control arm bolt. We'll then use the 24mm wrench on the bolt head and the 30mm socket and ratchet, this is usually an axle nut socket, on the backside of the front bolt. Torque the lower ball joint nut to 111 foot-pounds. Using a screw jack or a floor jack, put the weight of the vehicle onto it so the suspension is at ride height. This means when we torque down our bushings, everything will be in place with no preload. The strut bolt gets torqued to 248 foot pounds. We did need to rent a larger torque wrench to get these sizes, but it is still a 1/2" drive and still works with the sockets we already had. Using a 24mm wrench to hold the bolt and a 30mm socket and torque wrench, torque this to 296 foot-pounds. The nut on the rear control arm is also 24. That gets torqued to 148 foot-pounds.
Now you sort of need to build the sway bar link into the truck, so we'll start with a washer and then a bushing. We'll go up through the control arm, install a bushing with the tapered end down, followed by another washer, the sleeve, a washer with the cup end facing up, and a bushing with the tapered end facing up. We'll go through the sway bar, install another bushing, then install the washer and the nut and tighten your new hardware down. You'll want a 17mm wrench on the nut and a 16mm socket and ratchet on the bolt end. Just tighten that up until it compresses the bushings so you know that everything's nice and tight and there's no slop in there to make any noise when you go over bumps. Once that's down tight, you can lower the weight off of the screw jack or floor jack.
Reinstall the wheel and tire onto your hub. It's easiest to put a lug nut inside of the 19mm socket to start it onto the studs. Get all five of these down as tight as you can by hand, and then we'll torque the wheel once there's some weight on it. Lower the vehicle back down and put partial weight onto the wheel and tire. This means that you may have your jack or lift under the vehicle. Get the tire to touch and let the vehicle come down some without allowing it completely off of the lift or jack. Torque your lug nuts to 100 foot-pounds in a cross pattern.
Thanks for watching. Visit us at 1AAuto.com for quality auto parts, fast and free shipping, and the best customer service in the industry.
Shop Products


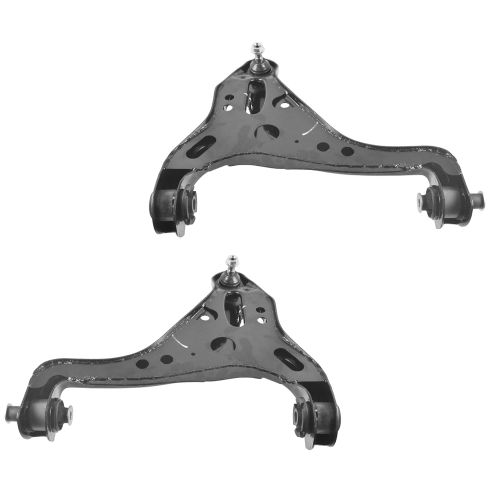
Ford Mercury Front Driver & Passenger Side 2 Piece Control Arm with Ball Joint Set TRQ PSA62247
Part Details:
- 2 Piece
- (1) Front Driver Side Lower Control Arm with Ball Joint
- (1) Front Passenger Side Lower Control Arm with Ball Joint

How to Replace Upper Control Arm 2009-14 Ford F-150
How to repair, install, fix, change or replace failing, rusted, rotted, or damaged control arms with ball joint on 11 Ford F150
