
How to Replace Front Shock Absorbers 1998-2011 Ford Ranger
Created on: 2016-12-16
If the front shocks are bad and need to be replaced, this video will show you how to change them yourself
-
step 1 :Removing the Wheel
- Pry off the center cap with a flat blade screwdriver
- Remove the wheel lock lug nut with a wheel lock key
- Loosen the 19mm lug nuts with the vehicle on the ground
- Raise the vehicle with a floor jack
- Secure the vehicle on jack stands
- Remove the lug nuts
- Pull off the wheel
-
step 2 :Removing the Strut
- Tap a wrench to bottom of the shock, beneath the washer
- Break the 14mm nut loose
- Remove the 14mm nut
- Remove the washer and top bushing
- Remove the wrench from the 16mm nut
- Pull the shock down to compress it
- Place the shock off to the side, out of the opening
- Place a 10mm wrench over the bolt on the top side of the lower control arm
- Loosen the 13mm nut on the bottom of the control arm
- Remove the bolt from the control arm
- Repeat this process with the opposite bolt
- Slide the shock out of the upper control arm
-
step 3 :Installing the Strut
- Install the washer to the stud of the shock
- Install the bushing to the stud of the shock
- Set the stud into the shock bracket
- Set the top bushing over the stud
- Set the washer over the bushing
- Start the 10mm bolt and 13mm nut on the bottom of the shock
- Tighten the lower bolts
- Hold the bottom of the shock with a 16mm wrench
- Tighten the 14mm nut
-
step 4 :Reattaching the Wheel
- Slide the wheel into place
- Start the lug nuts by hand
- Tighten the lug nuts preliminarily
- Lower the vehicle to the ground
- Tighten the lug nuts to 100 foot-pounds of torque in a crossing or star pattern
- Reattach the center cap
Tools needed
-
Wheel Lock Key
Hammer
Flat Blade Screwdriver
Torque Wrench
Jack Stands
19mm Wrench
19mm Socket
10mm Wrench
10mm Socket
Floor Jack
1/2 Inch Breaker Bar
Hi, I'm Mike from 1AAuto. We've been selling auto parts for over 30 years! We're dedicated to delivering quality auto parts, expert customer service, and fast and free shipping, all backed by our 100% satisfaction guarantee. So visit us at 1AAuto.com, your trusted source for quality auto parts.
In this video we're going to be working with our 2001 Ford Ranger 4.0-liter four wheel drive. We're going to show you how to remove and replace your front shock absorber. We're working on the passenger side, but this process will be exactly the same on the driver side.
If you like this video, please click subscribe. We have a ton more information on this truck, as well as many other makes and models. If you need these parts for your vehicle, you can follow the link down in the description over to 1AAuto.com.
Here are the items you'll need for this repair: flat blade screwdriver, wheel lock key, 10-19mm socket, ratchet, socket extension, 10-19mm wrench, hammer, breaker bar, torque wrench, jack and jack stands
Using a taped flat blade screwdriver, locate the relief cuts in the hubcap. Stick the screwdriver in, and pry out to release it from the wheel. This particular truck has a wheel lock on it, so we'll need the wheel lock key in order to remove it. Otherwise, the rest of the nuts come off with a 19 millimeter socket and breaker bar. Simply crack them loose for now. Then raise and support your vehicle, and remove the lug nuts the rest of the way. Remove the wheel from the vehicle.
With the wheel and tire removed, you can fold up the skirt on the inside of the inner wheel well and see the 14 millimeter nut, as well as down here on the cap of the shock is a 16. Now, that can be pretty tight, so you may need to use a hammer to tap the wrench onto those flats. Just tap the wrench into place. You'll need to pair up a 14 and a slightly larger wrench for some extra leverage. Put the boxed end over the stud, and break the nut loose. Once the nut has been broken loose, if you have a ratcheting wrench, now is a great time to utilize that to finish removing the nut. Otherwise, you can remove it manually with a regular wrench. Once you've removed the nut from the top of the shock, you'll also need to remove the washer and the top bushing. Remove your wrench, and this should be even easier if you're replacing a shock that's already failed. You pull down and compress the shock. Once the stud comes out of the opening, go ahead and place it off to the side.
Place a 10 millimeter wrench over the bolt on the top side of the lower control arm and loosen up the 13 millimeter on the bottom. Remove the bolt from the top, and repeat this process with the opposite bolt. Move the top of the shock. Release the bottom. Slide the shock out of the upper control arm. You may have to compress it a little to help get it out, or you may just want to drop it out of the bottom, whichever is easiest.
Here we have our old shock that we removed from our vehicle and our new part from 1AAuto.com. As you can see, these parts have the same height, diameter, the same bar pin at the bottom where it will bolt on to our lower control arm with a nice new bushing as well as the same cap on the top of the shock to hold while we tighten up the stud here. It comes with a nice new set of top bushings and washers, one for below the bracket, and one for above, as well as a new nut, and a new set of nuts and bolts for the bottom. What your shock absorber does is control the up-and-down travel of your vehicle. Bad shocks will make the ride feel harsh or bouncy because it's not controlling the rate at which the suspension travels as well as the number of times the suspension can travel up and down.
If your vehicle has a poor ride quality, is harsh or bouncing when hitting bumps, a new set of shocks from 1A Auto will go in direct fit just like your original equipment, get your vehicle writing nice and smooth, and fix you up right. Install your washer and bushing onto the stud of the shock. Set it up into the control arm. Through the opening in the shock bracket, place the bottom over its holes, set the top bushing and washer over the stud, and tighten up the nut at the top, a few threads by hand. Install the 10 millimeter bolt for the base of the shock, start the 13 millimeter nut on the bottom. Tighten up the nuts and bolts with a 10 millimeter wrench on the bolt head and a 13 millimeter socket ratchet and extension at the bottom. Once you've tightened one bolt down, go ahead and do the other. Hold the top nut of the shock in place with your 16, and tighten down the top with a 14 millimeter.
Reinstall the wheel and tire and start your lug nuts by hand. That's to 100 foot-pounds in a cross pattern. Reinstall your center cap, and you're good to go.
Thanks for watching. Visit us at 1AAuto.com for quality auto parts, fast and free shipping, and the best customer service in the industry.
Shop Products


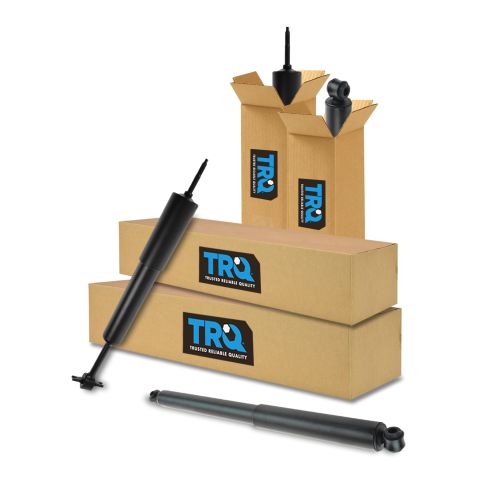
Ford Ranger Mazda B2500 B3000 B4000 Front & Rear 4 Piece Shock Absorber Set TRQ SBA60439
Part Details:
- 4 Piece
- (2) Rear Shock Absorbers
- (2) Front Shock Absorbers

How to Replace Strut Assembly 2000-05 Ford Focus
Watch this video to learn how to fix a sagging or loose suspension. The experts at 1A Auto show how to replace the front shocks in your 00-05 Ford Focus.
