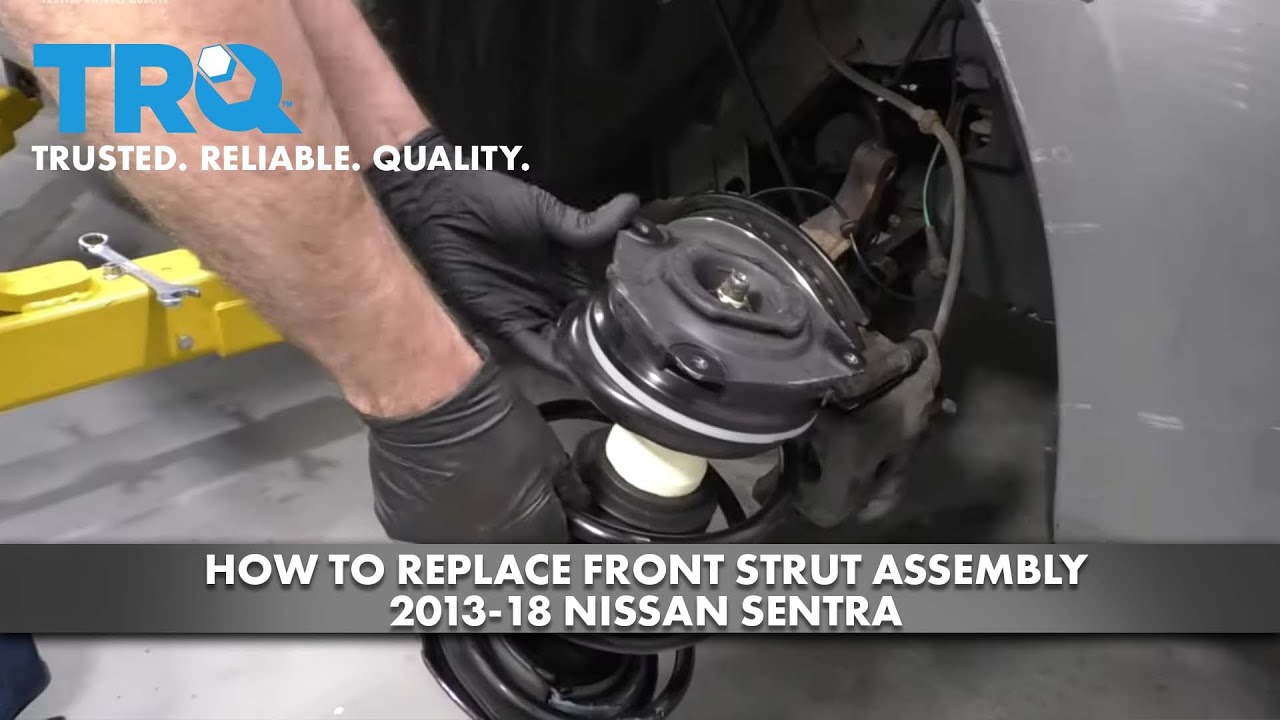
How to Replace Front Strut Assembly 2013-18 Nissan Sentra
Created on: 2020-03-17
This video shows you how to install new front struts from TRQ on your 2013-18 Nissan Sentra.
Tools needed
-
12mm Socket
13mm Socket
Torque Wrench
Hammer
Socket Extensions
Rust Penetrant
18mm Wrench
21mm Socket
21mm wrench
Flat Blade Screwdriver
6mm Hex Socket
Ratchet
Assistant
1/2 Inch Impact Gun
You wanna keep in mind, when you're doing this job, after you're done, you're gonna wanna go to a local garage and have the vehicle aligned so you don't have premature tire wear. Take the wheel off. I'm going to use a 21-millimeter socket. Remove the wheel. I'm just going to spray a little rust penetrant on here, this is pretty rusty. Let it soak. I'm going to take this nut off using 18-millimeter wrench, and then to hold the stud I'm gonna use a 6-millimeter hex bit. Loosen this up first. And take that nut off, and then slide this out. And take the ABS wire out of this bracket right here, just slide it out. And this one too. And we want to remove the brake hose from this bracket, there's a little clip right here, just take a screwdriver, just try to pry it out a little bit. Slide that off and slide the brake hose out. Now I'm going to use a 21-millimeter wrench on this bolt here and 21-millimeter socket, take these two nuts off. Be careful with the brake hose, don't get it caught. Don't want to rip it. And then you can take these bolts out. And slide the knuckle off of here. You might want to support this knuckle, you don't want to put too much tension on the brake hose or on the CV joint, if it start pulling out.
And we need to take these bolts out, but before we take these two out, there is a third one that's behind the cowl, right here. You can just take a straight blade screwdriver, raise this up right here. Take this out of the way. And then there's a little cover right here, pull this up and out of the way, and then you can access it. I just take a 13-millimeter socket and an extension, then I pull this cover off so I can access it from here with my hand, just to get on it and loosen it up. And pull the other two out. Now I'm going to grab the strut assembly from underneath and take this last bolt out. And I'll pull it right up. All right. Take the new strut assembly. Now, this only goes on one way, these bolt holes will only line up one direction. So, slide this in position. Then you can get one of these bolts started. It might be easier if you have a helper hold that while you get the bolt in. And get this other one in. Just make sure you get a couple turns on these bolts. I am going to leave this loose so that we can attach everything underneath first before we torque these down.
Now, take the knuckle, slide this in position. If you have to twist the strut, you can. And raise it up. Slide the bolt there. And this one right here. And now we'll torque these to 92 foot-pounds. Line the brake hose up. Take the clip, slide the clip in position, and just take a hammer and just give it a tap. There we go. Looks good. Take the ABS wire, put that back in the bracket right there and right there. Reattach the upper sway bar link. Put the nut on. Now we'll torque this to 62 foot-pounds. And then line these bolts up to kind of where they were before, there is an alignment adjustment right here. I'm going to use a 12-millimeter socket to tighten these down. And then torque these to 12 foot-pounds. And put these covers back on, here and right here. Put the wheel back on, and the lug nuts. Now I'm going to torque these lug nuts to 83 foot-pounds in a star pattern to tighten the wheel down evenly. Just go around again, double check.
Shop Products


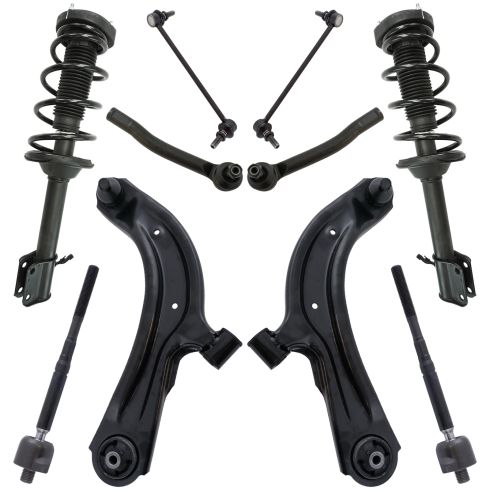
Nissan Sentra Front 10 Piece Steering & Suspension Kit TRQ PSA64902
Part Details:
- (2) Front Sway Bar Links
- (2) Front Lower Control Arms with Ball Joints
- (2) Front Strut & Spring Assemblies
- 10 Piece
- (2) Front Outer Tie Rods
- (2) Front Inner Tie Rods

How to Replace Shock Absorbers 2007-16 Chevy Silverado
You can learn how to change the rear shocks on your 07-13 Chevy Silverado or GMC Sierra. Watch this video where 1A Auto experts show you step by step!
