
How to Replace Front Struts 1997-2001 Toyota Camry
Created on: 2016-06-20
Check out this video to learn how to replace the front struts on your 97-01 Toyota Camry. 1A Auto will show you step by step instructions for this repair.
-
step 1 :Removing the Wheel
- Loosen the 21mm lug nuts with the vehicle on the ground
- Raise the vehicle with a floor jack
- Secure the vehicle on jack stands
- Pull off the hub cap
- Remove the lug nuts
- Pull off the wheel
-
step 2 :Removing the Strut
- Hold the sway bar link collar with vise grips
- Remove the 14mm nut from the top of the sway bar link
- Remove the vise grips
- Pull the sway bar out of the strut
- Remove the ABS sensor wire from the clip
- Remove the 12mm bolt from the ABS sensor
- Pull the sensor and brake line aside
- Loosen the two 22mm nuts at the bottom of the strut
- Tap the 22mm bolts loose with a hammer
- Remove the 22mm nuts and bolts
- Open the hood
- Remove two of the three 14mm nuts from the top of the strut
- Loosen the third 14mm nut
- Support the strut as you remove the last 14mm nut
- Pull the strut down and out
-
step 3 :Installing the Strut
- Lift the strut into place
- Start the three 15mm nuts onto the bolts at the top of the strut
- Tighten the 15mm nuts to 59 foot-pounds of torque
- Make sure the steering wheel is straight
- Line the spindle up with the strut
- Place the two 22mm bolts into the bottom of the strut
- Start the two 22mm nuts onto the bolts at the rear
- Hold the nuts with a 22mm wrench
- Tighten the bolts with a 22mm socket and ratchet
- Tighten the 22mm nuts to 156 foot-pounds
- Clip the brake line and abs wire into place
- Insert the 12mm bolt into the ABS sensor bracket
- Push the ABS sensor clip onto the wheel spindle
- Fasten vice grips to the sway bar link collar
- Put the sway bar link into the strut
- Start the 14mm nut onto the sway bar link
- Tighten the 14mm nut to 29 foot-pounds
- Remove the vice grips
-
step 4 :Reattaching the Wheel
- Slide the wheel into place
- Start the lug nuts by hand
- Tighten the 21mm lug nuts preliminarily
- Lower the vehicle to the ground
- Tighten the lug nuts to 76 foot-pounds in a crossing or star pattern
- Reattach the center cap
Tools needed
-
21mm Socket
12mm Socket
Hammer
Socket Extensions
Torque Wrench
14mm Socket
15mm Socket
Jack Stands
Ratchet
Floor Jack
1/2 Inch Breaker Bar
22mm Socket
Brought to you by 1AAuto.com, your source for quality replacement parts and the best service on the Internet.
Hi, I'm Mike from 1A Auto. I hope this how-to video helps you out, and next time you need parts for your vehicle, think of 1AAuto.com. Thanks.
In this video, we're going to show you how to replace the struts on this '98 Toyota Camry. It’s pretty much the same for any '97 to '01 Camry with the 2.2 liter four cylinder. You'll need new struts from 1AAuto.com, 12 to 22 millimeter sockets with wrenches and ratchets and extensions, vice grips, breaker bar, hammer, and jack and jack stands.
Break all your lug nuts lose while the vehicle is still on the ground. You'll need a 21 millimeter socket and a breaker bar. Install your jack under the vehicle. Line it up with the pinch weld. Jack the vehicle up high enough that you can get a stand underneath. Making sure you have enough clearance to remove your tire or do whatever you have to do under the vehicle, install your jack stand onto this uni-body frame rail under the vehicle. If you need to work on the rear of the vehicle put your jack stand underneath and just ahead of the lower control arm here right by the tow point. Once the weight is on your stands give the vehicle a little shake to make sure they're on there secure. Repeat these steps on the opposite side. Make sure that you bring the vehicle up so that when it sits on the other set of jack stands the vehicle will be level. You can now lower your vehicle onto the stands on this side. With the vehicle raised and supported, remove your lug nuts the rest of the way. If you need a little more room to work, you can pull the hub cap off. Remove your wheel from the hub.
We've put our vehicle on a lift to make it easier to film for you, but this job can be easily done with a jack and jack stands.
This is the passenger side of our '98 Toyota Camry. Removal and installation of the strut will be exactly the same on the driver's side. Unless you're replacing your sway bar links with the strut you only have to remove the 14 millimeter nut on top and move the sway bar link out of the way. These are prone to spinning so we'll use a small pair of vice grips to clamp onto the metal collar on the back of the sway bar link. Remove the nut with the with the 14 millimeter socket and ratchet. With the nut removed you can remove your vice grips. Take the sway bar out of the strut. So with the sway bar installed, you would want to take the vice grips and clamp to this ring to keep the stud from spinning while you remove the nut.
Lift up on these tabs and remove the clip for the wheel speed sensor. Remove the 12 millimeter bolt, holding the brake line and the ABS sensor wire in place. Remove the brake hose and the sensor wire from the retainers. Allow them to hang off to the side.
Loosen the two 22 millimeter nuts from the bolts using a wrench, 22 millimeter socket and breaker bar. Once they're broken lose you can switch to a ratchet. Don't remove the nuts fully. Be sure to leave a couple of threads. The reason we didn't remove the nuts fully is these bolts tend to get stuck into the spindle. We use a hammer and tap them out. Then we can remove our nut. A little more. The reason we leave the nut on there is so we don't mushroom the end of the bolt and prevent it from coming out or going back in easily. With the nut removed, you should be able to wiggle the spindle. Remove your bolt. Repeat this process on the bottom. With the bolts removed separate your strut from the spindle.
Remove the three 14 millimeter nuts at the top of the strut using a socket and ratchet. Leave the last nut on with a few threads. Support the strut from the wheel well. Finish removing the last nut. Remove the strut spring assembly from the vehicle.
Here we have our old strut from the vehicle and our new strut from 1A Auto. As you can see, this is a spring strut assembly ready to go out of the box directly into your car. No need to compress the spring, remove the strut top, change everything over, and replace new parts. As you can see we have a new strut mount on top with new studs. We have the same spring, same upper strut mount, same spring perch. We have the same bolt locations into the spindle. The same bracket to hold our ABS wire as well as our break line. These smaller holes here are to hold the clip for the ABS wire and on the opposite side we have the ear for the sway bar link. If your old suspension is worn out, bouncy, rusted out or your ride quality just isn't what it used to be, this new strut from 1A Auto is going to go right in, direct fit like your original equipment, and fix you up right.
Reinstall your strut into the wheel well. Use the new nuts included with your new quick strut. The nuts included with the new strut are 15 millimeters so use a 15 millimeter socket and ratchet to install the new hardware. Torque the 15 millimeters nuts to 59 foot pounds.
For easiest installation make sure the steering wheel is straight so the spindle will line up with your strut. Line the spindle up. Send your bolts back through front to back. Start the nut on the back side. Tighten these back down with a 22 millimeter socket, ratchet and wrench. Using a 22 millimeter socket and torque wrench as well as a 22 millimeter wrench, torque the steering knuckle to strut bolts to 156 foot pounds.
Reinstall the hook and tab for the ABS wire. Reinstall the brake hose into its clip. Tighten down the 12 millimeter bolt with a socket and ratchet. Reinstall the clip for the ABS wire into the holes of the strut.
Reinstall your vice grips onto the sway bar link. Send the sway bar link through the strut. Tighten down the 14 millimeter nut. Use a torque wrench to tighten the nut to 29 foot pounds. Remove the vice grips.
Reinstall your wheel and tire. Start your lug nuts. Check that they're all seated. Jack up on your pinch weld. Be sure that where you jack isn't going to interfere with your ability to remove the jack stands. Bring the vehicle up until it's off the stands. Remove your stands from under the vehicle. With the stands clear, lower the vehicle. Move to the other side and repeat these steps. If you've removed a tire, only lower the vehicle until the wheel touches the ground. With partial weight of the vehicle on the ground, torque your lug nuts to 76 foot pounds in a cross pattern. Then you can remove your jack the rest of the way. Reinstall your hub cap. Align this notch with the valve stem on the wheel. Snap it back into place.
Thanks for tuning in. We hope this video helps you out. Brought to you by www.1AAuto.com, your source for quality replacement parts and the best service on the Internet. Please feel free to call us toll-free, 888-844-3393. We're the company that's here for you on the Internet and in person.
Shop Products


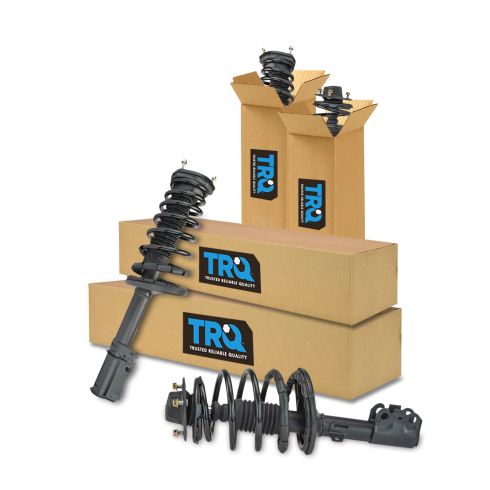
Toyota Avalon Camry Lexus ES300 Front & Rear 4 Piece Strut & Spring Assembly Set TRQ SCA57070
Part Details:
- 4 Piece
- (2) Front Strut & Spring Assemblies
- (2) Rear Strut & Spring Assemblies

How to Replace Strut Assembly 2000-05 Ford Focus
Watch this video to learn how to fix a sagging or loose suspension. The experts at 1A Auto show how to replace the front shocks in your 00-05 Ford Focus.
