How to Replace Front Struts 2007-09 Chevy Equinox
Created on: 2017-01-10
This video shows how to remove and install the wheels, sway bar links, and front struts on the 07-09 Chevy Equinox
-
step 1 :Removing the Wheel
- Loosen the 19mm lug nuts with the vehicle on the ground
- Raise the vehicle with a floor jack
- Secure the vehicle on jack stands
- Remove the lug nuts
- Pull off the wheel
-
step 2 :Removing the Sway Bar Links
- Grab the back side of the sway bar with locking pliers
- Remove the 17mm nut from the sway bar link
- Remove the sway bar link from the strut
-
step 3 :Removing the Front Strut
- Remove the 13mm bolt securing the flexible brake hose and ABS harness
- Remove the lower strut bolts from the spindle with a 15mm open wrench and 21mm socket and breaker bar
- Tap the bottom bolts out with a hammer
- Remove the three 13mm bolts on the top of the strut
- Remove the strut from the vehicle
-
step 4 :Installing the Front Strut
- Install the strut into the vehicle
- Tighten the three 13mm bolts to the top of the strut
- Torque the strut mount bolts to 18 foot-pounds
- Tighten the 13mm bolts to the bottom of the strut
- Torque the bolts to 136 foot-pounds
- Reinstall the 13mm bolts to the ABS harness
-
step 5 :Installing the Sway Bar Links
- Insert the sway bar link into place
- Tighten the bar with vise grip pliers
- Tighten the 17mm nut
- Torque the top nut to 63 foot-pounds
-
step 6 :Reattaching the Wheel
- Slide the wheel into place
- Start the lug nuts by hand
- Tighten the lug nuts preliminarily
- Lower the vehicle to the ground
- Tighten the lug nuts to 100 foot-pounds in a crossing or star pattern
Tools needed
-
Socket Extensions
Torque Wrench
Rust Penetrant
Jack Stands
Bungee Cord
Ratchet
Floor Jack
1/2 Inch Breaker Bar
Complete Metric Socket Set
Hi, I'm Mike from 1AAuto. We've been selling auto parts for over 30 years! We're dedicated to delivering quality auto parts, expert customer service, and fast and free shipping, all backed by our 100% satisfaction guarantee. So visit us at 1AAuto.com, your trusted source for quality auto parts.
In this video we're going to be working with our 2008 Chevy Equinox. We're going to show you how to remove and replace your front strut assembly.
If you like this video, please click subscribe. We have a ton more information on this and many other vehicles. If you need this part for your car you can follow the link down in the description over to 1AAuto.com.
Here are the items you'll need for this repair: socket metric set, ratchet, socket extensions, full wrench metric set, locking pliers, torque wrench, breaker bar, rust penetrant, bungee cords, jack and jack stands
Using a 19mm socket and a breaker bar, break all of your lug nuts loose about one turn to make it easy to get them off once our vehicle is in the air. Raise and support your vehicle. We're using a lift to make it easier to show you what's going on, but this job can easily be done in your driveway or garage at home on a jack and jack stands. Finish removing your lug nuts and remove the wheel and tire from the vehicle.
After removing your wheel and tire, grab on to the steel on the back side of your sway bar with a pair of locking pliers, and remove the 17mm nut with a socket and ratchet. Remove the nut to remove the sway bar link from the strut. You can see where I've grabbed onto it with the locking pliers there. Remove the 13 millimeter bolt securing the flexible brake hose and ABS sensor harness onto the side of the strut. Do this with a 13 millimeter socket and ratchet.
Remove the bolt. Remove the bracket. Using the 15 millimeter open-end wrench on the head of the bolt, because of the style of this bolt we can't use a six-point contact, and a 21 millimeter socket and a breaker bar on the other side, loosen up and remove the two bolts securing the bottom of the strut into the spindle. Now, that bolt head is not turning, so it's possible that these are splines. Sometimes they do that to keep them from turning when you're doing something like this. Where it's so high torque and those splines have been in there for so long it's possible that they will strip out, so it's a good idea to have that wrench handy. We also pretreated these and soaked them in penetrating oil before we started shooting the video to give it some time to soak in and help free that up. I've left this nut flush with the end of the bolt because we're going to use that to safely tap it out without risking damaging the hardware. Once we get it to that point, we'll repeat the same process on the bottom bolt. Now that you have the nut flush with the end of the bolt, we can give it a good tap and not worry about mushrooming the end of the bolt over and making it so the nut won't come off or go back on again. Tap those studs out of the spindle.
You can see on this one, what I was talking about with those splines. Now we'll just start turning these out a little more, and tapping them a little farther, and turning, and tapping until they're completely out of the spindle. Now that those splines are out, you might need that 15 millimeter wrench to hold the bolt while you turn the nut. Now the majority of the tension is off the bolt, so you should be able to just gently tap the end and not worry about pinning that bolt over. Push in a little. You may have to rock the spindle to get the bolt out. Repeat these steps on the bottom. Remove the three 13 millimeter bolts on the top of the strut tower with a socket ratchet and extension. When removing the last bolt, reach down and support the strut. Once the bolts are out you can remove the strut from the vehicle.
Reinstall the strut into the vehicle. Watch out for all the suspension components underneath there when you place it in. You're going to want to keep a bolt in your hand so you can line up the bolt pattern at the top and throw one bolt in, just a couple of threads by hand, to keep it in place while we line up the rest. Once you've got all the bolts started, you can hang the strut there safely while you tighten everything down with your 13 millimeter socket and ratchet. Torque the strut mount bolts to 18 foot-pounds.
Reinstall the spindle into the strut. You may have to lift up on the suspension a little, kind of work it in. Once you have everything lined up, reinsert the bolts with the splines at the front and the threads coming out at the rear of the strut. Now we'll take a hammer and just gently tap the splines back in. Now you'll see that the bolt isn't fully set in, but as long as those splines have got some bite into the spindle, we'll be able to get the nut on and tighten them down in.
Get both nuts started on there and tighten them down with a 21 millimeter socket and ratchet. Torque the nuts to 136 foot-pounds. Reinstall the 13 millimeter bolt that secures the bracket for your flexible brake hose and ABS sensor harness. Make sure that this tab sits over the strut and locks into place. We'll tighten it down with the 13 millimeter socket and ratchet.
Reinstall the sway bar link into the strut. Start the 18mm nut on by hand. Clamp the back with a pair of locking jaw pliers like you did to remove it. Make sure you bite as far back as you can to make sure that you don't prevent it from tightening down fully. We'll snug it up with an 18mm socket and ratchet. Torque the top nut on the sway bar link to 63 foot-pounds.
Remove your locking jaw pliers, and reinstall your wheel and tire. Get all of your lug nuts on as tight as you can by hand. Lower the weight of your vehicle back onto the tires. With the partial weight of your vehicle back on the tires, then tighten up your lug nuts to 100 foot pounds in a cross pattern.
Thanks for watching. Visit us at 1AAuto.com for quality auto parts, fast and free shipping, and the best customer service in the industry.
Shop Products


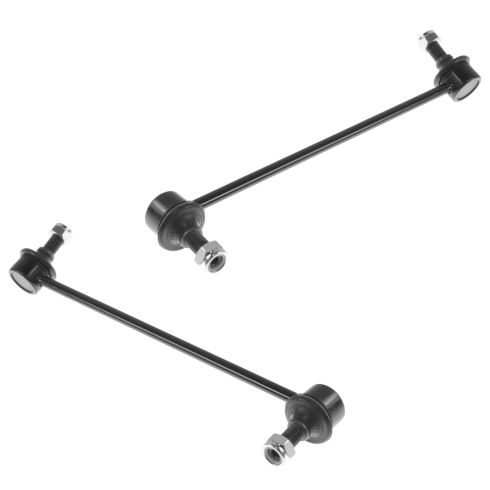
Front Driver & Passenger Side 2 Piece Sway Bar Link Set TRQ PSA55790
Part Details:
- 2 Piece
- (1) Front Passenger Side Sway Bar Link
- (1) Front Driver Side Sway Bar Link

How To Install Replace Remove Rear Shocks Struts 2002-06 Nissan Altima
If the rear shocks on your 02-06 Nissan Altima are bouncy or clunking, it's probably time to replace them! Watch this video to learn how to do it yourself!
