
How to Replace Front Struts 2009-13 Ford F150
Created on: 2020-09-01
This video shows you how to install new reliable TRQ struts in your 2004-2008 Ford F150.
Tools needed
-
21mm Socket
Gloves
Hammer
Rust Penetrant
Wheel Chocks
Center Punch
Bungee Cord
Floor Jack
Liquid Thread Locker
Safety Glasses
Torque Wrench
Pry Bar
Okay, friends, to get started on this job, there's just a couple of things that I like to mention. First of all, safety safety safety. You need eye protection and hand protection. Now that we've gotten that out of the way, there's gonna be several parts of the suspension that we're gonna have to kind of remove or disassemble. Any of the nuts that we remove, it's recommended to go ahead and replace them. If for some reason you're not gonna replace them, you definitely need to use a little bit of thread locker. Aside from that, you're gonna wanna make sure you get yourself an alignment. That's going to help you go straight on down the road and be as safe as possible. Let's get started.
Okay, friends, one of the first things we need to do is safely raise and support our vehicle with the suspension hanging. Once we've done that, we're gonna remove all six of our 21-millimeter lug nuts, and then remove the wheel. Now that we have the wheel off, we have a nice, clear view of our front strut. Up along the top, you're gonna find three mounting nuts off along the sides of the strut area. Go ahead and spray those down with some penetrant. We're not worried about the center one, so don't worry about that.
Now, following that strut down to where connects into the control arm, you're gonna find a big old bolt with a big old nut. Go ahead and spray that down as well. And I'm gonna do my sway bar link. And I also like to do over at the tie rod ends. So that way there, when we get our alignment, it'll be nice and freed up. The next thing we need to do is remove our nut right down here on the lower aspect of the strut. I also like to hold the bolt on the other side with a wrench.
Now, the next thing we need to do is go ahead and drive this bolt right out of here. So, next, we're gonna take off our three mounting bolts up here. You have one there, one over here, and one right there. Do not touch this center one. You don't need to do anything with that. Once I get them all off, I'm gonna go ahead and start this one back on just a little bit, because it's gonna be the easiest to get to through the wheel well, and then we'll move along to the bottom of the strut.
Now, the next thing we need to do is go ahead and remove this outer tie rod nut. Once we get that out of there, we're gonna give the knuckle a couple of bonks and try to break it free. The next thing that we need to do is remove our nut from our sway bar link. I like to do the top one. You can also do the bottom if you find that it's easier for you. To do that, use an 18-millimeter wrench. If you have a ratchet wrench, it'll probably come in handy. Also, use an 8-millimeter wrench, pry up along the top here. The reason for using the 8-millimeter wrench is to hold the stud on the sway bar link. We're gonna go ahead and try to press these two together and remove this nut. There we are.
Next, we're gonna need to take off our upper ball joint nut. You wanna do that approximately the same way. You can hold the stud if for some reason it spins, but use your 21 and get the nut off of there. Just take that nut, start it back on there just a couple of threads for safety. And the next thing we need to do is bunk right along here on the knuckle with our hammer. We're trying to break the ball joint free from the knuckle.
Now, before we go ahead and bonk on the knuckle right here, I like to have a nice strap ready. The reason for that is because I wanna make sure that the knuckle can't come pulling away too far and potentially put a tug on our flex hose here or even our axle. So just make sure you have something handy, and let's move along.
Okay. So I put my strap up along here and then up to there. And, of course, it's a bungee cord, so I will have a little bit of stretch. Let's go ahead and pull this down, get the nut off of there. There we are. Carefully set this aside. All right. Now, the next thing we need to do is take a nice pry bar. Come in between here, carefully pull down and we're just gonna draw the strut right out of there. At this point, we're gonna grab right onto that nut that we already have loosened up here. We'll loosen that at the same time as holding this, and we'll remove it. A little ratchet wrench here. Hold that strut.
There it is, friends. Okay, friends, once you've compared to new strut to your old strut, we're gonna get ready for an install. To start, what I always like to do is put a little bit of red thread locker right on the studs. Let's line up those studs with the holes in the strut tower. There we are. Start on your nuts. Now, the next thing we need to do is take our pry bar, come right in between here, and just try to help our strut into the lower control arm.
The next thing we need to do is have our bolts in our hand and grab a nice big pry bar. I'm gonna come right underneath this control arm, and then, of course, on top of the skid plate right there, just so I can lift up on this control arm. Line up the strut with the control arm hole, put your bolt through. A little bit of thread locker on our ball joint threads here. All right, now, the next thing we need to do is grab our knuckle, bring it up here, and we're gonna grab the ball joint/control arm, and pull it down. It's probably gonna be easiest using a pry bar. Stick it right up here so it's going inside the coil area of the strap. We're gonna carefully bring this over it. And I like to have the ball joint nut in my hand.
Now, the next thing we need to do is snug up this nut right here. Something that you might notice as the stud might happen to spin. If it does, you can try to use something such as some locking pliers up here and then, of course, once the stud's coming down enough that you can grab onto the tip with a wrench, you can do it that way. Tighten your upper ball joint nut. Now let's get our upper sway bar link nut back on there. Okay. That's bottomed out. Let's get our tie rod end back on here and, of course, our nut. Now to snug up our tie rod end, what you're gonna notice is the stud will just spin as you tighten the nut. If that's the case, just go ahead and take a pry bar, apply some leverage to it, and then hopefully that'll help you.
Okay. So, the next thing we need to do is go ahead and put our nut on here. I always like to double-check and just put on a little extra thread locker on it because in all honesty, this is gonna have a lot of torque to it and I like to make sure it's gonna stay tight for a very long time. Now we're gonna go ahead and put our nut on there. Just like that. Before we go ahead and tighten it up, what you need to do is put some load on the suspension. What I mean by that is take a nice jack come underneath the control arm and start jacking it up. You wanna be very careful if you're on jack stands because we don't wanna shift the vehicle. Taking a wrench from the backside, we're gonna go ahead and tighten up this nut on the rearward side.
Now it's gonna be time to start torqueing things down. We're gonna torque the lower shock mount to 406 foot-pounds. That's a lot. So just so you know. Now, we're gonna torque the sway bar link to 59 foot-pounds. Torque your tie rod nut to 85 foot-pounds. Torque your upper ball joint nut to 85 foot-pounds as well. Okay. So what we're gonna need to do next is a couple of different steps, and I'm going to list them out for you real quick. What we have to do is, of course, snug up these nuts that hold the strut to the strut tower. But before you can do that, we're gonna get the wheel on here. We're gonna snug up the lug nuts, torque them to 150 foot-pounds. Get this down on the ground so it's putting full pressure of the strut into the tower. Then we'll snug them and we'll torque those.
Okay. Torque these to 150 foot-pounds in a criss-cross manner. Now we're just gonna go ahead and snug up these nuts. Something to pay attention to is the torque is only gonna be 30 foot-pounds, so you don't need to make them super tight by snugging them up. Okay. Now that everything's snugged, let's go ahead and torque these to 30 foot-pounds.
Shop Products


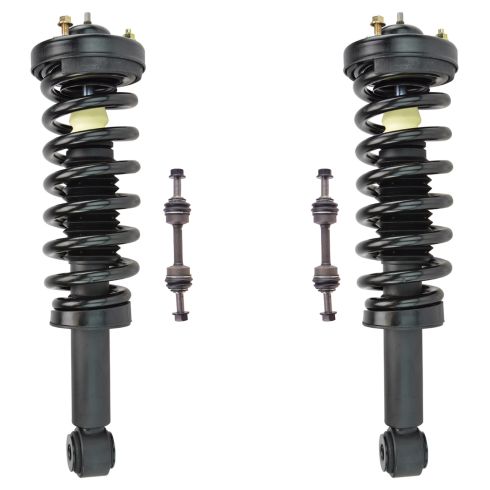
2009-13 Ford F150 Truck Rear Wheel Drive Front 4 Piece Suspension Kit TRQ SCA71222
Part Details:
- 4 Piece
- (2) Front Sway Bar Links
- (2) Front Strut & Spring Assemblies

How to Replace Front Struts 2000-07 Chevy Monte Carlo
How to repair, install , fix, change or replace your front shocks with their loaded struts on 00, 01, 02, 03, 04, 05, 06, 07 Chevy Monte Carlo.
