How to Replace Front Sway Bar Link 2003-09 Mazda 3
Created on: 2018-09-28
How to remove, replace, and install a sway bar end link on 07 Mazda 3.
-
step 1 :Removing the Wheel
- Loosen the lug nuts with a 21mm socket with the vehicle on the ground
- Raise the vehicle with a floor jack
- Secure the vehicle on jack stands
- Remove the lug nuts
- Pull off the wheel
-
step 2 :Removing the Front Sway Bar Links
- Clean off any rust from the nut with a wire brush
- Spray the rusty parts with rust penetrant
- Break the nuts free with a 14mm wrench
- Counter-hold with a 5mm Allen bit
- Remove the upper nut with a 14mm wrench
- Counter-hold with a 5mm Allen key
- Remove the lower nut with a 14mm wrench
-
step 3 :Installing the Front Sway Bar Links
- Insert the sway bar link into place
- Tighten the nuts with a 15mm wrench (bottom nut first)
- Counter-hold with a 5mm Allen bit
- Torque the bolts to 40 foot-pounds
-
step 4 :Reattaching the Wheel
- Slide the wheel into place
- Start the lug nuts by hand
- Tighten the lug nuts preliminarily
- Lower the vehicle to the ground
- Tighten the lug nuts to 87 foot-pounds in a crossing or star pattern
Tools needed
-
5mm Hex Wrench
14mm Wrench
Torque Wrench
5mm Socket
Ratchet
Needle nose pliers
Hi, I’m Mike from 1A Auto. We’ve been selling auto parts for over 30 years!
Hi, everyone. Sue here at 1A Auto. Today, we're putting front links in our '07 Mazda 3 Sedan. If you need this part or any other part for your car, head on over to 1AAuto.com.
We're going to loosen the lug nuts with the weight of the car on the tire, and it's a 21 millimeter. Now, you're going to raise the vehicle with a jack and jack stands or two pulse lift if you have that. Now, I can take the lug nuts off. It's up in the air. Front sway bar links. We're going to remove the top bolt then the bottom.
This nut is a 14 millimeter, and the Allen head is a five millimeter. So, break it free first. I'm going to put that together. There we go. The top ones the easier one. The bottom one not so much, but we can get to it. I've seen a lot worse.
Going to take the nut off and the bracket off. Set that aside. We're going to push that out. We're going to move down to the bottom. The bottom nut on the sway bar link is the same as the top. It's a 14 millimeter and we got to pull down. Break that free, and stud is already spinning in place. I'm hoping that I can get a Allen head in there with the angle of that sway bar. Might have to move to a set of Allen wrenches instead of a ratchet.
I have a set of stubby Allen head sockets. Let's hope that this gets in there. It's probably so rusted that it won't even go in. We're going to do it the old school style. Going to put a pair of locking pliers on the back here. Lock them in, and break that nut free. Let's see how we can get in here at this angle. Let's see. There we go. Wonderful. Nice.
Now, I'm going to move probably to a ratchet wrench and speed this process up. Okay. This one was really on there. We got it though. There's the old link. That's still factory.
Here we have the front sway bar link to our '07 Mazda 3 Sedan. This is ones from 1AAuto.com. It's the same length as the factory and same design. Sealed bushing, so it's self-greasable. And the nice thing about this one is it has a cutout notch to fit a wrench in there. A 16 millimeter wrench holds in there instead of if you watch the video. I had to use vice grips on that to hold that still. That's a nicer design because less chance of cutting the boot and destroying it. If you need this part or any other part for your car, click on the link below and head on over to 1AAuto.com.
Going to install. We're just going to reverse proceduring and put the bottom one on first. Probably line it up from the top here. Maybe. New ones much tighter than the old one, which is a good thing. The joints don't want to move. Put the nut on hand-tight so it won't pull back out.
Put the bottom one on. The new nut is a 15 millimeter. The factory was 14. These nuts are 15. The inside holding is a 16 millimeter wrench. I've got my 16 millimeter wrench holding the backside.
I'm going to start tightening up this bottom nut. Now, that I've got that tight, I'm going to torque it in the torque specs on the sway bar links is a 40 foot-pounds. I'm going to just do the bottom without even tightening the top because I've got my wrench in there and going to take full advantage of that. There we go. Get that off.
Now, we'll move up to the top. Now, that it's in steady, the bottom's tight, and we take the nut back off so I can install that bracket. Same up here. 15 millimeter nut. 16 holding the back of it. 40 foot-pounds. All set there. Wrench comes nice right out. You're all set.
Now, you just have to do the other one because everything's done in a pair when it comes to sway bar links. Happy fixing.
Once I lower this to the ground, always tighten wheels in a star pattern. Now, wheel torque on our '07 Mazda 3 is 87 foot-pounds. Always go around twice.
Thanks for watching. Visit us at 1AAuto.com for quality auto parts, fast and free shipping, and the best customer service in the industry.
Shop Products


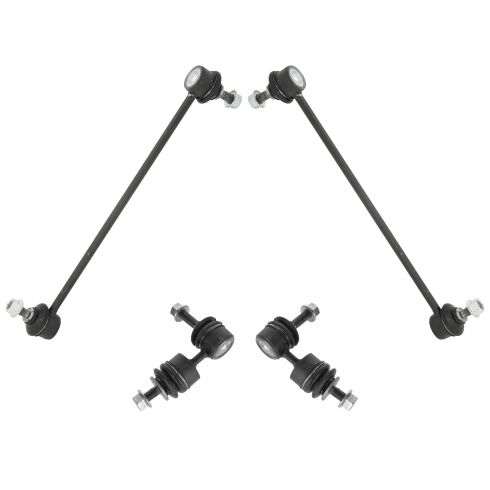
Mazda 3 5 Front & Rear 4 Piece Sway Bar Link Set TRQ PSA55930
Part Details:
- 4 Piece
- (2) Front Sway Bar Links
- (2) Rear Sway Bar Links

How to Replace Front Sway Bar Links 1980-2003 Ford F-150
How to remove, replace, and install a sway bar end link on 80, 81, 82, 83, 84, 85, 86, 87, 88, 89, 90, 91, 92, 93, 94, 95, 96, 97, 98, 99, 00, 01, 02, 03
