How to Replace Front Sway Bar Link 2004-08 Ford F150
Created on: 2020-08-03
This video shows you how to install a new front sway bar link on your 2004-08 Ford F-150.
Tools needed
-
15mm Wrench
Torque Wrench
Socket Extensions
Rust Penetrant
15mm Socket
Pry Bar
Jack Stands
Locking Pliers
Socket Driver
Wheel Chocks
Straight Cutters
Ratchet
Floor Jack
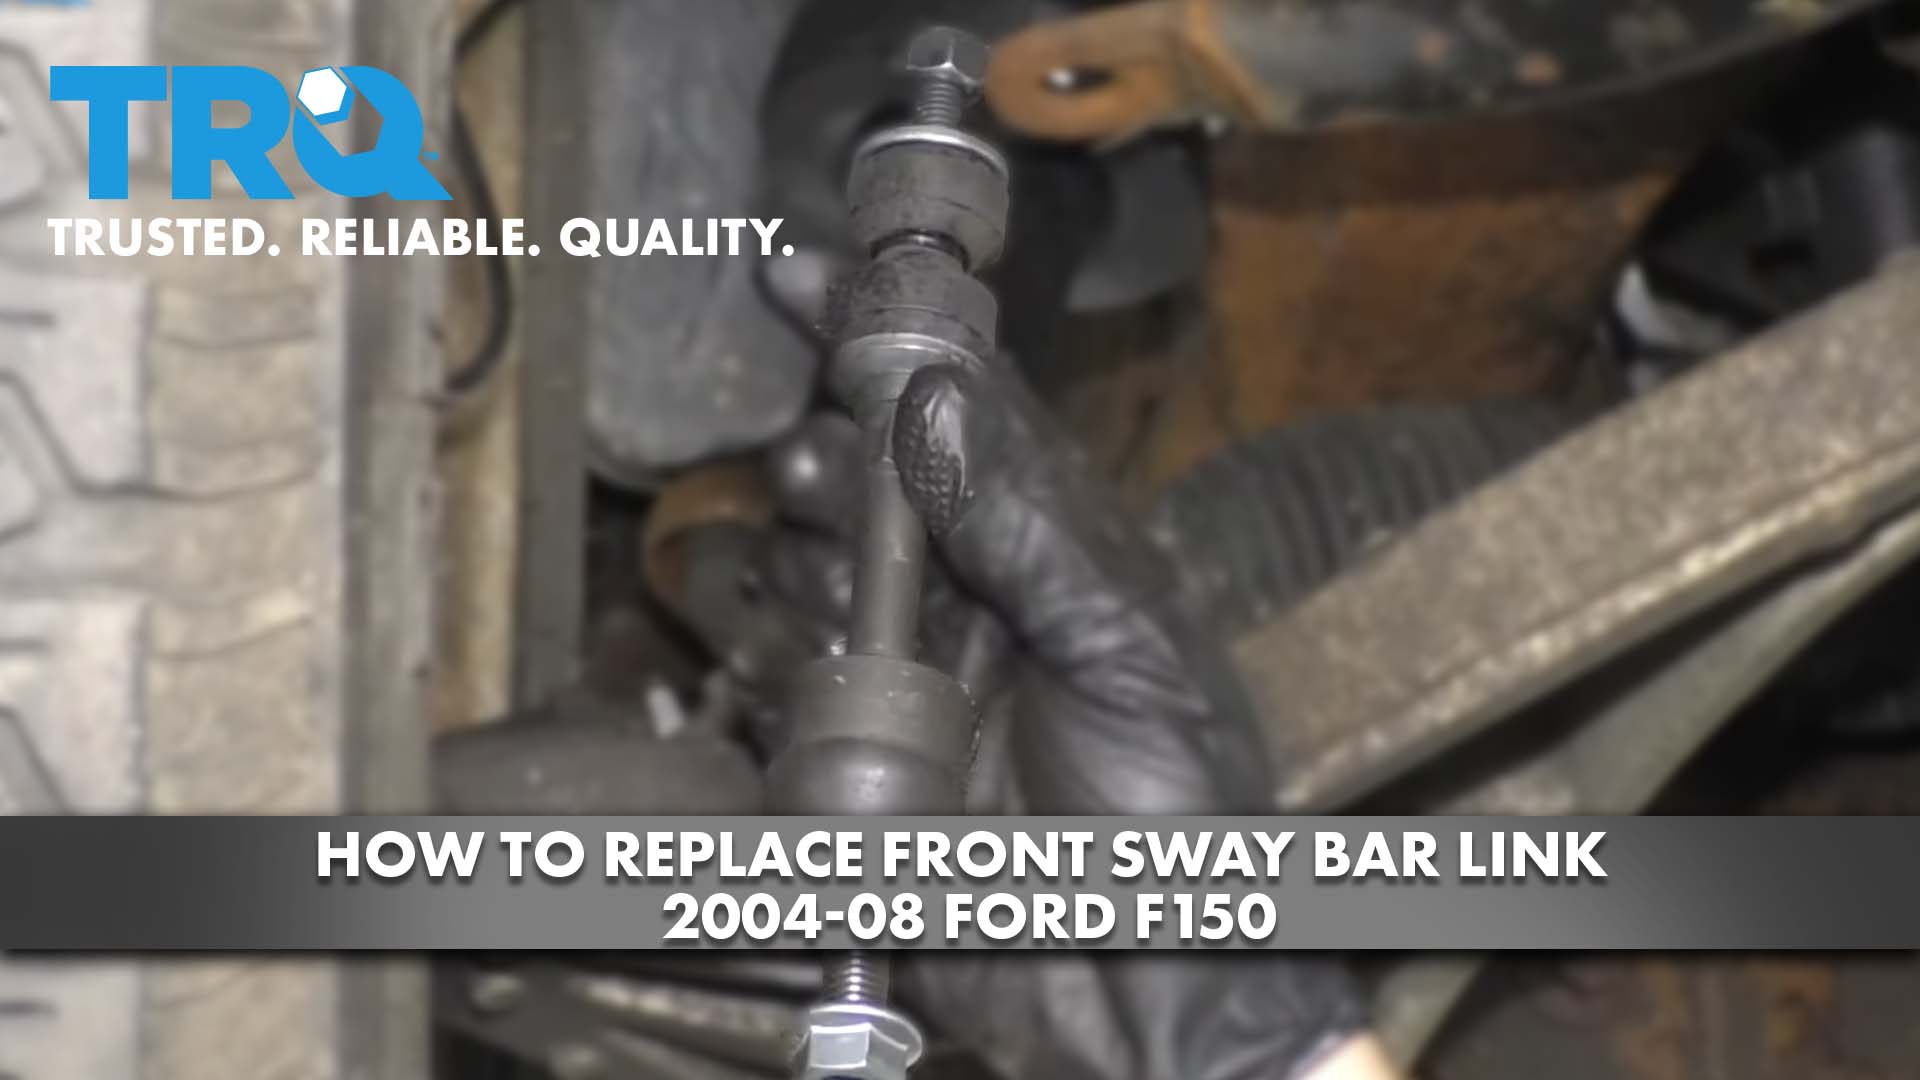
Okay, friends. It's time to do our front sway bar link. One thing that I'd wanna note is you don't necessarily have to remove the wheel to do this. If you're working on the ground, of course, you'd wanna use a jack stand, safely get underneath your vehicle, and right behind the wheel is where you'll find your sway bar link. If you need to remove your wheel for any reason to do this job, you're gonna torque the wheel at the end to 150 foot-pounds. With that said, let's get started.
I like to use a little bit of penetrant on any of the areas I'm going to be removing. We're gonna remove that top nut, and then down along the bottom of the control arm, there's another nut. Spray those down, let them sit. Next, I'm going to use a 15-millimeter wrench and I'm gonna come along this area of the sway bar link. It should have a hexagon there for us to grab on to. Use a 15-millimeter socket and remove that nut. All right, so our nut broke off which is fine because we're replacing this anyway. So now to get the lower nut off of there, there's something you have to pay attention to. As you try to spin it, and it finally breaks free, it's actually gonna spin the joint right up here. What I like to do is, you can either use a razor blade or a nice pair of cutters and get this boot right out of there.
The next thing we'll do is grab right onto it with some locking pliers, and then we'll come down here and we'll get the nut off of there. I'm just gonna cut this and try to get it out of my way. There might be grease in there, so you're probably gonna want a rag. And I always like hand and eye protection at all times. There we are. Got our nut off of there. Now that we have the nut off, you can see that this moves around. The problem is it's not gonna come out of here. We need to be able to get this bar up. So, it's always a great idea to remove and replace your sway bar links as a pair. If for some reason you're not doing them as a pair, you still need to go over to the other side of the vehicle and take off the upper nut. That way there we can move this bar up and down.
Now that I have removed the nut from the other side sway bar link, I can grab my bar and I should be able to move it out of the way just enough to get the sway bar link up. And then we'll see if we can pull this up and out of here. And there it is, friends. All right, friends. Now it's gonna be time to install our brand new front sway bar link. One thing that I like to note is, right down along the bottom area, it has this nice nutted area. That's gonna be great because you're gonna be able to grab onto that with a wrench and snug up the nut. Whereas the old or original sway bar link didn't have this and we had to use locking pliers. With that said, I'm gonna go ahead and get the nut off of there. I'll take the nut off at the top as well. And then I'm also gonna take off the washer, and just the top bushing. It's two separate pieces. I'm gonna leave the lower washing and the lower bushing.
Take this and put it right through the control arm hole. And then, of course, we're gonna take the rest of our sway bar link and put it up in there. Lift up that bar, put it right through there. Now, before we go ahead and put this all back together along the top, it's important to remember if you're doing both side sway bar links, you wanna make sure you get the other side in to this point as well. Because you need to still be able to move this bar around. Of course, once you've done the other side...or maybe you haven't if you're only doing one. Next, we're gonna go ahead and put our stuff together here.
If you look at the bushing, you're gonna see it has a little piton area that comes down. That's gonna be the area that faces towards the bar itself. And then of course it has the rounded edge that fits right inside that washer. We'll put this right up on here. Then we're gonna take our nut. You wanna put the area that has the lock, or the blue neoprene in there, facing up towards the top. Start that on there. Do the same to the other side if you're at this point. And now, of course, we'll snug it up. Let's torque this to 35 foot-pounds. There we are. Do the lower one...to 66 foot-pounds.
Shop Products


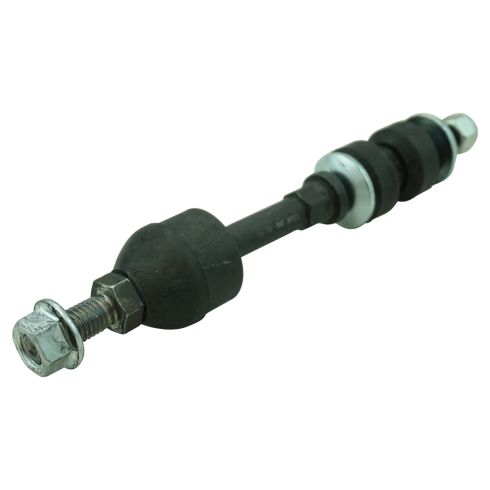
Ford F150 Lincoln Mark LT Front Sway Bar Link TRQ PSA67836
Part Details:
- Yes
- No
- Male Threaded
- Male Threaded
How to Replace Sway Bar Link 2001-06 Hyundai Elantra
If the sway bar link is rattling or broken, this video will show what steps and tools are needed to replace it
