
How to Replace Front Sway Bar Links 2006-15 Honda Pilot
Created on: 2017-08-09
This video shows how to replace the front sway bar links yourself, including torque specs for reinstallation
-
step 1 :Removing the Wheel
- Attach the wheel lock key to the locking lug nut
- Loosen the lug nuts with a breaker bar with the wheel on the ground
- Raise and support the vehicle
- Remove the lug nuts
- Pull the wheel off the hub
-
step 2 :Removing the Sway Bar Link
- Apply rust penetrant to the sway bar link bolts
- Break loose the 17mm nut on the top of the sway bar link with a 17mm wrench and a dead blow hammer
- Counter hold the top sway bar link stud with a 5mm Allen Key and breaker bar
- Remove the 17mm nut from the top of the sway bar link
- Thread the 17mm nut partially onto the top stud
- Break loose the 17mm nut on the bottom of the sway bar link with a 17mm wrench and a dead blow hammer
- Counter hold the bottom sway bar link stud with a 5mm Allen Key and breaker bar
- Remove the 17mm nut from the bottom of the sway bar link
- Thread the 17mm nut partially onto the bottom stud
- Pull out the bottom sway bar link stud
- Remove the nut from the top sway bar link stud
- Pull out the top sway bar link stud
-
step 3 :Installing the Sway Bar Link
- Remove the 18mm nuts from the new sway bar link
- Put the sway bar link into place
- Start the two 18mm nuts onto the sway bar link
- Counter hold the top ball joint with an 18mm wrench
- Tighten the top 18mm nut
- Counter hold the bottom ball joint with an 18mm wrench
- Tighten the bottom 18mm nut
- Tighten the two 18mm nuts to 56 foot-pounds of torque
-
step 4 :Installing the Wheel
- Slide the wheel onto the hub
- Start the lug nuts by hand
- Tighten the lug nuts preliminarily
- Lower the vehicle to the ground
- Tighten the lug nuts to 80 foot-pounds of torque
Tools needed
-
Socket Extensions
Torque Wrench
15mm Socket
17mm Wrench
18mm Wrench
16mm Socket
17mm Socket
Jack Stands
19mm Wrench
18mm Socket
19mm Socket
5mm Hex Wrench
Flat Blade Screwdriver
Dead Blow Hammer
Ratchet
Floor Jack
1/2 Inch Breaker Bar
If your vehicle is equipped with a wheel lock key, you want to make sure you have this before you start. I'm going to use a breaker bar, and these are 19 millimeter. We'll start with the wheel lock key one. You should always use a breaker bar and a wheel lock key. Don't use an air impact, because you can easily break the key. Just get them loose about a half a turn. You should always loosen the lug nuts for the vehicle on the ground.
Once you loosen your lug nuts, raise and support your vehicle. We're going to use the lift for this, so it'd make it easier for you to see what we're doing, but you can do this on jack stands in your driveway. With the vehicle in the air, now we can loosen the rest of the lug nuts. Careful as you loosen the last one, because the wheel might start to slide off the wheel studs.
This is the front sway bar link. It attaches here to the stripe, and down here to the sway bar. There is a hex drive in here, or Allen head. It's five millimeter and there's one on the other side that’s five millimeter, so that when you go to loosen the nut, you can counter hold that. We're going to start by spraying some rust penetrant in here. It’s pretty rusty, and spray some on the other one.
This is a 17 millimeter nut, I'm going to use a 5 millimeter Allen key on a breaker bar to counter hold it. I'm actually going to do – before I counter hold it, I'm going to take this out. I'm going to try to break it free using a dead blow hammer, or you can use a rubber mallet. I'm going to hit it up. See it's starting to turn. The reason why you need to counter hold it is, as it gets free and starts to want to turn, it's going to spin the little ball joint that's inside the sway bar link.
Now I'm going to counter hold it. I'll let it counter hold. I can unscrew the nut. I'm just going to spray some more penetrating oil in here. We work that free. Take this off.
You don't want this to flop around and be loose while I'm trying to undo the bottom one, so I'm just going to just lightly thread it on. I will remove the lower 17 millimeter nut on the sway bar link. I've already sprayed it with some rust penetrant, I'll take my wrench, break it free. It's really stuck on there. Take a rubber mallet or a dead blow hammer. I'm going to break it free. Sometimes they're really stuck. I'm going to make sure it's got a lot of rust penetrant oil on there. Take a 17 millimeter socket and a breaker bar. Push up. Now I can see it it's spinning on the stud, but the nut is loose.
I'm going to take the 17 millimeter wrench, place it over the nut. Take my five millimeter Allen head that's on the breaker bar. I'm going to use the box wrench to get this loose, and then switch to a ratcheting wrench. You need to counter hold this. This is my ratcheting wrench. Once it's loose, pull off with your fingers. Just pull it right out of the hole. I left the top one bolted in, so it didn't fall out. I'm just going to undo it with my fingertips and slide it out.
Here is our old sway bar link that we removed. You can see the Allen key that helps you hold it while you remove this nut.
If this happens to strip, there are some flat spots right here. Take a 16 millimeter wrench while it’s on the vehicle. Slide that in there. Use it to counter hold it while you remove this nut, if this doesn't work for you.
Go over here to our new sway bar link from 1AAuto.com. It’s very similar in design and comes with new nuts. It does not have an Allen key on the top, it has a hex head here. This will be 18 millimeter so when we go to reinstall it, I'm going to put this 18 millimeter wrench right here to counter hold it while I throw the nut on. Then between the drivers and passenger side, they are identical on this vehicle.
All right. For our new link, there's no up or down, just the orientation of it. You can install it this way, and you can flip it around and install it this way. It'll work the same. I'm just going to start by putting it in the sway bar on the bottom. Take one of our nuts and just capture it. They have to just – it's basically a ball-joint that's in here, and you can bend them. It sakes a little bit of force just like that. They're pretty stiff. Get this lined up. Turn that on.
Take an 18 millimeter deep socket and a ratchet. Then start to tighten this down. I believe it is now spinning the joint which is fine. We'll take our 18 millimeter wrench, slide it in here to helps counter hold it. I'll tighten the lower nut on the sway bar link. Take the 18 millimeter wrench and counter hold it. Take the 18 millimeter for the deep socket. Just ratchet it down.
Torque the sway bar nut to 56 foot-pounds. Use the 18 millimeter to counter hold it. The 18 millimeter deep socket. Torque the upper sway bar nuts to 56 foot-pounds, use the 18 millimeter wrench to counter hold it.
Now we’re finished with the breaks. Put the wheel back on. We'll start with our locking lug because it's got a nice little tool you hold it with, the key. Get the wheel seated on the hub. Take the rest of our lug nuts. After you have all your lug nuts started by hand, you can snug them up with your ratchet. I just want to get them seated. I will torque the wheel when it's on the ground. You put the wheel lock key on. Sometimes you just have to spin it around so it lines up. Take our torque wrench set to 80 foot-pounds.
Thanks for watching. Visit us at 1AAuto.com for quality auto parts, fast and free shipping, and the best customer service in the industry.
Shop Products


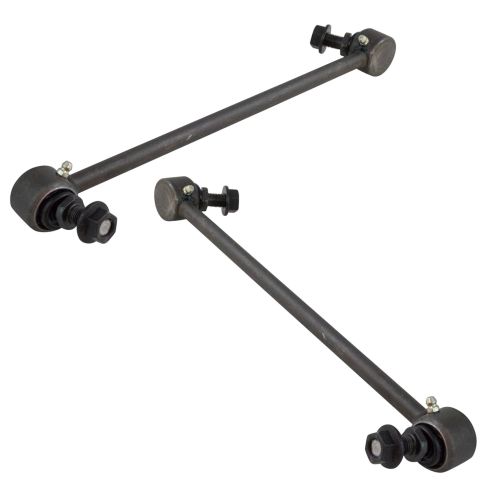
Honda Pilot Acura MDX ZDX Front Driver & Passenger Side 2 Piece Sway Bar Link Set MOOG MGSFK00069
Part Details:
- 2 Piece
- (1) Front Passenger Side Sway Bar Link
- (1) Front Driver Side Sway Bar Link

How to Replace Front Sway Bar Links 1998-2008 Ford Ranger
Check out this video to learn how to replace the front sway bar links on your 98-08 Ford Ranger.
