
How to Replace Front Upper Control Arm 2005-15 Toyota Tacoma
Created on: 2020-04-17
Watch this video to learn how to install a new TRQ upper control arm on your 2005-15 Toyota Tacoma.
Tools needed
-
Torque Wrench
Pry Bar
19mm Wrench
Copper Anti-Seize
19mm Socket
Ratchet
Swivel
3/8 Inch Impact Gun
Trim Tool Set
3/8 Inch Breaker Bar
Pocket Screwdriver
Once your vehicle is raised and supported safely, you're gonna remove all six lug nuts. Now that the wheel's out of the way, let's continue on by removing this right here. Just pull that down. It depends on how far you wanna go to get it out of your way. That looks pretty decent for now. That exposes the nut right here. We're gonna spray this with some penetrant, and it comes all the way up, and it comes through to this point. So it's something that you're gonna wanna pay attention to is if you're gonna be able to clear your body. If you're not gonna be able to clear the body, there's gonna have to be some special maneuvering involved.
The next thing we're gonna do is use a 19-millimeter wrench. We're gonna come right up here on this bolt, and you're gonna use your 19-millimeter socket and whatever you have. If you have an air gun that you can get in there or a ratchet, remove this nut. This should move around freely. If it doesn't, just try to spray it down and work it until it does. Paying attention to this area right here, where the bolt's gonna come out, you might notice that you're gonna have this issue, where it seems as though it's gonna hit. There's gonna be something that you can do, you could try to pry on this right here and pull this away. Just pay special attention to any flaking or scraping. If you scrape the metal in any way that takes off the paint, I would just of course clean it off the area and then hit it with some undercoating, just so you could prevent the damage from rust and all that.
Okay, this is gonna keep coming out. If you were to feel behind here, there's gonna be wires that run from here to here. These are just clipped in. Let's go ahead and push those out and give ourselves a little bit more room here. So I've got that so it's pulled out of the way. Just make sure you put it someplace that that's gonna be easy to remember. The last thing you wanna do is leave this unsecured. Okay, at this point, we're gonna leave it right where it is because we know it's doing good. Let's move along to getting the rest of this stuff out of the way. So when we're doing this job, I usually like to start with the separate bolt because, generally speaking, this is the one that's gonna cause issue not wanting to come out. Once I'm sure that it's gonna be ready to come out, I'll continue on with removing everything else.
Let's get this locking clip off of here. Just take your pocket screwdriver, grab underneath the ear, pull it away, and then draw this out. I'll show you what I'm talking about. That's what it looks like. So I came in with my flat head, I pulled this away, and then I pulled out the cotter pin. The next thing I wanna do is remove this bolt right here. I just wanna be careful because usually they freeze up inside the control arm. Got it. That gives us plenty of slack right there. If you feel like you need more, you can take off the bracket that comes down here as well.
The next thing we're gonna do is remove the nut from the sway bar link so we can get this off of here. Just try to pull the stud. Awesome, now we have a nice, clear view and an access area to get this nut off. Let's get this nut off of here. I like to take my nut. I'll just start it on there, just a couple threads. That's gonna prevent this from falling down once this breaks free. Let's go ahead and bonk right on the knuckle right here. I'm just gonna try to break this free from each other. All right, that's enough. Take off that nut. You should be able to lift this up and carefully pull this aside. Now when you do this, you wanna be careful not to put a tug on your ABS wire, leave a little bit of slack, and of course your brake hose as well. So let's kind of put this aside and we can move along. Let's try this bolt out of here, wiggle the control arm around as needed.
Okay, awesome. All right, so we have our nice, new control arm. We compared it to the other one to make sure we have the right side of the vehicle because if you have it backwards, it's gonna obviously cause major issues. Let's go ahead and line this up in here. We're gonna grab our bolt. If you drop the washer, just make sure you put that back on there as well. We're gonna put it through the hole on the control arm first and then we'll kind of line everything up and slide it right on through. If you wanted to use a little bit of copper never seize, it's probably a great idea, but only do it on the smooth part of the shaft, not necessarily on the threaded area.
Let's go ahead and get this washer on there. Start on that nut. Let's hold this side with our 19-millimeter wrench. Go ahead and snug this one up. The next thing we need to do is torque down the nut right here, so let's hold the bolt side with our 19-millimeter once again, and we're gonna torque this to 85 foot-pounds. Torqued. Let's go ahead and pull this over. We're gonna try to pull down on your control arm. If you can't get it far enough down, well, don't get too worried. We'll use a pry bar and use some leverage. Use your 19-millimeter socket and snug this up. Let's torque this to 81 foot-pounds. Once it's torqued, you need to make sure that your castle nut portion lines up with the cotter pin hole. If it does not, you need to continue tightening until it does. That looks pretty great. Let's get our cotter pin in there. Slide that through and lock it in.
The next thing we're gonna do is put in this little bolt to hold this in. If you wanna use a little copper never seize, it's probably a great idea. Go ahead and snug that up. Okay, bonged out. A teeny bit more, that's great. Let's get the sway bar link back into the knuckle. Make sure you put on your washer first, just like that. It's easy to forget. We're gonna line this up, start in the nut, just like that. And then of course, now is a great time to go over and do the same on the other side before you snug this up. Go ahead and hold that. We're just gonna bottom this out and then we'll torque it to 52 foot-pounds. Take a quick look up here, make sure the paint hasn't scraped away. If it has, just go ahead and give it a little spray.
Don't forget about this wire right there. Make sure you re-secure that, you push it right through, just like that. Give it a nice tug. This feels great. Now we're gonna continue on by putting this back up here. Just put in all your little push clips where you took them out from. That looks great. We'll do the same thing over here. Now the process for this would be the same on the other side of the vehicle. Okay, we're cruising. Let's get the wheel back up on here. And of course, get all your lug nuts on and start it. Let's go ahead and bottom out all the lug nuts. Okay, now we're gonna do the same to the other side and then we're gonna torque them to manufacturer's specifications. All right, let's go ahead and torque the wheel in a crisscross pattern to 83 foot-pounds. Torqued.
Shop Products


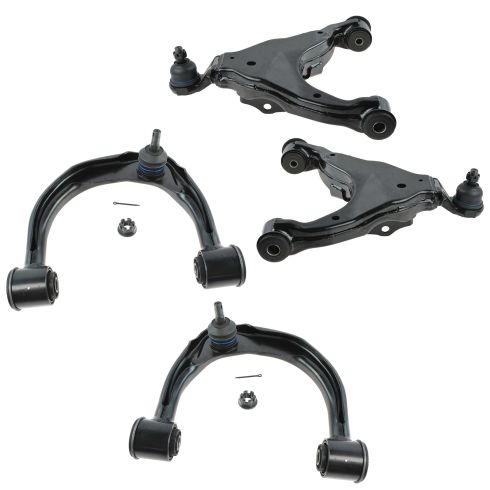
Toyota Tacoma Front Driver & Passenger Side 4 Piece Control Arm with Ball Joint Set TRQ PSA62519
Part Details:
- 4 Piece
- (2) Front Lower Control Arms with Ball Joints
- (2) Front Upper Control Arms with Ball Joints

How to Replace Front Upper Control Arm 2007-14 Toyota FJ Cruiser
Check out this video to learn how to replace the upper control arm with ball joint on your 07-14 Toyota FJ cruiser. 1A Auto shows you how to DIY it!
