How to Replace Front Wheel Bearing Hub 2005-13 Volkswagen Jetta
Created on: 2015-01-31
Watch this video to learn how to replace the front wheel hub and bearing on your 05-18 Volkswagen Jetta. 1A Auto shows you how, step by step!
-
step 1 :Removing the Wheel
- Pry off the center cap with a flat blade screwdriver
- Pry off the lug bolt covers with a pick
- Loosen the 27mm hub bolt
- Loosen the locking lug bolt with the key
- Loosen the lug bolts with the vehicle on the ground
- Raise the vehicle with a floor jack
- Secure the vehicle on jack stands
- Remove the lug bolts
- Pull off the wheel
-
step 2 :Removing the Brake Pads
- Pry off the caliper bolt plugs by hand
- Remove the two T47 Torx bolts from the brake caliper
- Pry the caliper clip off with a flat blade screwdriver
- Pry the brake pads into the caliper with a flat blade screwdriver to push in the pistons
- Pull the caliper aside
-
step 3 :Removing the Brake Rotor
- Remove the two 21mm bolts from the brake caliper bracket
- Pull off the brake caliper bracket
- Remove the T30 bolt from the rotor
- Apply rust penetrant to the hub
- Thread in one lug bolt
- Strike the back of the rotor with a hammer to loosen it
- Pull the rotor off
-
step 4 :Removing the Hub
- Remove the 27mm hub nut
- Thread in the hub bolt half way
- Strike the hub bolt with a hammer to loosen the axle
- Remove the hub bolt
- Remove the three 16mm nuts from the control arm
- Pry down the control arm with a pry bar
- Tap the axle out of the hub with a hammer and a socket
- Remove the four 12-point 12mm bolts from the hub
- Thread one 12mm bolt half way into the hub
- Tap the hub with a hammer to loosen it
-
step 5 :Installing the Hub
- Put the hub into place
- Insert the 12mm bolts into the hub
- Tighten the 12mm bolts to 50 foot-pounds of torque
- Turn each hub bolt an extra 1/4- turn
- Push the axle into place
- Push the control arm onto its studs
- Fasten the three 16mm nuts onto the control arm
- Tighten the three 16mm nuts to 50 foot-pounds
- Thread on the hub bolt by hand
-
step 6 :Installing the Brake Rotor
- Slide the rotor on
- Insert the T30 bolt into the rotor
- Put the bracket back into place
- Start the two 21mm bolts by hand
- Tighten the 21mm bolts to 90 foot-pounds
-
step 7 :Installing the Brake Pads
- Put the brake pads into the caliper bracket if they are not already installed
- Put the caliper on
- Insert the two T47 bolts into the caliper
- Tighten the T47 bolts to 30 foot-pounds
- Push on the wire caliper bracket clip
- Push on the caliper bolt plugs
-
step 8 :Reattaching the Wheel
- Slide the wheel into place
- Start the lug bolts by hand
- Tighten the lug bolts preliminarily
- Lower the vehicle to the ground
- Tighten the lug bolts to 100 foot-pounds in a crossing or star pattern
- Push on the lug bolt caps
- Tighten the hub bolts to 150 foot-pounds
- Reattach the center cap
Tools needed
-
A Piece of Pipe (for leverage)
Torque Wrench
Hammer
Pry Bar
16mm Socket
17mm Socket
Jack Stands
Pick
21mm Socket
27mm socket
Flat Blade Screwdriver
12mm 12-Point Socket
Ratchet
Floor Jack
Brought to you by 1AAuto.com, your source for quality replacement parts and the best service on the Internet.
Hi, I'm Mike from 1A Auto. I hope this how-to video helps you out, and next time you need parts for your vehicle, think of 1AAuto.com. Thanks.
In this video, we're going to show you how to replace a front hub on this 2005 Volkswagen Jetta. It's the same part and similar process on these Jettas from 2005 to 2009. We show you on the passenger side, but the driver side is the same procedure. The items you'll need for this is a new front hub from 1aauto.com; 16, 17, 21, and 27mm socket and ratchet; flat blade screwdriver; a pick; a T30 and T47 Torx bit; a hammer; jack and jack stands; a torque wrench; and a 12mm 12-point bit that we recommend using with an impact gun.
Now, to get started, you want to just pry off this Volkswagen badge, and then using a 27mm socket and ratchet with a piece of pipe for some extra leverage, just loosen up that hub bolt. You're not removing it for right now. Now, using your pick, remove these caps. For one of these lug nuts you're going to have to use a key, and the key can be found in your trunk with the spare tire. It just inserts into that special lug nut and then removes the same as the other lug nuts using a 17mm socket. If you have air power tools you can raise your vehicle, then remove the lug nuts. If you don't, loosen the lug nuts while the vehicle's on the ground, then raise and support the vehicle and remove them the rest of the way. Then your wheel will pull free.
The first thing we're going to do is . there are little plugs here that pry out. Then there are Torx bits in there. There's this one here and this one down here as well. We'll fast forward as Mike removes those two T47 bolts. With a flat blade screwdriver, just pry out this wire clip and pull it free. Just to get things off easier, take a large screwdriver and you just pry a little bit. Now pull your brake caliper off and this first brake pad will just pull right out. Then, for this one, just pull out on either side of it and it will pull out of the piston.
Now remove these two 21mm bolts. You can see Mike uses a piece of pipe for some extra leverage and just removes those. Once those are removed, your caliper bracket will pull free. Now remove this T30 screw at the front of your rotor. Spray some penetrating oil around the edge here where the rotor meets the hub and then twist in one of these lug bolts halfway. Then, using a hammer, just hit the back of the rotor until it breaks free. Then remove that lug bolt and your rotor will pull off.
Now remove this 27mm hub bolt. Now twist it back in just about halfway. Then hammer it and this will help push out the axle on the other side. It won't pull out all the way yet though until you remove these three 16mm nuts. We're just going to speed up this process. Then, using a pry bar, pry down on the lower control arm. Then push the socket back through the hub, and using a hammer push the axle out the rest of the way. Now you can pull the axle free and set it aside.
Then remove these four 12-point 12mm bolts. You want to put the bit in there, and then use your impact gun. If you don't have one, you can use a socket and ratchet with a piece of pipe for some extra leverage. To get the two towards the back of the vehicle you just want to turn your wheel. Once you've removed all four of them, twist one of them back into place. You only want to twist it in a few thread into the hub and then just hammer the hub until it seems to break free. Then remove that bolt and your hub's free.
On the right, is the old hub. On the left, is the new one from 1A Auto. You can see they're identical and will fit exactly the same. Start one of the bolts and then push your new hub into place and twist the bolt back in. Then replace the other three bolts and tighten them up. Now I'm going to torque each one of these. It's 70 newton-meters which is about 50 foot-pounds. Then you're supposed to go another quarter of a turn. I can usually get to 50 foot-pounds. Then another about eighth of a turn is what I can manage without feeling like I'm going to strip something out.
Now line up your axle and push it into place. You want to make sure that your steering wheel is centered again. It makes pushing the axle in a lot easier. Then, line up the studs and push them back into the lower control arm and replace those 16mm nuts and tighten them up. Now torque these three 16mm nuts to 50 foot-pounds. Replace that hub bolt. You just want to twist it in as far as you can by hand for right now.
Then replace your rotor and the T30 screw that holds it into place. Now, take your caliper bracket and put it back into place, and replace those two 21mm bolts and tighten them up. Now torque each of those 21mm bolts to 90 foot-pounds.
Put your caliper back down into place. Now tighten up those two T47 screws and torque each of those to 30 foot-pounds. Push the wire clip back into place. Replace these two caps.
Now replace your wheel and you'll realize here that lug nuts are a bit easier than lug bolts. You just have to try to hold the wheel in place while you put a lug bolt through. You want to just balance it on the hub. Eventually the bolt will line up and push in. You just want to tighten those up preliminarily and replace and tighten up each of those. Then lower the vehicle and tighten them up the rest of the way. Now torque each of these to 100 foot-pounds in a crossing pattern and replace your lug nut caps. Now torque that 27mm hub bolt to 150 foot-pounds.
We hope this video helps you out. Brought to you by www.1AAuto.com, your source for quality replacement parts and the best service on the Internet. Please feel free to call us toll-free, 888-844-3393. We're the company that's here for you on the Internet and in person.
Shop Products


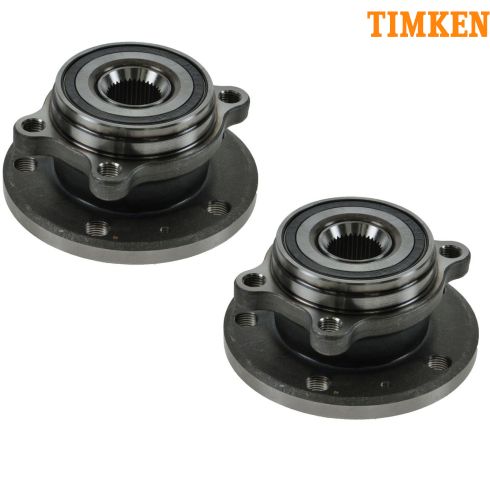
VW Audi 2 Piece Wheel Bearing & Hub Assembly Set Timken TKSHS00394
Part Details:
- 2 Piece
- (2) Wheel Bearing & Hub Assemblies

How to Replace Hub Assembly 1997-2008 Pontiac Grand Prix
Learn how to replace your own wheel hubs on your97-05 Chevy Impala, Buick Century, or Pontiac Grand Prix. In this video, the expert mechanics at 1A Auto will show you how to replace a hub that's vibrating, groaning or loose.
