How to Replace Front Wheel Hub Assembly 2002-09 GMC Envoy
Created on: 2020-07-07
This video shows you how to install a new TRQ wheel hub and bearing assembly on your 2002-09 GMC Envoy.
Tools needed
-
13mm Socket
Torque Wrench
Hammer
Rust Penetrant
18mm Wrench
Pry Bar
18mm Socket
19mm Socket
Liquid Thread Locker
Trim Tool Set
Safety Glasses
Gloves
Copper Anti-Seize
Wheel Chocks
Center Punch
Brake Caliper Compressor Tool. Quad Piston. Ratchet Style.
Ratchet
Floor Jack
Wire Brush
Okay, friends. One of the first things we need to do to start this job is to safely raise and support the vehicle. I like to raise it directly on the frame. Once you have the wheel off the ground, we're gonna remove our center cover. That exposes our 19-millimeter lug nuts. Remove them all, and then remove the wheel. The next thing I like to do is remove the caliper from the bracket directly. The reason for that is because I like to take a look at the pads when I'm taking everything apart. I'm gonna use an 18-millimeter to hold the slider from spinning, and then I'm gonna come right from the backside of the caliper, and I'm gonna remove my 13-millimeter nuts that hold the caliper to the bracket. Okay. I've got both our bolts here. Slide the caliper off. It's always a great idea to inspect the caliper directly. Look along these boots to make sure you don't see any moisture or anything like that, and you also wanna make sure that the piston itself isn't chipped or broken in any way. Let's get the pads off of here. Feels as though this rearward one's frozen in there. There we are. I usually like to turn the wheel a little bit so I can expose these 18-millimeter headed bolts. We're gonna remove both those bolts that holds the bracket to the knuckle. I'm gonna leave that in just a little bit. Remove the other one. Grab that bracket, and remove the other bolt. There it is, friends. Now it's time to remove the rotor.
Next, we're gonna use a little bit of penetrant. We're gonna come right here along where the axle nut is, and then we're gonna come along the wheel bearing where it connects onto the knuckle. We wanna try to spray down that area with some penetrant, and if you can see the bolts coming through the wheel bearing, spray those areas as well. Let's remove that axle nut. The next thing we need to do is make sure that our axle can move around inside the wheel bearing. If for some reason the axle does not slide in and out, take a punch, take a hammer, go right in this center hole, get it to break free. If that's not working, go ahead and spray inside there with some penetrant spray. The next thing we need to do is disconnect and unsecure our ABS wire so when we remove the wheel bearing, it'll be ready to come out. If you were to look at the frame, you're gonna see this area right here. It has a couple wires coming in, a couple wires going out. This area leading towards the front is actually part of the ABS wire we're gonna be removing. So we need to come right here and disconnect this. Just take my little pocket screwdriver. I'll pull it like that until I can see that white piece is pressed up against here, and then you press on this area, and you should be able to take these two apart. There we are.
Now what we need to do is use our little forky tool here or a pry bar or whatever you might have. We're gonna try to get in between this piece and the frame because there's gonna be a little push clip or piton that forces in. I'll show you what it looks like. There it is. That just forces right inside this hole, and it holds it secure. The new wheel bearing is gonna come with all new clips, so you don't have to worry about breaking them. That one out of there. Okay. A lot of times the clips that go up into the control arm, they kinda get stuck up in there. You can try to pry it out of there. More than likely it's gonna break the little piton going up in. So if you wanted to, if you were to look right along this side, you can see an area that we can press with a small pocket screwdriver, and it'll let this come down. That's the way I'm gonna remove this one. Get this one off of here. For this one, you need to squeeze these two tabs right here. Give them a little squeeze with some pliers and should pry off. There we go, friends. Now what we need to do is come from the backside of this knuckle here. If you were to look along where the axle goes through the knuckle, you're gonna see where the bolts are that hold the wheel bearing to the knuckle. We're gonna use an 18-millimeter to remove all 3. There's one of my bolts. Do the same to all.
The next thing that I like to do is use this ABS wire. We're not gonna be reusing it, so this is okay. I'm gonna take it, and I'm just gonna tie it right around the knuckle, just like this. The reason for that is because now what I need to do is start bonking on this with a hammer carefully and try to break it free from the knuckle. When it does break free, the last thing that I want is for it to come shooting off and potentially hurt me. So, this kinda acts as a safety net. Let's go ahead and start hitting this with the hammer. There we are. As you can tell, my safety net worked well. We'll just go ahead and get the backing plate off of here. There it is, friends. The next thing we need to do at this point is to clean up this area. All the areas that you notice where the wheel bearing was sitting up against the knuckle need to be nice and clean. The wheel bearing needs to be able to ground thoroughly through the knuckle. Use something like a scraper, a screwdriver if you have to. You could use a little brush. Use whatever you need to, but try to get off the majority of this rust, especially any raised areas. The next thing we would wanna do is clean up the backing plate the same way. Clean up both sides, the area that's gonna be up against here and then, of course, the area that the bearing's gonna be against. Once you've done that, go ahead and take your bolts. Make sure that they're clean.
These look like they could use a cleanup, so I'm gonna take them to the wire wheel. After I've done that, I'm gonna apply a little bit of threadlocker. So I've got these cleaned up. I've got a little bit of threadlocker on there. The next thing we're gonna do is use a little bit of copper Never-Seez, try to get around the areas where the bearing's gonna be resting in here. It's just gonna help make it come out easier next time. I also like to get the splines on the axle. Now we have our backing plate nice and cleaned up. We did both sides where the bearing's gonna ride like I said. Go ahead and take that ABS wire that comes from your wheel bearing. Slide it right down and through the center there. That's great. Now we're gonna line up the slot with where this is gonna go through, and then we're gonna put the whole unit up on to the knuckle just like this. Now something that's important to remember is that you wanna have the slot in the backing plate facing to where the caliper is. So if I was to put this in like that, it's not gonna be right. You're gonna wanna go twisting it until it lines up right like this. Let's get the ABS wire out of there. Perfect. Let's go ahead and start in those bolts. Now let's just go ahead and bottom out those bolts. Torque these to 77 foot-pounds. Now it's gonna be time to get our ABS wire back resecured.
We wanna make sure that it doesn't get damaged by hanging around and flopping and all that stuff. So, just take a look at it and take a look at all the areas that we left on here for clips. Any of those corresponding areas, we'll just take them off of the new one, okay? So I've got this clip that just comes around back here. It's gonna slide in. That's the one we got with the pliers. You remember that one. We'll bring this up through here. This one, obviously, we can take this off of here. We'll recycle that. Once up here, click it in. Same thing right here. We'll get this one off of there as well. Put this up in here. Latch it in. Make sure you give it a nice tug. All right. So now we're just gonna follow this and put it back in everywhere where it goes in. That one in there. Now we'll clip these together. Make sure you lock it in, give it a nice tug, and then secure it. Double-check all your anchor points. Make sure that there's no way that this ABS wire can come loose. The last thing you want is for it to get damaged. The next thing we're gonna do is get our axle nut back on here. I like to use a little bit of threadlocker. We'll put it on, bottom it out, and then we'll torque it to manufacturer's specifications. Now to torque this axle nut, what you're probably gonna find is that as you try to turn this to tighten it, the bearing's gonna keep spinning. To cure that, you can use a nice long pry bar. Come right in between the lug studs.
You wanna make sure it's nice and flat so you don't damage the threads. Now we're gonna torque this to 103 foot-pounds. Going with the assumption you're not replacing your brakes or your rotors, you're gonna wanna clean up the mounting area that goes up against where the bearing is. Now we're gonna go ahead and spray down this area of the hub with some copper Never-Seez. Put our rotor on, and then grab one of your lug nuts and start it in so it holds the rotor so it doesn't move around. Next, it's gonna be time to go ahead and push in the caliper pistons. What you'll notice, if you were trying to use a tool that looks like this, which is what most people have, is you would go inside like this, squeezing this piston. As you squeeze this one in, this one would start coming out. That could be an issue. If you're using this tool, the best way to do it would be to go ahead and take one of your old brake pads and then go ahead and grip right in the center and squeeze it down. For me personally, I have this tool right here. As you crank it, it's gonna push in both these pistons at the same time. You could also use this at the same time if you wanted to. Put this in. Now we're just gonna slowly push in the pistons. The next step for preparing this is we wanna add a tiny bit of lubricant along the pistons themselves and then along each of these three ears.
The reason for doing this is for vibration dampening and noise reduction. Time to get the caliper bracket on. Go ahead and take your caliper bolts and use a tiny bit of threadlocker. Let's get these started. Torque these to 118 foot-pounds. Now it's gonna be time to get the brake pads onto the vehicle. What you're gonna notice is you should have some wear indicators. They probably came in your little bag. You can go ahead and squeeze that right onto the pads, and you want them both facing just like this. When we install these, we want the brake indicators facing up. See if I can slide this in here. Should slide in nice and easy. If you have to force it in or use a hammer for any reason, you probably didn't clean up the bracket enough. These look great. Make sure they can move around freely. Go ahead and take that caliper and slide it over. Put it right down on there. Now we're gonna grab our caliper mounting bolts. We've got our caliper bolts with a teeny bit of threadlocker. Start them in, bottom them out, and then we'll torque them down. Let's torque these to 31 foot-pounds. It's always a great idea to double-check everything that you removed and replace. Just make sure everything's secure and good to go. Once you've done that, let's go ahead and get the wheel up on here.
Bring the vehicle down so the tire's just barely touching the ground so we can't spin, and then torque the wheels in a crisscross manner to 103 foot-pounds. Now it's gonna be time to get our center cover on here. If you were to turn it around, you might see something that looks a lot like a valve stem. Line it up with your valve stem and then go ahead and pop it on there. All right. Now I know you think you're done, but you still need to pump up the brake pedal, and then we're gonna go out there and double-check that brake fluid level. Right underneath the hood, you're gonna see your master cylinder. It'll tell you what type of fluid to use. You can give it a little shake and just double-check to make sure you can see it's up at that maximum line.
Shop Products


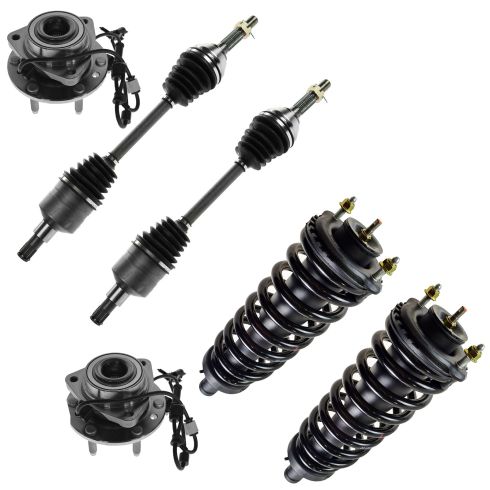
Front 6 Piece Suspension & Drivetrain Kit TRQ PSA59763
Part Details:
- (2) Front Shock & Spring Assemblies
- (2) Front Wheel Bearing & Hub Assemblies
- Ball Bearing
- 6 Piece
- (2) Front CV Axle Assemblies

How to Replace Front Hub Assembly 2006-10 Ford Explorer
Learn how to replace a bad, failed, or noisy hub on the 06-10 Ford Explorer with the steps in this video
