How to Replace Front Wheel Hub Assembly 2007-13 Nissan Rogue
Created on: 2017-05-01
Watch this video to learn how to replace the front wheel hub on your 07-13 Nissan Rogue. 1A Auto shows you how!
-
step 1 :Removing the Wheel
- Loosen the 21mm lug nuts with the vehicle on the ground
- Raise the vehicle with a floor jack
- Secure the vehicle on jack stands
- Remove the lug nuts
- Pull off the wheel
-
step 2 :Removing the Hub Nut
- Remove the 10mm ABS sensor hold down bolt
- Wiggle the ABS sensor out of the hub
- Bend the cotter pin up straight with pliers
- Remove the cotter pin
- Leverage a 16mm wrench against the caliper by placing it on a stub
- Tighten a lug nut over the wrench
- Break the 32mm axle nut loose
- Remove the lug nut and 16mm wrench
- Stick a punch in the center diver of the CV axle
- Tap the punch with a hammer to loosen the splines
-
step 3 :Removing the Hub
- Remove 13mm bolts from the brake caliper
- Pull the caliper aside and secure it with a bungee cord
- Remove the rotor
- Remove the four 17mm bolts on the backside of the spindle securing the hub
- Pop the axle out as far as possible
- Hammer out the hub by hitting the edges to free it from the spindle
- Hit the CV axle out of the hub
-
step 4 :Installing the Hub
- Install the dust shield and hub into the spindle
- Hand-tighten a few 17mm bolts to the backside
- Insert the axle into the hub
- Tighten the 17mm bolts with a socket and ratchet
- Reinstall the axle nut by hand
- Reinstall the brake rotor
- Lower the caliper onto the rotor
- Reinstall the 19mm bolts by hand
-
step 5 :Installing the Axle Nut
- Install a 16mm wrench to the stud
- Leverage the wrench against the caliper
- Tighten a lug nut to the stud
- Tighten another lug nut to the thread closest to the wrench
- Tighten the 32mm axle nut
- Insert the cotter pin into place
- Bend the cotter pin down
- Tighten the 10mm bolt to the ABS sensor
-
step 6 :Reattaching the Wheel
- Slide the wheel into place
- Start the lug nuts by hand
- Tighten the lug nuts preliminarily
- Lower the vehicle to the ground
- Tighten the lug nuts to 80 foot-pounds in a crossing or star pattern
Tools needed
-
Socket Extensions
Torque Wrench
Hammer
16mm Socket
17mm Socket
Jack Stands
21mm Socket
32mm Socket
Center Punch
Bungee Cord
10mm Socket
Ratchet
Floor Jack
Needle nose pliers
1/2 Inch Breaker Bar
Hi, I'm Mike from 1AAuto. We've been selling auto parts for over 30 years! We're dedicated to delivering quality auto parts, expert customer service, and fast and free shipping, all backed by our 100% satisfaction guarantee. So visit us at 1AAuto.com, your trusted source for quality auto parts.
In this video, we're going to be working with our 2009 Nissan Rogue. We're going to show you how to remove and replace your right front wheel hub. This is a CVT all-wheel drive vehicle, but should be very similar for the other styles. If you like this video, please click subscribe. We have a ton more information on this and many other vehicles, and if you need this part for your car, you can follow the link down in the description over to 1AAuto.com.
Here are the items you'll need for this repair: 10-32mm sockets, ratchet, socket extensions, u-joints, breaker bar, bungee cord, mechanics wire, needle nose pliers, wrenches, punch, hammer, torque wrench, jack, jack stands
Crack all of your lug nuts loose with a 21 millimeter socket and a breaker bar. Raise and support your vehicle. We're using a lift to make this easier to show you what's going on, but this can easily be done at home with a jack and jack stands. Remove the rest of your lug nuts either by hand or with the help of a 21 millimeter socket. These are kind of deep into the wheels, so it helps to use a socket. Remove your wheel and tire from the vehicle.
Use a 10 millimeter socket and ratchet to remove the 10 millimeter ABS sensor hold down bolt. Now this isn't going to be as easy as we're going to make it look. You'll probably want to use some pliers or a screwdriver to help wiggle this out, but you want to remove your ABS sensor from the hub.
Remove the cotter pin. Use a pair of needle nose pliers to bend it up straight, and then you can usually poke one of the teeth through the loop, and then just pull your pin out. Using a wrench, in our case, we're using a 15mm. You're going to want to set this up to wedge it against the caliper, and just use one of your lug nuts, just hand tight to hold it there. I'll actually probably want to put one here to keep from damaging the threads as well.
Using a 32 millimeter socket and a breaker bar, break the axle nut loose and remove it. Remove the lug nuts as well as your wrench. Using a punch, go into the center divot of the CV axle and tap the splines loose from the hub with a hammer. Using a 19 millimeter socket, remove the caliber bracket bolts. I'm using a long handle half inch ratchet, but you can start off with a breaker bar if yours are really stuck. Once you have the bracket removed, secure it out of the way with a bungee cord, mechanics wire, or some zip ties.
Remove your rotor. Remove the four 17 millimeter bolts on the back side of the spindle, securing the hub. We popped our axle out as far as we can. We'll do this with a 17 millimeter socket, ratchet and extension. It usually helps to soak these in penetrating oil, and we've done that. However if you break them, don't be too concerned. Just as long as you have new hardware, they thread into the actual wheel hub that we're going to be replacing. It may help to have a wobble extension or a universal joint on some of these bolts.
Remove the hub by hitting the edges to free it up from the spindle. Once it's out, you may still need to hit the CV axle. We ended up replacing our CV axle. So be sure when you remove yours, you use a block of wood, a soft hammer, or a punch in the divot of the CV axle when removing it so you don't damage yours.
Here we have our old hub that we removed from our vehicle, and our new part from 1AAuto.com. As you can see, these parts were exactly the same. We had quite a bit of difficulty removing this one, as the splines for the CV axle had actually seized into the splines of the hub, so it took some heat, some pretty heavy duty tools, and quite a bit of work with a hammer to get this out. So it's bent and missing studs, but other than that, the basics are the same. We have brand new studs on this one, brand new splines.
Everything's the same dimensionally. On the back we have the same four bolt mounting locations. It's a new bearing and a new hub. We also have the dust shield on the back here for our CV axle, and the tone ring for your ABS is actually inside this, so it's ready to go, you just bolt it in and your ABS signal will work. So if your wheel bearing has gone bad and is groaning or creating a grinding or whining sound, this new part from 1A Auto is going to go in direct fit, just like your original equipment, and fix you up right.
Reinstall the dust shield and the hub. The easiest way to do this is to get it close over the CV axle, and send a few bolts in from the back side. Just start those in to keep it in place there while you line up and install the rest of them.
Using the 17 millimeter socket, ratchet and the appropriate extensions, tighten down the four 17 millimeter bolts, securing your hub to the steering knuckle. Once the hub is installed, reinstall the nut onto the CV axle. Reinstall your break rotor.
Remove the hangar from the caliper. Reinstall that over the rotor. Reinstall the 19 millimeter bolts by hand for the caliper carrier bracket. You can then tighten them down with a 19 millimeter socket and ratchet. So install your wrench the other way to brace against the brake caliper. Don't forget to install the other lug nut here to keep that wrench from damaging any threads. Use your 32 millimeter socket, and I'm going to use a breaker bar to get some leverage on this, to tighten down that nut, and just pop it off and make sure if your new nut is a castle nut like ours is, that those tabs line up with the holes in the axle. Install a cotter pin, bend it over, then remove the lug nuts and wrenches.
Reinstall your sensor. Reinstall the 10 millimeter hold down bolt, and tighten it down with the 10 millimeter socket and ratchet. Reinstall your wheel and tire as well as all five of your lug nuts. Now I'm just going to use a 21 millimeter socket and bring the lug nuts down as tight as I can by hand using that. With the vehicle lowered partially, so just a little bit of weight is on the tires to keep them from turning, we'll torque our lug nuts to 80 foot pounds in a cross pattern.
Thanks for watching. Visit us at 1AAuto.com for quality auto parts, fast and free shipping, and the best customer service in the industry.
Shop Products


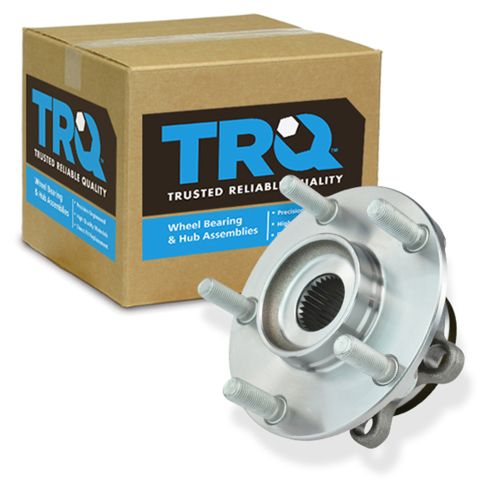
Nissan Rogue Rogue Select Sentra Front Wheel Bearing & Hub Assembly TRQ BHA54114
Part Details:
- 4.5 in
- 29
- 4
- 66 mm
- 136 mm
- 68 mm
- 5
- 5.35 in
- No
- Yes
- 2.68 in
- Square/Modified
- No
- 2.6 in
- 114 mm
- M12x1.25
- Ball
- Gen 3

How to Replace Front Wheel Hub and Bearing 2003-07 Cadillac CTS
Not only can a worn wheel bearing or hub be annoying if it is noisy or vibrating, , it leads to accelerated wear in other parts, or unsafe driving conditions. Replacing your worn bearing or hub with a quality TRQ part is a safe, smart, decision. How to do the replacement yourself on your 2003-07 Cadillac CTS.
