How to Replace Fuel Tank Filler Neck 1988-96 Buick Regal
Created on: 2012-10-19
How to repair, install, fix, change or replace a rusted, damaged, rotted, bent or leaking fuel tank filler neckon Buick Regal, Pontiac Grand Prix, and Chevy Lumina, years 91, 92, 93, 94, 95, and 96.
-
step 1 :Removing the Fuel Filler Neck
- Twist off the gas cap
- Remove the three 7mm bolts from the fuel filler neck
- Remove the five bolts from the filler neck bezel
- Remove the three 7mm bolts from the inner fender
- Remove the 10mm bolt from the filler neck bracket
- Remove the clamps fuel hose clamps
- Loosen the 15/16" bolts from the filler neck bracket
- Pry the vent tube out of the filler neck with a flat blade screwdriver
- Pull the bezel off the filler neck
- Maneuver the filler neck down and out
- Pry the fuel hoses off the filler neck with a flat blade screwdriver
-
step 2 :Installing the Filler Neck
- Put the bezel into place
- Thread the five 7mm bolts into the bezel
- Lift the filler neck into place
- Push the fuel hose onto the filler neck
- Push the vent tube onto the filler neck
- Tighten the hose clamps
- Tighten the bolts into the bezel
- Push the inner fender into place
- Insert the three 7mm bolts into the inner fender
- Twist on the gas cap
Tools needed
-
Socket Extensions
Flat Blade Screwdriver
Jack Stands
7mm Socket
Wire Ties
10mm Socket
Ratchet
Floor Jack
5/16 Inch Socket
Tin snips
Brought to you by 1AAuto.com, your source for quality replacement parts and the best service on the Internet.
Hi, I'm Mike from 1A Auto. I hope this how-to video helps you out, and next time you need parts for your vehicle, think of 1AAuto.com. Thanks.
In this video, we're going to show you how to replace a fuel filler neck on this '96 Buick Regal. The procedure is basically the same for Regal as well as the Cutlass Supreme and Pontiac Grand Prix. Often these filler necks get rusted out, they get pin holes and cause a check engine light to come on. The tools you'll need are jack and jack stands; 7mm, 10mm and 5/16"? sockets. You'll need a ratchet and extension; flat blade screwdrivers, small up to large; and I kind of put a little star next to tin snips and wire ties. On this vehicle, one of the bolts is rusted out so I have to clip a clamp that holds the filler neck to the body and then I use wire ties to resecure it.
Now, I'm removing the gas cap and then there are three 7mm bolts holding the top here. Remove those. I'll use fast forward here. I use this quite often just when I'm taking out bolts or whatever. You don't really want to watch me just turning the wrench the whole time. Now there are four bolts that hold the plastic bezel that surrounds the fuel filler. The bolts hold it to the body of the car, remove the four bolts around the outside and then there's one bolt inside at the root of the fuel filler door.
Now three 7mm bolts hold the panel in; one there, one a little higher up and then one down below the wheel and then there's two Phillips screws and the panel will come out. I'm going to speed it up here as I use a small Phillips screwdriver to remove the two screws and then a 7mm socket with a ratchet to remove the three bolts. Now, once you pull that down, back in here, you've got what's left of a 10mm bolt that you need to remove. On this vehicle, the bolt was so rusty that I just ended up taking a pair of snips and cutting the strap that holds the filler neck in place.
Looking up underneath you can see pretty much our problem with our fuel filler neck, very crusty. These get pin holes in them, they don't hold pressure. First thing we're going to do is remove this. We need to remove this clamp because it holds these tubes to the neck and then there are two clamps that hold the hoses on. We're going to remove this here, remove this hose. Then we're going to remove the main filler neck, it goes in right here so we're going to loosen the clamp and remove the hose here at the tank.
Actually, just to the right of that main filler hose is where that vent tube hose goes in. It's the other end that I showed you before and that clamp on this vehicle is in much better shape so actually what I do is just end up loosening that clamp.
For this, using a small screwdriver, pull that down and you should be able to pry the clamp apart and that will allow that to come off. First I'm going to use a 5/16"? socket and an extension and ratchet and go up and loosen up this clamp here to the main tube. You want to get it nice and loose so that there's no question about it being able to move around. I'm going to loosen this one up here too. Just to give myself some options. I'm eventually going to reach up in, grab hold of that main filler tube and twist it, and get it loose. I use a large screwdriver and pry on that vent tube and pry on the vent tube as you pull from the other side and pull it loose.
Now that everything is loosened up down below, I can move my neck around and take the plastic housing out just by sliding it over the neck and then sliding it out the quarter panel. I don't get the best shot of this here but I'm grabbing low on the filler neck, pull it out away from the tank and then twist it down and pull it out of the vehicle.
You can see I've just loosened up my clamp, just use a screwdriver, and you want to break basically, the rust seal between the tube and the hose. Now do the same for the smaller tube, remove the clamp and then just break the rust barrier between the tube and the hose and pull them apart.
Next step before you go to put it back in, you'll want to put the plastic housing back up in and start the five screws that hold it: the four around the edges and then the one inside near the base of the fuel door. You just start them in. you don't have to tighten them up yet. Now you take your new fuel filler neck and you feed it up in towards the plastic grommet and at the same time making sure that your filler tube here is going under there and that's in. Now take your tube and put it in from the back side.
A couple of notes: you'll notice that I had my clips or my clamps on the tube. Basically you put it up in there, get it to go onto the filler neck side first and then get it to go onto the fuel tank. I really can't film it. Now I'm going to repeat that, put the vent tube in there. Again, put the tube up in there and then reach in there either from the backside or between the tank and the suspension and get the tube on both the filler neck as well as the fuel tank. Now make sure you get all your clamps in place, you don't want to tighten them up yet. You want to keep them loose so you can move it around to get everything else connected first.
Now, take the top of our filler neck here and line up one of the holes here. I'm just going to fast forward here as I put the other two bolts in that hold the filler neck up into that plastic bezel and then I tighten up all four or five bolts that hold the bezel to the car.
In here, since I had to break this strap, I just worked some magic with some wire ties and it's held on up at the top and at the bottom so that should keep it steady enough. I can put this back in place and put the bolts and screws back that hold it in.
Now, up underneath, take that strap that was around the filler neck as well as the two vent tubes from the tank, and put it back up in and clamp it back into place. Then go back underneath, use your screwdriver as well as your ratchet and socket and extension and make sure you tighten up all four clamps on the filler neck as well as the vent tube.
We hope this video helps you out. Brought to you by www.1AAuto.com, your source for quality replacement parts and the best service on the Internet. Please feel free to call us toll-free, 888-844-3393. We're the company that's here for you on the Internet and in person.
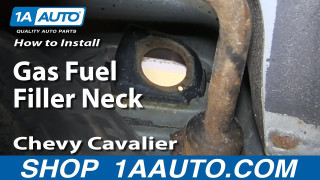
How To Install Replace Rusted Gas Fuel Filler Neck 1999-2005 Chevy Cavalier Pontiac Sunfire
A rusted fuel filler neck can be quite a pain! Watch this video to learn what do to to replace the one on your 99-05 Chevy Cavalier or Pontiac Sunfire.
