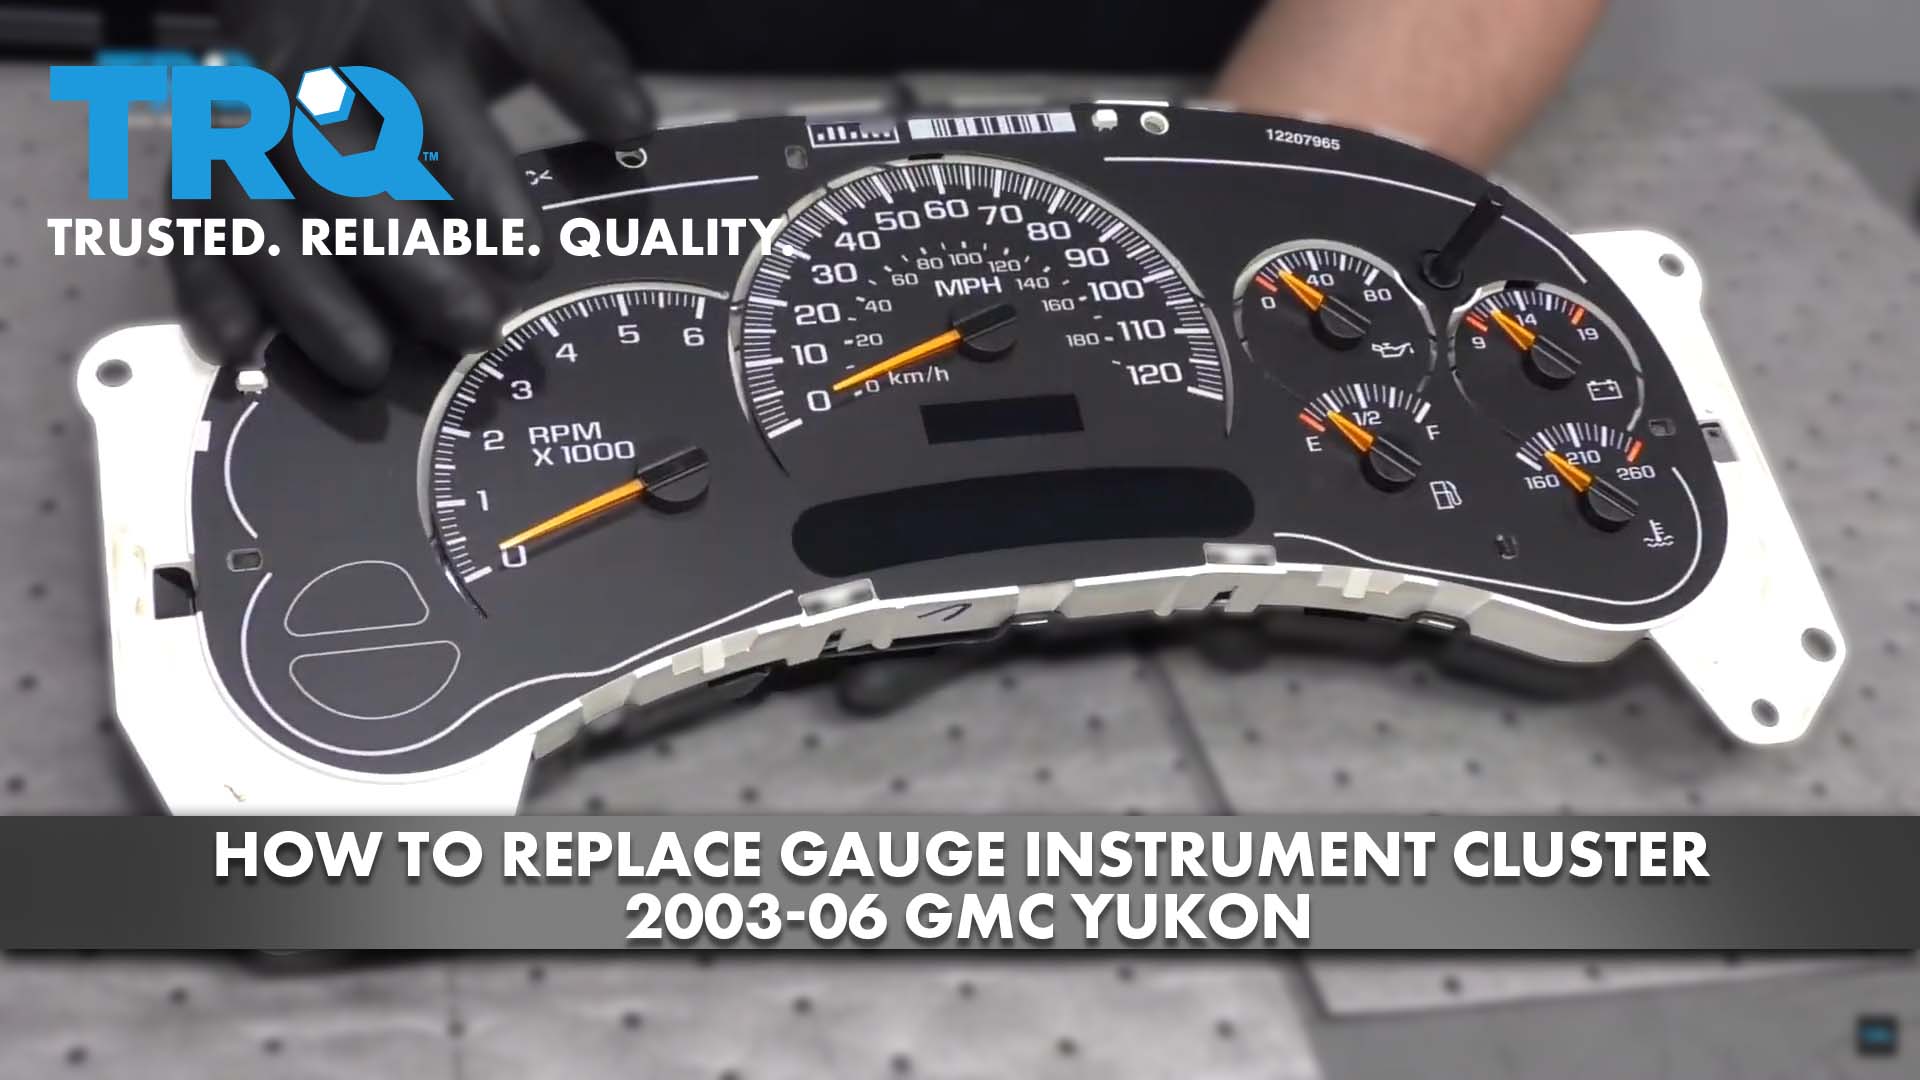
How to Replace Gauge Instrument Cluster 2003-06 GMC Yukon
Created on: 2020-05-07
This video shows you how to install new gauge cluster motors in your 2000-06 GMC Yukon.
Tools needed
-
Socket Extensions
Socket Driver
7mm Socket
Ratchet
Solder Kit
Pocket Screwdriver
So, tip the steering column down, all the way. Take the key. Turn the key to the on position without starting the vehicle. Make sure you put the parking brake on, and step on the brake. Shift all the way to the lowest gear setting, and just grab this trim. Get behind it and slide it forward just like that. Take a 7-millimeter socket, and there's two screws on this side and two screws on the other side. Take those out. Now slide this forward and disconnect the connector. There is a tab. Connector's right there. You just squeeze the connector just like that. Yeah. Shift this back into park and shut the key off.
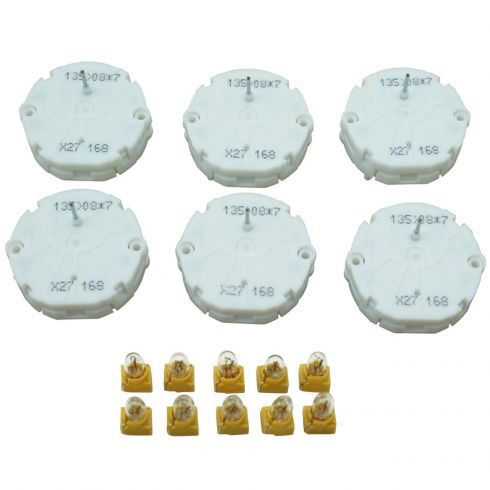
I wanna take this cover off. Just take a pocket screwdriver, get behind here and just pop these up. Just pull up a little bit of pressure. Three on top there. Then on the bottom, there's two right here that are clipped in. I'll use a pick on the back side right here. Try to release these without breaking them. There we go. Slide that off. Now we wanna take these needles off. Now this is the one that we have that's broken. The other ones are where they're supposed to be. Just get under here with a trim tool and just pry up, just like that. Do the same for the other ones. Because of this, I don't wanna just tip this completely upside down. Just go to the back side. We're gonna remove this cover. Just use a pocket screwdriver. And slide that off. And we'll just pop this up. Flip it over. So we're gonna replace this motor right here. And if you go to the back side, there's the four connections for where the motor is installed. This is what the new one looks like. There's the four connections. So we need to melt that solder and take the old motor off.
So now I want to extract the solder from those points right there, those two and then those two. So, I'm gonna use a hot soldering iron and a desoldering pump, which you put the pump real close to the solder that you wanna desolder, and then just melt it. And then suck it out. Looks good. I'll do the same for this one. And I'm just gonna use some needle-nose pliers, bend these tabs back a little bit. I'm gonna have to melt the solder a little bit more. And just grab the motor, just try to slide it out. If it seems like it's sticking a little, you might have a little more solder on there. There we go. And then slide the motor out. Take the new motor. Just line it up. There's a tab on the top, tab on the bottom, and slide it in position. Looks good.
Now very carefully just put a little dab of solder on the end. Just like that. Now if you need to replace some of these bulbs, you can take some needle-nose pliers and just hold the bulb itself, and just use the soldering iron. Oops. And just touch the solder just gently on one side and then same on the other side. Just pull up on the bulb. Oops. There we go. Now to install the new bulb, put it right in the same position the old bulb was, with the wires contacting where the solder is. You could add a little more solder if you need to. Just use the needle-nose to hold it in position, and just give it a tap. Do the same on the other side. Now to do any of the other motors or the other lights, you do the same procedure.
Now take the backing and put the board back in the backing just like that. Now just take this cover, slide this back in position, and lock it down. Now we're gonna take the needles. Now you wanna set these where they're supposed to go when the vehicle's off. So set that to zero. Just push it down. Set that one to zero. Should be good. Now before we put the cover over this, I'm gonna hook this up to the vehicle and just make sure all the gauges are working the way they're supposed to. If you have to, you can adjust accordingly.
Take the face shield and slide it in position, and lock it in place. Take the cluster, slide it in position, reconnect the connector, and make sure it's all lined up. Take the screws, four screws. Reinstall the screws. And snug those up. You can put the key in and shift it all the way down to the lowest gear. Take this trim piece, and you slide it down first. Push down on the top, and your four ways may come on. Just turn those off, and then line it up. There is some alignment tabs on the end, right there. And on this side, just make sure you pull out on the bottom so it goes in flush, and then push it in. Make sure it's in there good. All set. Put it back in park, shut the vehicle off. You're good to go.
Shop Products

How to Replace Center Trim Bezel 2005-10 Chrysler 300
How to repair, install, fix, change or replace a broken or snapped off dash trim panel on 05, 06, 07, 08, 09, 10 Chrysler 300
