
How to Replace Headlight 2000-04 Subaru Outback
Created on: 2012-08-13
Learn how to replace the headlight and change the bulbs with this video if yours are cracked, cloudy, or faded
-
step 1 :Handling the Bulbs
- Note: DO NOT TOUCH the bulbs- the oil from your fingers will burn into the light and foul your bulb.
- Clean with rubbing alcohol and a soft cloth if the bulbs do get touched.
-
step 2 :Removing the Headlight Assembly
- Remove three 10 mm bolts using your socket and ratchet
- Pull out the headlight assembly
- Unplug the wiring harness
- To change the bulbs, twist of the plastic cover to access them.
-
step 3 :Install the new headlight assembly
- Plug in the wiring harness
- Bolt the headlight assembly in using your 10mm socket and ratchet
Tools needed
-
10mm Socket
Ratchet
Brought to you by 1AAuto.com- Your source for quality replacement parts and the best service on the internet. Hi, I'm Mike from 1A Auto. I hope this how to video helps you out and next time you need parts for your vehicle, think of 1AAuto.com. Thanks.
On this video we're going to show you how to service a headlight on this 2003 Subaru Outback. We're going to show you both changing the bulbs as well as changing the whole assembly. Changing the bulbs does involve just removing the entire assembly. It's not too difficult. There are just three 10 mm bolts so you'll need a 10 mm wrench or a socket with a ratchet.
The easiest to service the headlights is actually to just remove three bolts, 10 mm. One here, here and here and the headlight comes out and then you can get to the back of it easily. Speed up here as I use a 10 mm wrench to remove those three bolts. The best tool for the job is probably a 10 mm socket with a ratchet, but I'm using the wrench to show you that it can be done and that's usually what most people have in their toolboxes.
Now pull the light forward. Ok and then these two here you have to twist counter-clockwise and the bulbs pull out. Ok then this here, you actually press on a little tab down here and disconnect that and the light comes out. If you just have to service the bulb, twist this counter-clockwise, pull it out. Headlight bulb; the top one press on this little retainer, force it down. Then this comes up and out. You have to wrap the wire around. Then this bulb disconnects from here, and then you can connect your new one. Put this in, wrap the wire up and around. Make sure it seats in there correctly. Push that down and around the lock.
Then this, you can turn counter-clockwise. Pull this bulb out, the tab right here push down, disconnect the bulb and the new one push that in place and turn it clockwise. Put this back on, put it in place then turn it clockwise. Here's the old light, new light from 1A Auto, you can how much brighter, more clear. That goes in, this is like this, this socket must have gone bad, that's why it has the wires like that. We'll put it in, you'll either do this or you'll to unplug and plug it back in. It's probably just a little bit here we go, in and turn it counter-clockwise, plug this one in. Ok, this connector plugs right in to the new light.
There are two adjusters, one here and here. You can reach them from the backside. One of them adjusts the light up and down. One of them adjusts it side-to-side. Now you're going to put this side in first. There's a little bracket down here that goes on the post there. Ok, that sides in. Push it right on. Put those three bolts back in place. The top one is a coarse threaded one. Push in the light a little bit while I start it.
Fast forward again as I finish putting in those two other bolts by hand. I hand tighten them first and then use the 10 mm wrench to tighten them right up. Ok, you can see how much of a difference that makes. There's the new one installed. There's an old one, dull and clouded. Those aren't even faded that bad, I've seen them faded much worse. The new one's nice and clear.
Again, if you want to adjust it, here's one adjusting screw, use a wrench. The other one is right down in there just beyond that wiring harness. You want to basically adjust the headlight so that at 20 feet away, you want to position your car 20 feet away from a wall, make sure it's on a level flat surface. At 20 feet away the low beam, when the low beam is on the concentration of the beam should be an inch the below the height of the low beam in the car. Then the high beam should be level with the height of the bulb in the car. The concentration of the beam should be one inch below for the low beam and level with the height of the bulb for the high beam.
We hope this helps you out, brought to by www.1AAuto.com. Your source for quality replacement parts and the best service on the internet. Please feel free to call us toll free 888-844-3393. We're the company that serves you on the internet and in person.
Shop Products


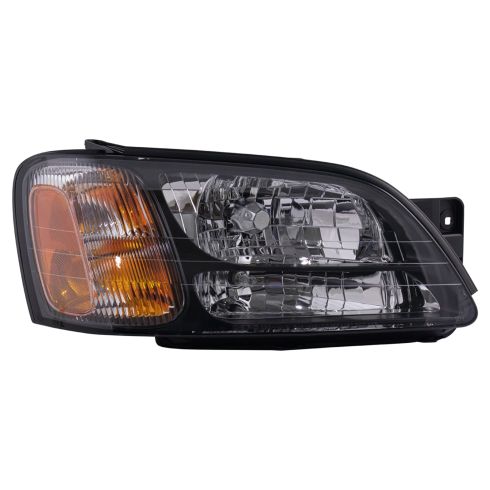
Subaru Baja Legacy Outback Passenger Side Headlight Assembly DEPO 320-1109R-AS
Part Details:
- Features and Benefits

How to Replace Headlight 2001-05 Chrysler PT Cruiser
Watch this video for help with replacing a headlight and headlight bulb in a 01-05 Chrysler PT Cruiser.
