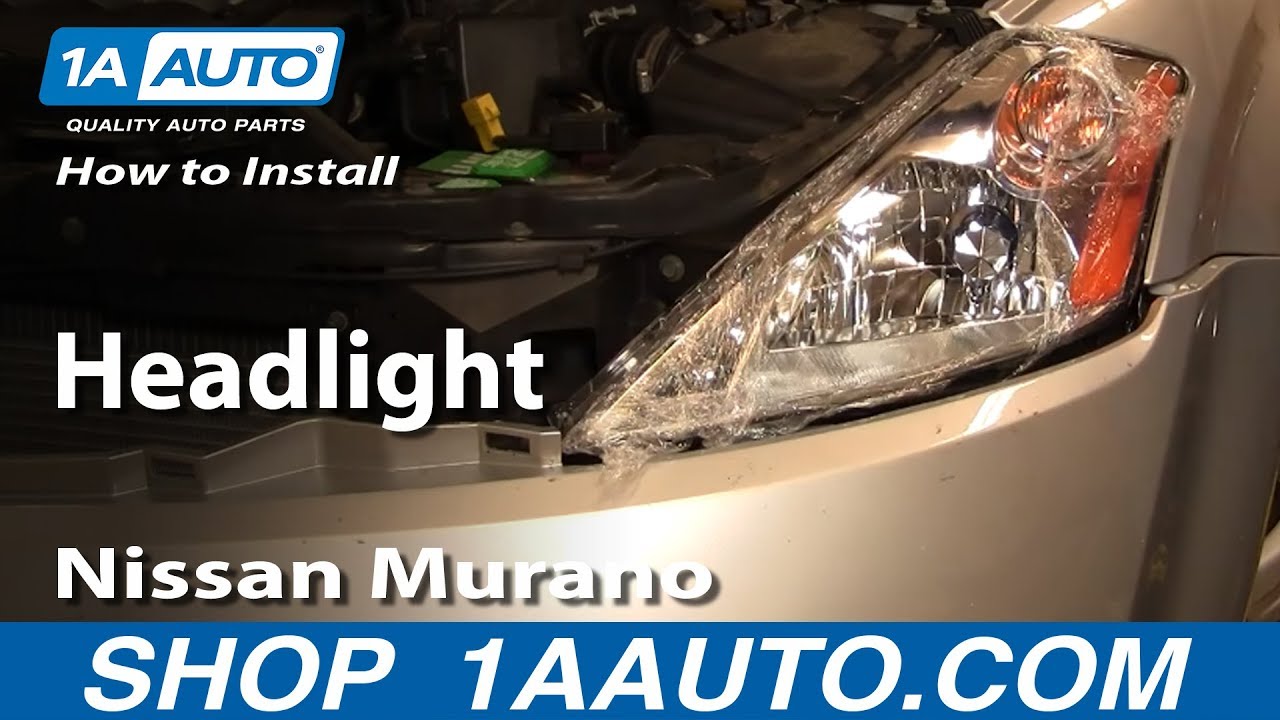
How To Replace Headlight 2003-07 Nissan Murano
Created on: 2011-10-20
Watch this video and find out how to access, remove, and install new headlights if the old ones are foggy, cracked, or broken
-
Note: DO NOT TOUCH the bulbs- the oil from your fingers will burn into the light and foul your bulb. Clean with rubbing alcohol and a soft cloth if the bulbs do get touched.
step 1 :To replace just the headlight bulb
- Pop the hood and secure it.
- Reach behind the headlight assembly in the engine bay and twist and pull the headlights out.
- Unclip them from the harness and replace.
-
step 2 :Remove the two plastic covers over the head light assemblies
- Remove the 8 pins using your screwdrivers to pry them up.
-
step 3 :Remove the front grille
- Reach behind the center of the grille and pull up on the tab and pull the grill off.
- Set aside.
-
step 4 :Loosen the fascia
- Remove the pins on the top of the fascia where the front grille was.
- Remove the 10 mm bolt in each wheel well securing the edges of the fascia.
-
step 5 :Remove the old head light assembly
- Remove the four 10 mm bolts around the head light assembly by pulling the loosened fascia out of the way.
- Remove the bracket securing the headlight assembly to the fascia.
- Unplug the bulbs and harness.
-
step 6 :Install the new head light assembly
- Plug in the bulbs and harness.
- Clip the HLA into place and replace the plastic bracket that secures the fascia to the headlight assembly.
- Tighten the four 10 mm bolts.
-
step 7 :Re-assemble the front end
- Clip the fascia onto the head light assembly bracket
- Bolt and clip the fascia back on completely.
- Clip the front grill and plastic covers back into place.
- Close the hood and enjoy your new 1A Auto headlights.
Tools needed
-
Socket Extensions
Flat Blade Screwdriver
Phillips Head Screwdriver
10mm Socket
Ratchet
Brought to you by 1A Auto.com, your source for quality replacement parts and the best service on the internet.
Hi, I'm Mike Green. I'm one of the owners of 1A Auto. I want to help you save time and money repairing and maintaining your vehicle. I'm going to use 20-plus years experience restoring and repairing cars and trucks like this to show you the correct way to install parts from 1A Auto.com. The right parts installed correctly, that's going to save you time and money. Thank you and enjoy the video.
In this video we're going to show you how to replace the headlights on this 2006 Nissan Morano, same as any 2003 to 2007. Tools you'll need are small flat blade screwdriver, a Phillips screwdriver, and a ten millimeter socket and ratchet with an extension. You do have to remove the grill and take apart the bumper cover, but it's actually not that difficult. Just check out the video.
Okay, if you're just looking to remove your headlight bulb, you can get your hand in here, turn that ring counter-clockwise and then pull your bulb out. You want to remove a series of pins. Okay, there's four, one, two, should be one there, three and four holding on this panel, four holding on this panel, and these are little screw type. You can try using a Phillips screw and going counter-clockwise to try and create a little separation. It doesn't always work so then just use a small flat blade to pull the centers out, but then pull the clips out. The other style clip, the center pops up and then the clip pulls out and you want to remove one, two, three here and then there's a couple more underneath these panels.
We're going to speed it up here as we take the clips out of those two panels and then remove them. You want to pull the clips out first. If you pull the middles out and then you pull out on the panel, sometimes you can flip the clips up and lose them in the engine compartment and then after that, remove all the clips from the top of the grill. Now from under the air intake and then the top of the grill.
Okay, so now if you look in here you can see a tab right down here and what I find helpful to do is reach in and put your finger underneath that tab, push up to release while you're pulling the grill. You reach in, you pull on those tabs. You reach in further. We're at the second tab. Keep pulling the tab out. Eventually the grill does pop right off. Right beside the bottom corner of the light there's a little pin. Pry up on the center of it. Pull it out. Up underneath the wheel well, okay there's a little spot right here, a little spot right here. You push your finger up in. Okay and then pull this down and then you can see a ten millimeter bolt. Okay, you can see a ten millimeter bolt right there and you want to remove that. Okay, now there is a bolt right there to remove. There's another bolt in down underneath here that goes right in like that. There is a bolt here and a bolt here.
Okay, we're going to speed it here as we just remove those four ten-millimeter bolts. We'll use a socket and ratchet and just pull that fender or the bumper cover back because we take those two out and then remove the top one and then that front one. Okay, this part's a little difficult to film, but in here there's a little bracket and I'll show this to you afterwards. What you have to do is there's some tabs on that bracket and you have to pull and push the tabs and this bracket comes off. That bracket's in there like that. What I did was I just reached in there, grabbed it like this and forced it out with my thumb and then I pushed one of the tabs down, one of the tabs up, and then these other tabs left and right respectively and that came off.
Okay, once that's off then your light comes out. Right over there it connects. You're going to want to push with your thumb nail or maybe a little small screwdriver on that tab. Disconnect your light and your whole light comes out. Okay, here's the new headlight from 1A Auto. If your headlight's been broken or damaged or it's clouded over, it's a great solution. We're going to just first peel the plastic off the edges a little bit. Connect a harness, 1A Auto light bulb will hook right in. Put our light in. Put the bolt up here. Start this bolt here.
Okay, so we're going to put this in. This is a little clip where the bumper cover goes in to. Back on. Now we'll speed it up as I'm putting those other two bolts in and start them in first. Start all four bolts, get the headlight aligned in the right spot, preliminarily tighten the bolts, then make sure headlight, give it one final alignment, make sure it's in the opening correctly, and then tighten up the bolts so it stays in place nicely. When you tighten them, you don't have to tighten them too tight, but you want to have them nice and firm. Bumper cover, fit back in. Take our pin here, just screwed it and locked it in. Pull down, pull down our inner fender. That will pop on through. Put the fender up in there.
Here we're going to fast forward again, putting the clips back in the top of that grill and remember the ones that go on the top of the grill have a plain head and then the ones that hold the panels on above the grill have the Phillips, the smaller style with the Phillips head pin for the center. Put those all on and then you should be all set.
We hope this helps you out, brought to you by www.1A Auto.com, your source for quality replacement parts and the best service on the internet. Please feel free to call us toll free, 888-844-3393. We're the company that's here for you on the internet and in person.
Shop Products


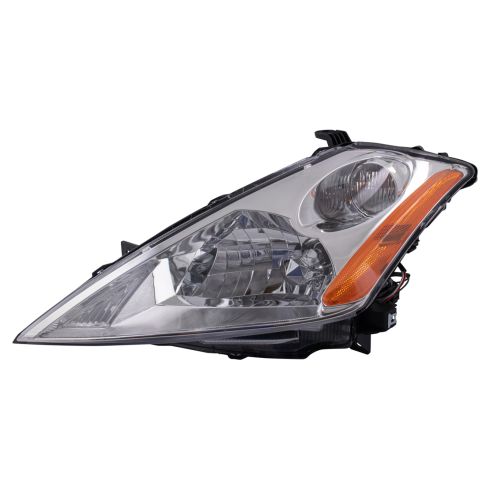
2003-07 Nissan Murano Driver Side Headlight Assembly TRQ HLA74219
Part Details:
- Yes
- Assembly
- PC (Polycarbonate)
- Yes

How to Replace Headlights 2004-07 Subaru Impreza WRX
How to repair, install, fix, change or replace the broken, damaged, cracked, faded, cloudy, or chipped headlightson 06 Subaru Impreza WRX
