
How to Replace Headlight Assembly 2003-05 Honda Pilot
Created on: 2015-06-10
How to repair, install, fix, change or replace the broken, damaged, cracked, faded, cloudy, or chipped headlights on 03, 04, 05 Honda Pilot
-
step 1 :Servicing the Bulbs
- Remove the rubber boot from the headlight
- Push the wire retainer in and up
- Twist the bulb socket counterclockwise out of the light
- Pull the bulb off of the socket
- Push on the new bulb
- Twist the bulb clockwise into the light
-
step 2 :Removing the Bumper Cover
- Pry up the center from the fasteners on the top bumper cover
- Remove the 8mm bolt in the wheel well
- Remove the two 10mm bolts on the bottom of the cover
- Remove the remaining fasteners on the bottom of the cover
- Pull out the bumper cover from its sides
- Remove the bumper cover
-
step 3 :Removing the Headlight
- Remove the Phillips pin beneath the headlight
- Remove the 10mm bolt beneath the headlight
- Remove the clip from the top corner of the headlight
- Remove the 10mm bolt from the headlight bracket
- Pull the headlight out
- Disconnect the headlight wiring harness
- Release the clips from the headlight molding
- Remove the headlight molding
- Remove the 10mm bolt from the headlight bracket
-
step 4 :Installing the New Headlight
- Transfer the headlight bracket and molding to the new headlight
- Tighten the 10mm bolt to the headlight bracket
- Transfer the old headlight bulb to the new headlight
- Reconnect the wiring harness to the headlight
- Line up the bolt holes on the headlight bracket to the bolt holes on the vehicle
- Replace the 10mm bolts into the headlight bracket
- Tighten the Phillips pin beneath the headlight
-
step 5 :Reinstalling the Bumper Cover
- Snap the bumper cover into place
- Push in the fasteners on the top bumper cover
- Insert the 8mm bolt in the wheel well
- Insert the two 10mm bolts on the bottom of the cover
- Insert the remaining fasteners on the bottom of the cover
Tools needed
-
Flat Blade Screwdriver
8mm Socket
10mm Socket
Ratchet
Brought to you by 1AAuto.com, your source for quality replacement parts and the best service on the Internet.
Hi, I'm Mike from 1A Auto. I hope this how-to video helps you out, and next time you need parts for your vehicle, think of 1AAuto.com. Thanks!
Okay, if your Honda Pilot headlights look like this and you want them to look like this, stick with us as we show you how to change both the bulbs and the whole headlight assembly on this 2003 Honda Pilot. The items you'll need are new headlights from 1AAuto.com, flat blade screwdriver, 8mm and 10mm sockets with a ratchet.
Open up your hood, hold the hood release lever, and then there's a little lever you lift up. Lift the hood up and secure the prop rod.
Let's look in to change the headlight bulb. There's a rubber boot on the back of the headlight. Pull that off. Actually, I pulled the harness off at the same time. You can pull the harness off first, then pull the rubber boot. Then there's just a wire retainer. You push in and up and it comes out. You can pull your headlight out. Be careful not to touch the headlight that you put back in, not the glass part of it. Put the headlight back in.
Make sure that the three tabs line up correctly, push the wire retainer back in, and lock it in place. Make sure the headlight's in there security. Put the rubber boot back on. Make sure you get the hole in the middle around the three prongs of the headlight. Push it on and reconnect the harness.
There's another light on the side that you can get to fairly easily. This is your signal light. Turn it counterclockwise slightly and turn it out. Not a very good shot, but the bulb also you push down and turn kind of counterclockwise and it comes out. Put the other one back in reverse of the procedure. Then put it back in place and turn it clockwise to lock it in.
To replace the lights themselves, you'll have to remove the front bumper cover. You'll need to take a series of clips out, pry up the center, and then pull the clip out. There's about eight. You want to remove the two back rows on top here, as you see me doing. On each side, there's an 8mm bolt at the top corner of the bumper corner. Then, on each side, two 10mm bolts at the bottom, as well as another four or five of those clips that you pull out.
I'll just fast-forward here as I remove the 8mm bolt. Then under, and remove those 10mm bolts. Then use a screwdriver to again pry out those clips. Those clips underneath can be more difficult because they're usually clogged up with sand. You may have to pry and pull with pliers as well. Then pull the sides of the bumper cover out to release them. Obviously, you have to take those fasteners out on both sides, the 10mm and 8mm bolts. I just put a couple of clips in so the bumper cover doesn't go flying when I get it all released. I just put a couple of clips back in. I don't even lock in the centers. I just put the outer part of the clip in. You pull the sides out and you just pull it straight to the front. Now remove those clips, pull that top panel up, and pull the bumper cover off.
Now at the bottom side, there's a 10mm bolt, the silver one there. Then there are two, actually there's a little Philips clip, so you turn the center of this clip out counterclockwise and then pull the center, as well as the clip out. Then underneath there are two more 10mm bolts that go into the body there and there. You can loosen up, you don't have to remove this one all the way, although you will later. Loosen up this 10mm bolt.
Pull out the clip in the top corner. Then, on the last 10mm bolt on top. Now just kind of pull the light up and forward and on the backside, counterclockwise remove the side marker light, the signal light, as well as unplug your headlight. There's a little clip that you pull on and then push the teeth with a flat-head screwdriver to release it. You'll need to transfer the molding that's below the headlight.
Here, I have the headlight upside down. I'm prying in the clip at the end and there are a series of clips that you just push down and pull that body-colored molding off. Remove that last 10mm bolt that holds the bottom brace on.
Now, you'll want to transfer those items to the new headlight. There's some protective plastic. Just pull that away a little bit. Then, lock the inside corner in first. Again, I have the headlight upside down here. Then push all the clips right in and lock them in place. Then put that brace back on. Just make sure it goes into place correctly on the side. Then put the bolt on and tighten it up. Transfer over your headlight, your headlight bulb. Just remove the headlight bulb from the old one and put it into the new one.
Now, get the headlights close to being replaced. Put your lights back in, twist clockwise to lock them in place. Obviously, line them up correctly. Make sure they go all the way in and then twist them to lock them. Reconnect the headlight and then re-clip the harness clip into place. Position the headlight to make sure that the metal bracket goes inside the plastic bracket on the outside there. One you get it lined up, it easily slides back into place.
Replace the plastic clip at the top to hold it in place, as well as the one on the bottom outside. Now put that bolt in at the top first. Just make sure you position the light as you want it, as close up into the body lines. Then replace the three bolts at the bottom and make sure they're all tight.
Put your bumper cover back into place. Make sure it goes around the hood opening latch correctly and that it hangs freely. Then push it back into place and lock the sides into place. Just made sure that you went up over the radiator panel correctly. Then you can put all the clips at the top in place. Replace the 8mm and 10mm bolts at the bottom, along with the clips along the bottom.
We're finishing up. If you want to aim the headlights, basically, you want your wall 20 feet away, level surface. With the low beams on, the concentration of the lights should be an inch below the level of the headlights. The high beams should be at the same level as the headlights. There are two adjusting screws on the back. The lower one goes up and down; the upper one goes left and right.
Here you can see the old and then the new. New set of headlights from 1A Auto. That makes your car look a little bit brighter, a little bit newer, and helps you see better at night.
Thanks for tuning in. We hope this video helped you out. Next time you need parts for your car, please visit 1AAuto.com. Also check out our other helpful how-to and diagnosis videos.
Shop Products


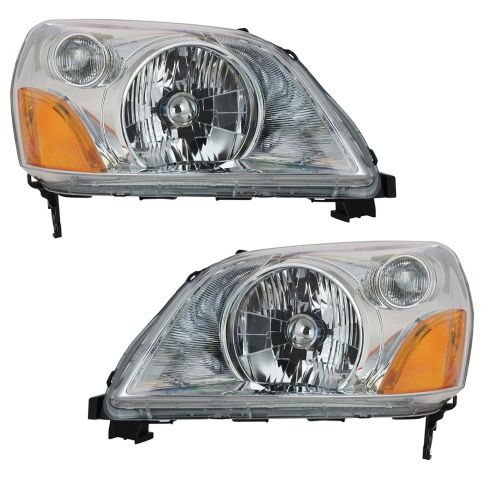
2003-05 Honda Pilot Driver & Passenger Side 2 Piece Headlight Set DIY Solutions LHT03401
Part Details:
- 2 Piece
- (1) Passenger Side Headlight Assembly
- (1) Driver Side Headlight Assembly

How to Replace Headlights and Bulbs 2000-04 Toyota Tundra
Does your 00-04 Toyota Tundra have dim headlights? Change the bulbs, or replace the headlights. Learn how to do both in this video from 1A Auto!
