How to Replace Headlight Housing 2006-10 Ford Explorer
Created on: 2016-09-28
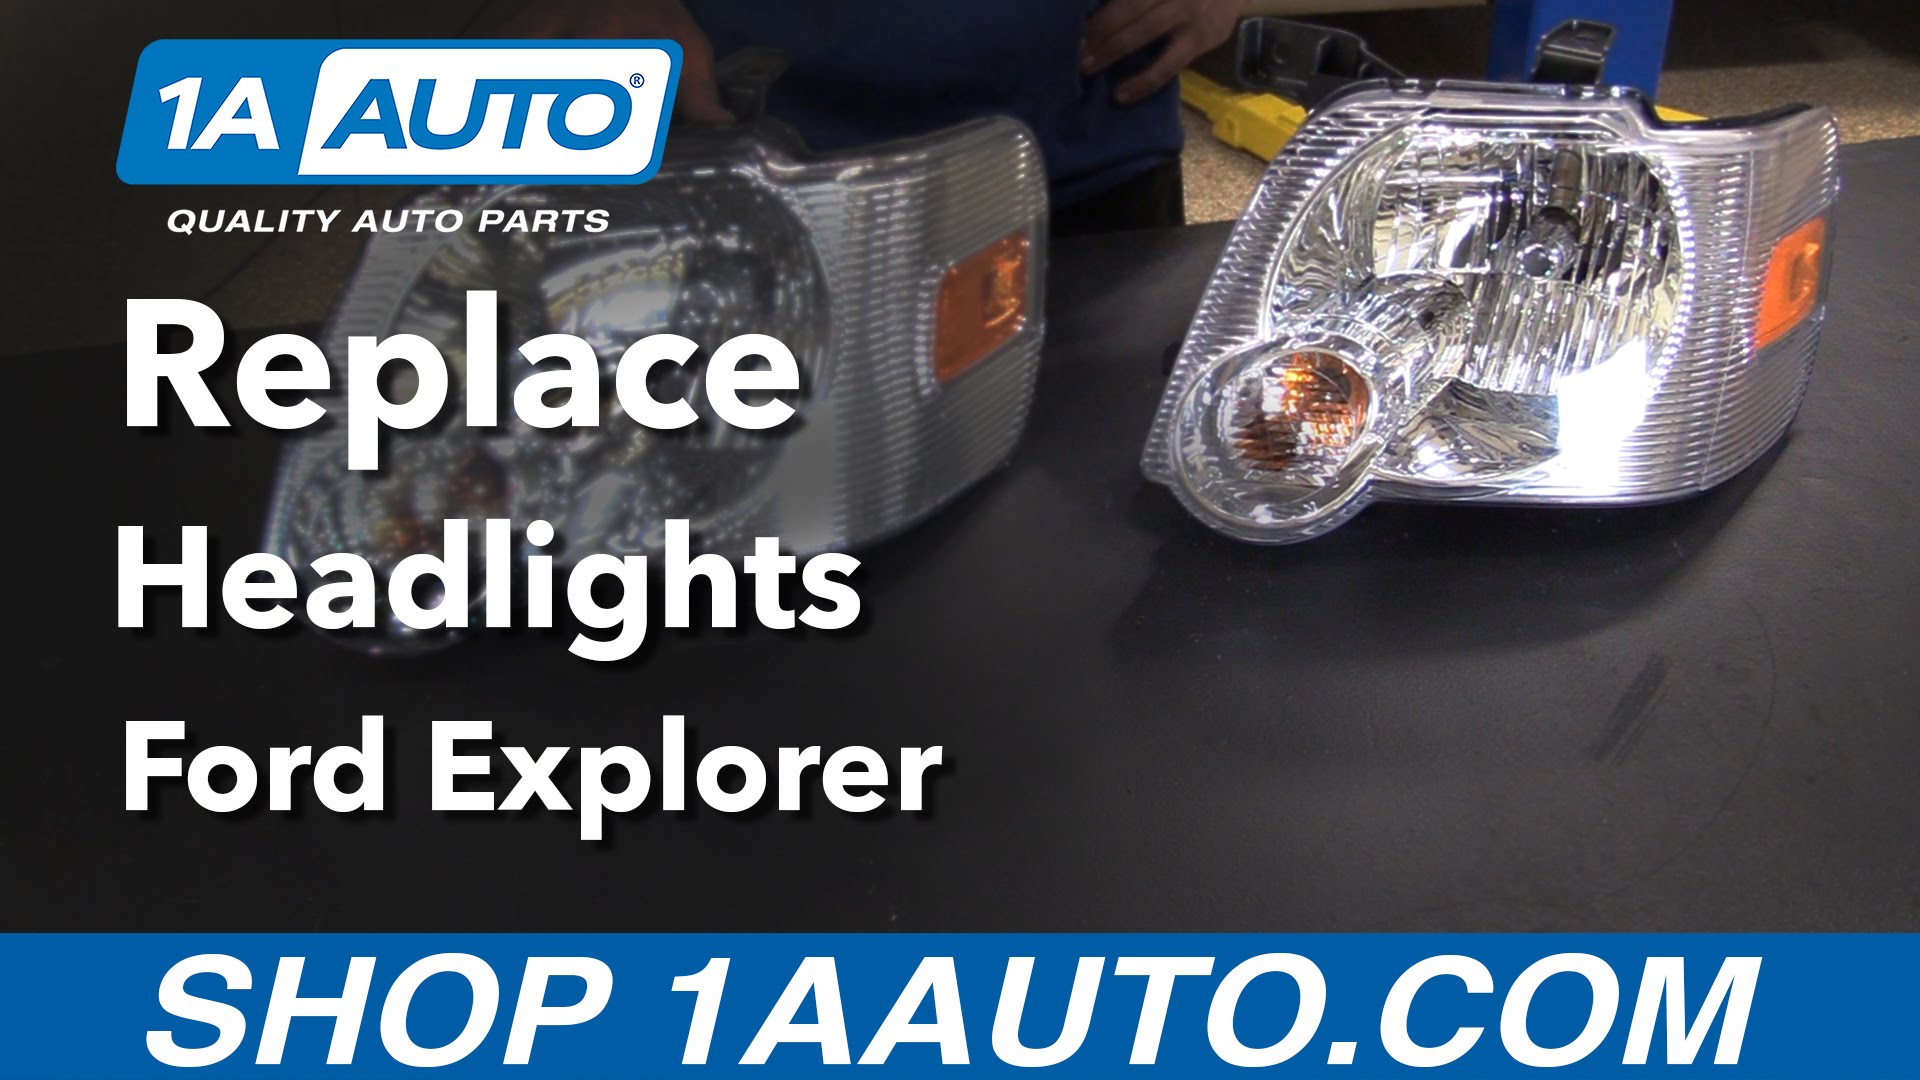
New Headlight from 1AAuto.com How to repair, install, fix, change or replace the broken, damaged, cracked, faded, cloudy, or chipped headlights on 06 Ford Explorer
-
step 1 :Removing the Headlight
- Remove the three 8mm bolts from the headlight bracket
- Pull the headlight out
- Disconnect the headlight wiring harnesses
-
step 2 :Replacing the Headlight Bulbs
- This step is only necessary if you are replacing the headlight bulbs
- Turn the base of the bulbs counterclockwise
- Remove the old bulbs
- Disconnect the wiring harnesses from the old bulbs
- Connect the new bulb to the wiring harness
- Insert the new bulbs
- Turn the base of the new bulbs clockwise
-
step 3 :Installing the New Headlight
- Reconnect the wiring harnesses to the headlight
- Line up the bolt holes on the headlight bracket to the bolt holes on the vehicle
- Replace the three 8mm bolts into the headlight bracket
Tools needed
-
Socket Extensions
8mm Socket
Ratchet
Brought to you by 1AAuto.com, your source for quality replacement parts and the best service on the Internet.
Hi, I'm Mike from 1A Auto. I hope this how-to video helps you out, and next time you need parts for your vehicle, think of 1AAuto.com. Thanks!
In this video, we're going to be working with our 2006 Ford Explorer. We're going to show you how to remove and replace your driver's headlight assembly. This process is going to be exactly the same if you need to replace your headlight on the passenger's side.
If you like this video, please click "Subscribe". We have a ton more information on this truck as well as many other makes and models. If you need this part for your vehicle, it's available from 1AAuto.com.
Here are the items you'll need for this repair: 8mm socket, ratchet, and socket extensions.
To remove the headlight housing, we're going to use an 8 millimeter socket with a long extension and a ratchet to remove these two 8 millimeter bolts at the top and loosen one down behind the grille here.
Remove the headlight housing by sliding it forward and removing it from that bolt we loosened. Push down on the tab and release the electrical connector from the turn signal, the headlight, and the side marker.
Here we have our old headlight that we removed from our 2006 Ford Explorer and our new part from 1AAuto.com. As you can see, these parts are exactly the same. We have the same headlight turn signal and side marker location. We have the same retainer pins on the rear here. Even comes with new side marker, headlight, and turn signal bulbs you can see down there. We have the same mounting locations at the top and the same slotted mount here on the inside edge at the bottom.
You can see our old headlight housing is starting to become cracked and faded. This is going to mess up the light pattern coming out of our headlight, making it dimmer and harder to see because the beam isn't going to be aimed the way it was designed to from the factory. It's going to break up differently through all those little hairline cracks in the housing, as well as allow moisture in, which is going to clog it up and corrode our electrical connectors, just create a whole mess of issues.
Fortunately, this new replacement part from 1A Auto is going to go in direct fit just like our original headlight, restore our vision and safety while driving, and fix you up right.
Now, we'll reinstall our electrical connectors on to the appropriate bulb sockets. Line up our tab here to the bolt we loosened at the bottom and then reinstall our top two bolts. Reinstall the headlight housing. Once your headlight is locked into place and all the hardware is tightened down, and you're good to go.
Thanks for tuning in. We hope this video helped you out. Next time you need parts for your car, please visit 1AAuto.com. Also check out our other helpful how-to and diagnosis videos.

How To Install Replace Headlight Pontiac Sunfire 1995-2002 1A Auto
Watch this video to learn how to replace and service the headlight assembly and bulbs on your 95-02 Pontiac Sunfire.
