
How to Replace Headlights 2002-09 GMC Envoy
Created on: 2020-07-08
This video shows you how to install a new TRQ headlight assembly on your 2002-09 GMC Envoy.
Tools needed
-
Gloves
Trim Tool Set
Safety Glasses
Pocket Screwdriver
Okay, friends. One of the first things we need to do to get started on our headlamp assembly is to pop the hood. Once you have the hood up, if you were to look right here and right over there, you're gonna see this little clip. You should be able to grab onto it and hopefully try to draw it up. You can use a screwdriver, a pry bar, some pliers, anything you've got. I'm just gonna lift it up just like that, and that unlatches it. Do the same thing to the other one. There we are. Now, the headlamp should be able to move around fairly freely. Be careful not to let it go so it doesn't fall down. Nobody wants anybody to get hurt. Okay, next we're gonna go ahead and start removing the wiring from the backside. If you have a nice pocket screwdriver or even that trim tool that I was just using, you can come down like this, lift up on the tab, draw it away. I always look at the connectors to make sure there is no funny colors.
Come right over here. The directional is gonna have a little squeeze tab. That's gonna keep it from spinning out. Go ahead and squeeze that down, give it a twist counterclockwise, and remove it. This one, counterclockwise, remove it. Check your bulbs, make sure they're in good condition and move along. So, I'm looking at the bulbs real quick, and I happen to notice this little bulb right here. I'm gonna hold it over the plastic so you can see. It's very dark, very black, definitely burnt. If I was to hold it to a new one, you could tell that this one is no good. At this point, it's the best time to go ahead and replace these. We've got our new headlamp assembly here. One of the first things we need to do, though, is prep it. If you were to look at the backside, first of all, you're gonna notice that this came inside the box, and you're gonna wonder why is that even there. It's because it's gonna need to cover this hole. What we need to do is we need to remove this wire tie right here, get this bracket out of here. This is just for shipping. It's gonna make sure that nothing gets rattled around, okay?
Go ahead and take some cutters, give that a little snip, and then go ahead and recycle this properly. At this point, we're gonna take that nice little cover that I just mentioned to you, and we're gonna slide it right over the top here. That's gonna help keep moisture and debris out of there. It's very important. You need to make sure you put it on. Go ahead and grab these white tabs. We'll remove those. This is also just for shipping. It's nothing important. And this is, of course, where all those bulbs are gonna go. All right, let's get ready for our install. Now it's gonna be time to get this back in here. Go ahead and line up the small one here for a marker. We'll grab that directional bulb, put it up there, lock it in by turning it clockwise. We've got our connector, click it in, give it a nice tug, make sure it's secure.
So, now if you were to look at the headlamp assembly, you're gonna see that there's little pitons. There's gonna be two on this side that match up with this, and then there's gonna be two on this side that match up with this one. We're gonna need those to go inside the holes that are right along here. So, what you need to do is make sure that these are still up. If for some reason they were loose and they slid down...if they were loose and they slid down like this, obviously the piton's not gonna make its way down inside there, and you're gonna have an issue. You need to make sure they're completely up. There we are. Perfect. Carefully slide it in there, lining up the pitons with the holes all the way, and then go ahead and lock it in.
Usually, once I get them started, I'll try to take something simple as a punch, maybe a hammer and just try to give it a couple loving bonks just to make sure it's completely locked in. You're gonna notice that the sound changes. You hear that? Okay. Give it a nice wiggle. Make sure it's completely secured on all four corners. Give it a test. If you were to look right down along the backside of your headlamp, you're gonna see a little star-looking piton down there. That's actually the adjustment. You're gonna need a tool that looks like this. This is a size E8 inverted torx. I'll put it right on here, and then I'll put it on there. If I was to turn this clockwise, it's gonna bring the lamp down. If I was to turn it counterclockwise, it's gonna bring the lamp beam up.
This is going to be a general tutorial on how to aim your brand new TRQ headlamp assemblies. Okay, so looking at your brand-new TRQ headlamp assembly, you're gonna see where your low beam is, and you'll see a little dot right in the center, and that is the axis point, okay? So, what we're gonna do is we're gonna mark that with an erasable marker, just so it's easier to see. Next what we need to do is measure from the level ground up to this point and take note of that measurement. And now we're just gonna pull the car up to our wall. On our vehicle, we remember that the measurement was 28 inches for our axis point. Your vehicle may be different, but that's where I'm gonna put this tape, just above that 28 inches. We'll do the same on the other side. Okay, so let's just back the vehicle up straight back, 25 feet from the wall. And now that we moved our vehicle 25 feet back from the wall, we're gonna start with our measurement here. That's where the headlamp center is. We're gonna go down 4 inches on the driver's side. On the passenger's side, we have our line here. What we need to do is go down 2 inches. To adjust the driver's side, we're gonna cover our passenger's side headlamp.
If you look at the backside of your headlamp assembly, you're gonna see something that looks like this. This is the adjustment. Some of these headlight assemblies have one, two, or even more of them, but you should at least have one. This is how we're gonna adjust the headlight beam. Now, we're gonna lower the top part of the beam down to just below this line. When you turn the adjustment to the right, it brings the beam up, and if you turn it to the left, it'll bring the headlight beam down. And this is this way on most vehicles. Let's continue on to doing the passenger's side. All right, we properly aligned our TRQ headlamp assemblies.
Okay, and on the quality TRQ headlamps for our pickup truck, the procedure is gonna be the same. You're gonna find your center dot, mark it, and then you'll measure from the level ground up to your dot. So, once your headlamps are properly adjusted, it'll be time to adjust your fog lamps. You'll notice on the driver's side, the focal point is all the way at the bottom right now. I would like to bring it up so it meets up with approximately the bottom of the focal point of the headlight. Some fog lamps have an adjuster, others don't. The ones that do have an adjuster, you would just turn the adjustment to the left or to the right to adjust the beam up and down to where it needs to be. Now, with your TRQ headlamps and fog lamps properly aligned, you can drive down the road safely.
Shop Products


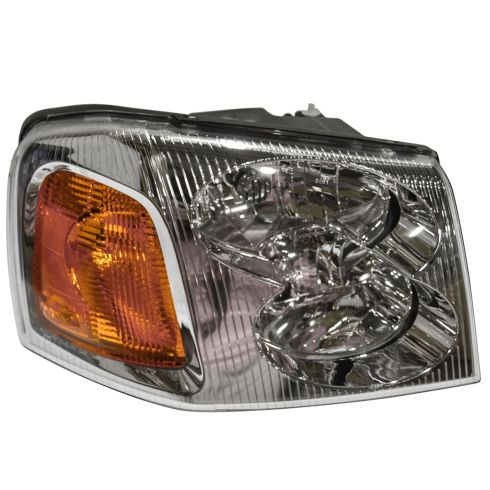
GMC Envoy Envoy XL XUV Passenger Side Headlight Assembly TRQ HLA88504
Part Details:
- Features and Benefits
- PC (Polycarbonate)
- 9005 High Beam
- 9006 Low Beam
- Yes
- Yes
- Assembly

How to Replace Headlight and Bulb 1997-99 Cadillac Deville
Watch this video to learn how to replace and service the headlight assembly and bulbs on your 97-99 Cadillac Deville.
