
How To Replace Headlights 2004-06 Hyundai Elantra
Created on: 2013-05-10
Watch this video to learn how to replace the headlights and access and replace the headlight bulbs if yours are cloudy or broken
-
step 1 :Changing the Bulbs
- To replace the turn signal twist the socket up and pull and push the bulb down and twist to remove it.
- Put the new bulb in and twist then replace the socket and twist it down.
- For the headlight remove the cap and pull off the connector.
- Push the clip down and off and pull the bulb out.
- Replace the bulb with the notch at the top.
- Replace the clip and harness. Then twist on the cap.
- Next to the headlight bulb there is a day time light that can be twisted out and the bulb pulls straight out.
-
step 2 :Replacing the Headlight Assembly
- Remove the two 10mm bolts at the top of the headlight.
- Use an extension to get the third 10mm bolt down behind the headlight.
- Remove the two connectors from the back of the headlight by pushing the tabs and pulling out.
- Pull the grille side of the headlight and pull the assembly free.
- Insert the new headlight assembly outside first.
- Replace the three 10mm bolts.
- Replace the connectors.
-
step 3 :Adjusting the Headlights
- Use a screwdriver in the adjustment screw on the back of the headlight to adjust the headlight up and down.
- Clockwise is up and counterclockwise is down.
- Aim the headlight at a wall 20ft away. Aim the concentration of the light one inch below the bulb.
-
step 4 :Removing Drivers Side Shield
- To remove the headlight assembly or change a bulb on the drivers side you need to remove the shield.
- Use a Phillips screwdriver to twist the center up and pull the clip out.
- Use a 10mm socket and ratchet to remove the bolt at the top of the shield.
- Remove the shield.
Tools needed
-
Socket Extensions
10mm Socket
Ratchet
Brought to you by 1AAuto.com. Your source for quality replacement parts and the best service on the Internet. Hi, I'm Don from 1A Auto. I hope this how-to video helps you out, and the next time you need a part for your vehicle, think of 1AAuto.com. Thanks.
In this video we're going to show you how to replace and service a headlight, and the parking lights. We're going to show you both replacing the entire headlight assembly, which at 1A Auto we sell great replacement headlights. If your lights are dim, dull, clouded or scratched or broken, we'll also show you how to just replace the bulbs if that's all you need to do. To replace the bulbs no tools are necessary. To replace the headlights you'll either need a 10mm wrench or a socket and ratchet with extension.
I'm going to replace and remove the turn signal on the right hand side of the vehicle. It's got a connector on it and it's the furthest most to the right. I'm going to twist it up and pull. I'm going to remove the bulb by pushing down and twisting, and repeat the process, push in and twist. To reinstall the socket put it in and twist down. I'm removing the regular low beam. So I'm going to show you on the new lamp, the back side, we've already twisted off the cap and you've got your low-beam bulb here. In order to take that off you're going to pull off the connector and remove the clip by pushing down and pulling off the clasp, and pull your bulb out. You'll notice it's notched on the top, and that's going to go back in. Put the notch at the top, seat it flush, push your clip down and then into the clasp. Put your connector back on nice and tight. There is a small daytime running bulb and in order to access that I'm just going to twist and pull the connector, and pull the bulb. I'm going to pull this bulb out. Just wiggle it a little bit and it should come right out. Snap your new bulb in and push it flush.
You can reinstall your low-beam connector, with your wires inside. Take your cap. If you want to replace your entire assembly for whatever reason, it being broken, or faded the lens, were going to go ahead and use a 10mm socket, a wrench to remove three ten-millimeter bolts, three and we'll speed up as Donny uses his 10mm socket and ratchet to remove the two bolts on top. Then he adds an extension to make it easier to get to the one down in the back. I'm going to remove the two connectors at the back side of the headlight assembly. First is the big square one, and next one is on the blinker assembly. The blinker connector you need to push the tab in and pull out. This is the tab here, so you push that in and pull it out. I'm going to pull the assembly right now. I'm going to take it from the grill side first. Just wiggle it until it comes out. So I've got the new lens assembly here from 1A Auto, and it's got new plastic on so the lens up front is totally clear and ready to go. It's going to install just as the factory one did. I'm going to reverse the procedure and it's just going to slide in the blinker side first. The holes line up just like they did with the other one.
We'll speed up here a little bit as Don installs the bolts. He starts them by hand first, and then tightens them up nice and firm with the 10mm socket ratchet and the extension for the one in behind. I am reattaching the two connectors on the back side of the lens assembly. Now we've got the new assembly installed. Peel off the protective plastic. I'm adjusting the headlight assembly with a Philips head screw driver short, and the adjustment screw is at the top of the headlight assembly on the back. So what I'm going to do is I'm going to adjust it to I have the car on a flat surface and 20 feet away is a board, and the concentration of the light should measure one inch below the level of the bulb in the headlamp assembly. In order to adjust it you're going to use that screwdriver on that screw, and if you turn it counter-clockwise the concentration of the beam is going to go down, and when you turn it clock-wise the beam will raise.
Okay, for your reference on the left side of the driver's side there is a shield in the way so there are three clips in the front that you have to remove. Here's a close-up of one of those clips. Use a Phillips screw driver to twist out the center and then pull the clip up and out. Then use a 10mm wrench or socket and ratchet and remove the small bolt on top and just kind of pull the shield out of the way. Shield on, so just remove that and it comes right out.
We hope this helps you out. Brought to you by www.1AAuto.com. Your source for quality replacement parts and the best service on the Internet. Please feel free to call us toll free 888-844-3393. Were the company that's here for you on the Internet and in person.
Shop Products


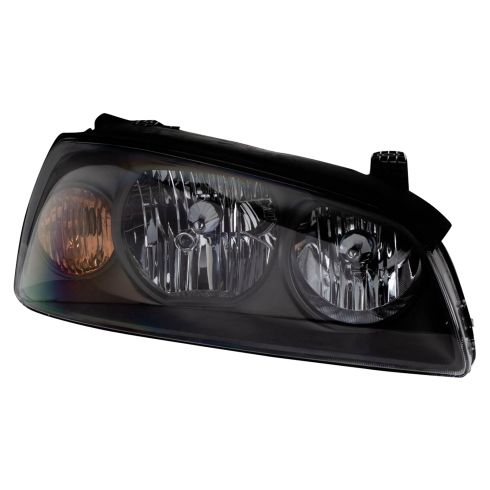
2004-06 Hyundai Elantra Passenger Side Headlight Assembly Eagle Eyes HY029-B001R
Part Details:
- Features and Benefits
- PC (Polycarbonate)

How to Replace Headlights and Bulbs 2000-04 Toyota Tundra
Does your 00-04 Toyota Tundra have dim headlights? Change the bulbs, or replace the headlights. Learn how to do both in this video from 1A Auto!
