How to Replace Heater Blower Motor 1970-91 GMC Jimmy Full Size
Created on: 2010-06-12
Check out this 1A Auto tutorial video, and you will learn how to replace the blower motor on your 70-91 GMC Jimmy.
-
step 1 :Remove the blower motor.
- Unplug the lead and unscrew the 6mm nut attaching the ground wire.
- Unbolt the five bolts securing the blower motor in the air box.
- Use a flex joint and socket and ratchet to reach the bottom bolt
-
step 2 :Remove air box
- Undo the clips on each side of the air box and move it out of the way.
- Lift the filter up and out.
- Lift the airbox up firmly and use a screwdriver to pop out the clips.
- Pull the airbox out towards the center of the car.
- Set it aside.
-
step 3 :Install the new blower motor
- Seat the new blower motor into it's housing.
- Bolt it back in with your socket and ratchet.
- Attach the ground strap and bolt it in.
- Plug in the lead.
-
step 4 :Test the blower motor
- Turn on the car and test the new blower motor.
Tools needed
-
Socket Extensions
6mm Socket
7mm Socket
Ratchet
Brought to you by 1AAuto.com, your source for quality replacement parts and the best service on the internet.
Hi, I'm Mike Green. I'm one of the owners of 1A Auto. I want to help you save time and money repairing and maintaining your vehicle. I'm going to use my 20 plus years of experience repairing and restoring cars and trucks like this to show you the correct way to install parts from 1AAuto.com. The right parts installed correctly, that's going to save you time and money. Thank you and enjoy the video.
In this video, we're going to replace the blower motor on this 1986 GMC Jimmy. This blower motor does fit a lot of different applications. The tools we need for the Jimmy are a 6 millimeter socket and a 7 millimeter socket and a ratchet handle with an extension and flex joint. Now, that may vary depending on your application.
The blower motor in these trucks right there at the passenger side under the hood. Okay, here it is. There's a ground strap connected to it with a 6 millimeter or a quarter inch nut or bolt. There's a lead that goes into it. I'm going to cheat here slightly with an air ratchet. There's one, two, three, four, five bolts over here. The easiest way to get to the bottom of this one is with a flexible joint and a hand tool then the motor comes right out. Our motor here is making a lot of squeaky noises so we're going to replace it. Okay, typically one of these motors is making a whole bunch of squeaking noises at low speed.
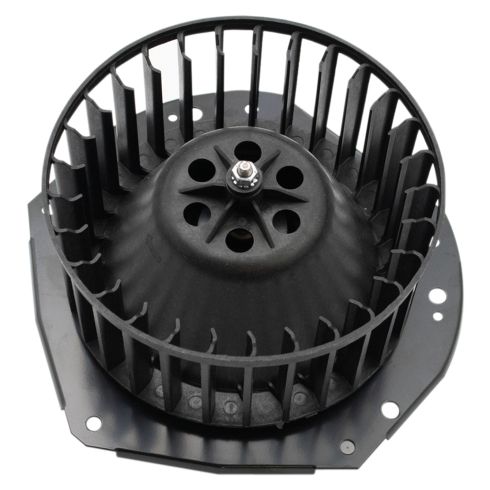
Here's our original motor and you can hear it squeaking. Here's our new motor, no squeaky. You can see, everything is exactly the same as the holes and tubes, the plug ins. Over the other side, the range is all the same, basically new and clean so it's ready to bolt in. Okay, obviously to get the motor back in, you'll line a pin right here. Okay. Try to put the motor in here. You know the plug is down on the bottom. That seems to work well. Let's start one screw in, then a second. I'll fit the first one in the bottom, I'll get it snugged and then I'll tighten the other ones up snug and then I'll tighten them tight. It don't have to be extremely tight because you are just going through plastic.
Attach the ground straps to the new motor. You generally have to get the bolt in, pull and then press your wrench in and it kind of spread itself in. We can plug in the lead. Okay. Now, I'm going to go in the car and turn on the pin and see if everything works well. As you heard, everything is working well.
We hope this helps you out. Brought to you by www.1AAuto.com, your source for quality replacement parts and the best service on the internet. Please feel free to call us toll-free, 888-844-3393. We're the company that serves you on the internet and in person.
Shop Products

How to Replace Blower Motor with Fan Cage 1982-88 Chevy Camaro
Need to replace the blower motor on the 82-88 Chevy Camaro. This video will help you do it yourself
