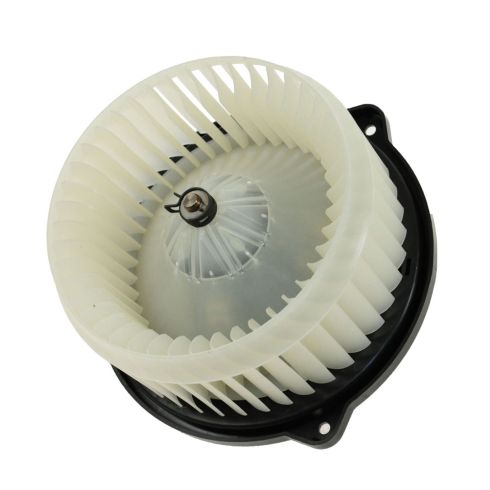
How to Replace Heater Blower Motor 1996-2002 Toyota 4Runner
Created on: 2012-03-10
Check out this video to learn how to replace the blower motor on your 96-02 Toyota 4Runner.
-
step 1 :Accessing the Blower Motor
- Remove the four Phillips head screws from the door sill plate
- Remove the sill plate
- Pry off the kick plate by hand
-
step 2 :Removing the Blower Motor
- Disconnect the wiring harness from the blower
- Remove the three screws from the blower with either a T25 Torx Driver or an 8mm socket
- Pull out the blower
-
step 3 :Installing the New Blower Motor
- Put the new blower into place with the tab on the left
- Start the three screws by hand
- Tighten the three screws
- Attach the blower motor wiring harness
- Turn the car on
- Test the fan
- Turn the car off
-
step 4 :Reinstalling the Trim Panels
- Snap the kick panel into place
- Put the sill plate in place
- Insert the four Phillips screws into the sill plate
Tools needed
-
Socket Extensions
Phillips Head Screwdriver
8mm Socket
Ratchet
T25 Torx Driver
Brought to you by 1AAuto.com, your source for quality replacement parts and the best service on the Internet.
Hi, I'm Mike from 1A Auto. I hope this how-to video helps you out, and next time you need parts for your vehicle, think of 1AAuto.com. Thanks.
In this video we're going to show you how to replace the AC and heater fan blower motor in this '99 Toyota 4Runner, same as any '96 to 2002 4Runner. Tools you'll need are: a Phillips screwdriver, and you'll either need an 8 millimeter socket with a ratchet and two inch extension or a T25 Torx driver.
Start by removing the 4 screws that hold this soleplate down. Fast-forward as I remove those screws. Now, on this kick panel here, I'm going to reach down underneath, and pull out. Right underneath is your fan. I'm going to disconnect it. There is a kind of a button coming in from the outside. Press that there and then pull down on the connector. It takes a little bit of force. On these screws you can either use a T25 Torx driver or an 8 millimeter socket with a ratchet. I'm going to speed up here again. You can see I start with the T25 Torx driver. That rear one that's kind of in the corner is a little more difficult, so I go with the 8 millimeter socket and ratchet. Probably the perfect tool is your 8 millimeter socket with a ratchet and a 2 inch extension. Now, as I'm taking that last screw out, the motor pretty much falls down. It comes right out.
The new motor from 1A Auto is exactly the same as the one that came out. Going to have this larger section, go over in there. Speed it up here again. You push the motor up in there. Start the 3 bolts in. I always start them first. Then use your socket and ratchet or your T25 Torx driver to tighten them up. I'll turn the key on, run a quick test. Once you've confirmed it, turn it back off and shut the key off. Now, fit that kick panel back in and it snaps back in place and then your sill plate snaps back in. We'll speed it up here as we put the four screws back in and tighten them up with a Phillips screwdriver.
We hope this helps you out. Brought to you by www.1AAuto.com, your source for quality replacement parts and the best service on the Internet. Please feel free to call us toll-free, 888-844-3393. We're the company that's here for you on the Internet and in person.
Shop Products

How to Replace Blower Motor with Fan Cage 1982-88 Chevy Camaro
Need to replace the blower motor on the 82-88 Chevy Camaro. This video will help you do it yourself

