How to Replace Heater Blower Motor 2002-09 Chevy Trailblazer
Created on: 2011-05-23
Watch this video and learn how to locate and replace the blower motor if yours is whistling, screeching, or broken
-
step 1 :Remove the AC Fan Blower Motor
- Under the passenger side dash, unbolt the plastic cover using your 7 mm socket and ratchet.
- Unclip the wiring from the plastic panel.
- Open the glove compartment and unhook it to let it drop down.
- Use your socket, ratchet and extension to unbolt the blower motor.
- Unplug the wiring harness from the blower motor and pull the blower motor down and out.
-
step 2 :Install the blower motor
- Insert the blower motor up into place.
- Plug in the wiring harness.
- Bolt into place with your 7 mm socket and ratchet.
- Rehook your glove box back in and close it.
- Clip the wiring brackets back to the plastic cover.
- Bolt the plastic cover back on with your socket and ratchet.
Tools needed
-
Socket Extensions
7mm Socket
Ratchet
Brought to you by 1AAuto.com, your source for quality replacement parts and the best service on the Internet.
Hi, I'm Mike Green. I'm one of the owners of 1A Auto. I want to help you save time and money repairing and maintaining your vehicle. I'm going to use my 20+ year's experience, restoring and repairing cars and trucks like this to show you the correct way to install parts from 1AAuto.com. The rights parts installed correctly. That's going to save you time and money. Thank you and enjoy the video.
In this video, we're going to show you how to remove and reinstall your heater and A/C blower motor on this 2004 Trailblazer, same as most Trailblazers, Envoys, Rainiers, and Olds Silhouette. Tools you'll need 7 mm socket and a 7/32 socket with a ratchet and extension.
First you want to remove two 7 mm bolts. One there and then one over there. Now this panel pulls down and you can see there are some connectors here. You can just kind of pry them away from the panel. You take this one; you can actually pry down on this little tab and then pull it off. Then this comes out. Open up your glove compartment. Okay, this little hook just pulls up and you can move your glove box down. You'll want a 7/32 with an extension and a ratchet and you're just going to reach up underneath. And we'll fast forward as I remove that bolt.
This one over here you can see. Then there's actually one, the third one is down in behind, so you're going to want to reach up from underneath. Let's see here, where is it at? Okay, it's right there. Okay, now once it's out, that's usually the easiest time to unplug your lead here, which to unplug it you want to press right there. The lead comes off and there's your motor out. Okay, now we're going to, just going to take the lead out and just pull this plastic casing out. So to reinstall, open our glove compartment back up. Basically what I'm doing, taking my motor, this little tube coming down here, that's where your rubber hose hooks on to. I'm going to put my motor up in, make sure that no wires or anything get up in there, getting caught. I'm just reaching in behind. There's my tube, push that up on, I'm holding the motor up on. I have to get this plastic cover up in there without getting any wires. The easiest way to do this, alls you're seeing is the glove compartment. I'm looking up under here and just moving all the wires out of the way, then I put the plastic cover up and in. Kind of rotate it.
Now I can start on this first bolt here that's holding it on. I'll take my extension and put my second bolt into it. Looking right through here, I can barely see this hole. Start my second bolt. Now I'm going to put my third one up in there. Okay, now I'm going to speed it up as I kind of tighten them by hand and then start tightening one with the wrench and then I'll slow it back down to connect the lead. They don't have to be extremely tight. Just make sure all my leads and everything are okay. I'm going to bring this, my lead to the motor through. It does clip up into a clip. You see my hand right in here; I'm just pushing it into its little plastic clip where it stays.
And I'll hit the fast forward button again as I tighten up the last two bolts and then close the glove compartment. Okay, now here I'm just going to speed through putting our harnesses, clipping them back into that panel and put the panel back up in there. Start the bolts and then tighten them back up.
We hope this helps you out. Brought to you by www.1AAuto.com, your source for quality replacement parts and the best service on the Internet. Please feel free to call us toll free 888-844-3393. We're the company that's here for you on the Internet and in person.
Shop Products


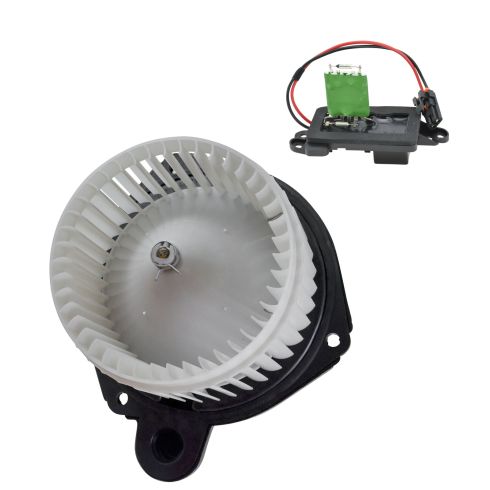
Chevrolet GMC Buick Olds Isuzu HVAC Blower Motor Kit TRQ HMA80801
Part Details:
- Highest Quality Materials
- Quality Tested - built to a strict level of product standards.
- (1) HVAC Blower Motor Assembly
- (1) Blower Motor Resistor

How to Replace Blower Motor with Fan Cage 1982-88 Chevy Camaro
Need to replace the blower motor on the 82-88 Chevy Camaro. This video will help you do it yourself
