
How to Replace Heater Hose Inlet Tube 1996-99 GMC K1500
Created on: 2017-03-24
Learn how to drain and refill the coolant to remove a bad heater hose inlet tube with this how-to video
-
step 1 :Draining the Coolant
- Push down and remove the radiator cap
- Have a drain pan ready
- Unscrew the drain plug
- Let the coolant drain
- Tighten the drain plug
-
step 2 :Removing the Heater Hose Inlet Tube
- Disconnect the plastic connector
- Remove the heater inlet hose from the fitting
- Spread the plastic container bracket and pull the hose out
- Loosen the hose clamp and remove the hose
- Remove the hose from the vehicle
- Pry up on the lock tabs with a clip and slide it off the end of the inlet hose
- Remove the hose clamp from the old hose
-
step 3 :Installing the Heater Hose Inlet Tube
- Install the quick connector to the new hose
- Install the spring clamp onto the other end of the hose
- Reinstall the quick connector
- Clip the hose into the brackets
- Connect the hose and the hose clamp
-
step 4 :Refilling the Coolant
- Add coolant to the coolant bottle using a funnel
- Twist on the coolant bottle cap
- Run the engine briefly
- Add coolant as necessary
Tools needed
-
Drain Pan
Anti-Freeze
Pick
Hi, I'm Mike from 1AAuto. We've been selling auto parts for over 30 years! We're dedicated to delivering quality auto parts, expert customer service, and fast and free shipping, all backed by our 100% satisfaction guarantee. So visit us at 1AAuto.com, your trusted source for quality auto parts.
In this video we're going to be working with our 1996 GMC Sierra K1500. We're going to show you how to remove and replace your vehicle's heater core inlet hose.
If you like this video, please click Subscribe. We have a ton more information on this and many other vehicles. And if you need this part for your truck, you can follow the link down in the description over to 1AAuto.com.
Here are the items you'll need for this repair: drain bucket, pliers, pick, coolant, funnel
Remove your radiator cap by pushing down and turning it counterclockwise. At the bottom of the driver's side of the radiator you'll see a little thumb screw for your radiator drain. Make sure you have a drain bucket underneath there and reach down and loosen it by hand. Allow your cooling system to drain, and then close the drain on the radiator.
Disconnect the plastic connector for the heater inlet hose that simply clips together. Pull it out of the fitting. You then need to spread the plastic retainer bracket down here. Hold the hose out. There's another retainer bracket just under your airbox. Lift up and release the retainer. You can then follow the hose back.
Using a pair of pliers, collapse the clamp on the hose at the firewall. Slide it back, and then use the pliers to twist the end of the hose and free it from the fitting. Remove the hose from the vehicle. Using a small pick, pry up on the lock tabs of the clip. Slide it off the end of the inlet hose. Slide the clip off the end of your old hose while we have it on the bench. Remove the clamp from the inlet hose as well.
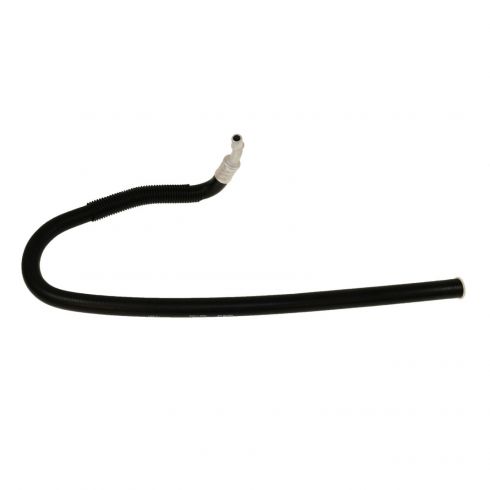
Here we have our old heater hose that we removed from the vehicle and our new part from 1AAuto.com. As you can see, these parts are exactly the same with the same click connect fitting on the end, the same coupling, and it even comes with some insulating wrap here. The rubber hose is bent the exact same way to keep it from kinking and make installation nice and easy.
Now these hoses can tear or break, but also have one of these fittings snap off or begin to leak. So if that's your problem, this new part from 1A Auto is going to go in direct fit, just like your original equipment, and fix you up right.
Carefully reinstall the quick connector back onto your heater inlet hose. Go ahead and clean off any debris that's on the old fitting. You just want to make sure that there are no cracks or any heavy build up on there. A little bit of discoloration is fine. Then we'll set our spring clamp to go back on to this end of the hose. We'll just set that on there partially for now so we can finish installing it back on our vehicle.
Reinstall the quick connector. You want to make sure that the tabs align with the notches and the fitting. Reinstall that fully. We'll then set it back into its retainers, and they just simply push all the way in and pop into place—one next to the alternator and the other one under the airbox.
Get your hose started onto the heater core Inlet. Then compress the clamp with a pair of pliers or locking jaw pliers like I'm using here. Release the clamp and refill and bleed your cooling system. Fill your vehicle with a 50/50 mix of Dex-Cool coolant. We're using the special funnel to show you how much air actually comes out of the system when you do this, but any old funnel will do at home.
To finish bleeding your cooling system, simply leave the radiator cap off, start your vehicle, set your defrosters or vents to the lowest fan speed and highest temperature setting. This will allow the heater core to bleed as well. Just run the vehicle. Keep an eye on the temperature gauge. Let it get up to temp and monitor the coolant level inside of your radiator and top off as necessary.
You'll notice that there will be several surges where it sort of burps and an air bubble comes out, it loses some fluid. You top it off and this process will probably repeat a few times. Remove your funnel and reinstall your radiator cap, fill the overflow and your vehicle is good to go.
Thanks for watching. Visit us at 1AAuto.com for quality auto parts, fast and free shipping, and the best customer service in the industry.
Shop Products

How to Replace 1994-2004 Chevrolet S-10 Heater Hose Connector
This video shows how to replace a heater hose in your 1994-2004 Chevrolet S10.
