
How to Replace Hood Latch 1994-2005 Chevy Blazer S10
Created on: 2011-01-26
Watch this video to learn how to replace the hood latch on your 94-05 Chevy Blazer. 1A Auto will show you how.
-
step 1 :Removing the Hood Latch
- Remove the two 13mm bolts securing the hood latch.
- Pry the hood latch cable up and out of the hood latch.
-
step 2 :Replacing the Hood Latch
- Pull back the spring and reconnect the hood latch cable.
- Line up the hood latch and put it down into place.
- Replace the two 13mm bolts.
-
step 3 :Adjusting Hood Height
- Loosen the 13mm bolts and slide the latch up or down to adjust the height of the center.
- Turn the rubber knobs on either side of the engine to adjust the height of the sides.
Tools needed
-
Flat Blade Screwdriver
13mm Wrench
Brought to you by 1AAuto.com. Your source for quality replacement parts, and the best service on the internet.
Hi, I'm Mike Green. I'm one of the owners at 1A Auto. I want to help you save time and money repairing and maintaining your vehicle. I'm going to use my 20 plus years' experience restoring and repairing cars and trucks like this to show you the correct way to install parts from 1AAuto.com. The right parts installed correctly. That's going to save you time and money. Thank you, and enjoy the video.
In this video we're going to be showing you how to replace the front hood latch on this 2000 S10 Blazer same as any Blazer or the GMC Jimmy as well as the Pickups. The only tools you need are 13m wrench and small flat blade screwdriver.
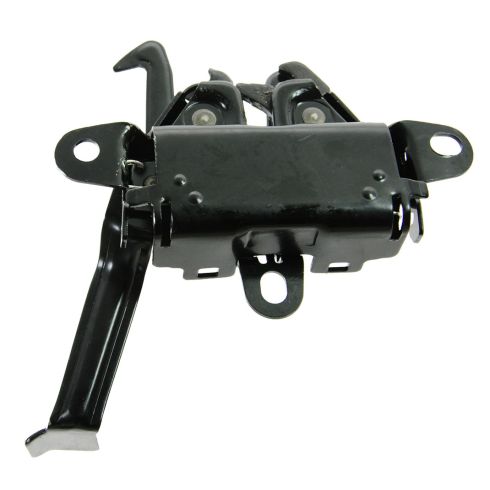
Hood latch, here's actually a new one. You see they mount on the car like this, but turn around, and you can see here what happens is when you pull your cable, you pull that, and the hood pops up. Then when the hood comes down there is a bar that pushes right into here, it pushes that down until it latches. What can happen is if you don't lubricate them, theses can get worn around here, worn around here, and they don't work. This can wear out here so it doesn't latch as well. So, that's why you might need to replace it.
Replacing is pretty easy. 13mm wrench and two 13mm bolts. Undo them. Okay and we'll just hit a little bit of fast forward here as we just remove those two bolts. Once you get that up and out, you just want to pull that cable out of that bracket, and then get a flat blade screwdriver and pry that cable right up out of there. That spring just keeps the cable like that. You see that this latch is in good shape. So, I actually will just reinstall it.
Reinstalling, just put the cable in. Take you spring pull it back this way. Slide the cable right into your clip here. Now put the bolts in. You can see how nicely the bolts have a nice dark circle here. You can use those first time you tighten it up. Just tighten it up so the bolts go right back into the original footprint, and that's a good place to start as far as lining up your hood. A little bit of fast-forward here again as we just put those in and tighten them up. Obviously, you can loosen this up and move it down if you want the center of your hood further down, or up if you want the center of the hood further up. On each side you have rubber bumpers here. You can move these up by turning them counter-clockwise or down by turning them clockwise. Those will control where the level of your hood is, so, you can line up your hood by using the bumpers on the side and moving your latch mechanisms up and down.
We hope this helps you out. Brought to you by www.1AAuto.com, your source for quality replacement parts, and the best service on the internet. Please feel free to call us toll-free 888-844-3393. We're the company that's her for you on the internet and in person.
Shop Products


How to Replace Hood Latch 2002-09 Toyota 4Runner
Watch this video to learn how to replace the hood latch on your 02-09 Toyota 4Runner.
