How to Replace Hood Latch 2004-09 Subaru Outback
Created on: 2018-05-29
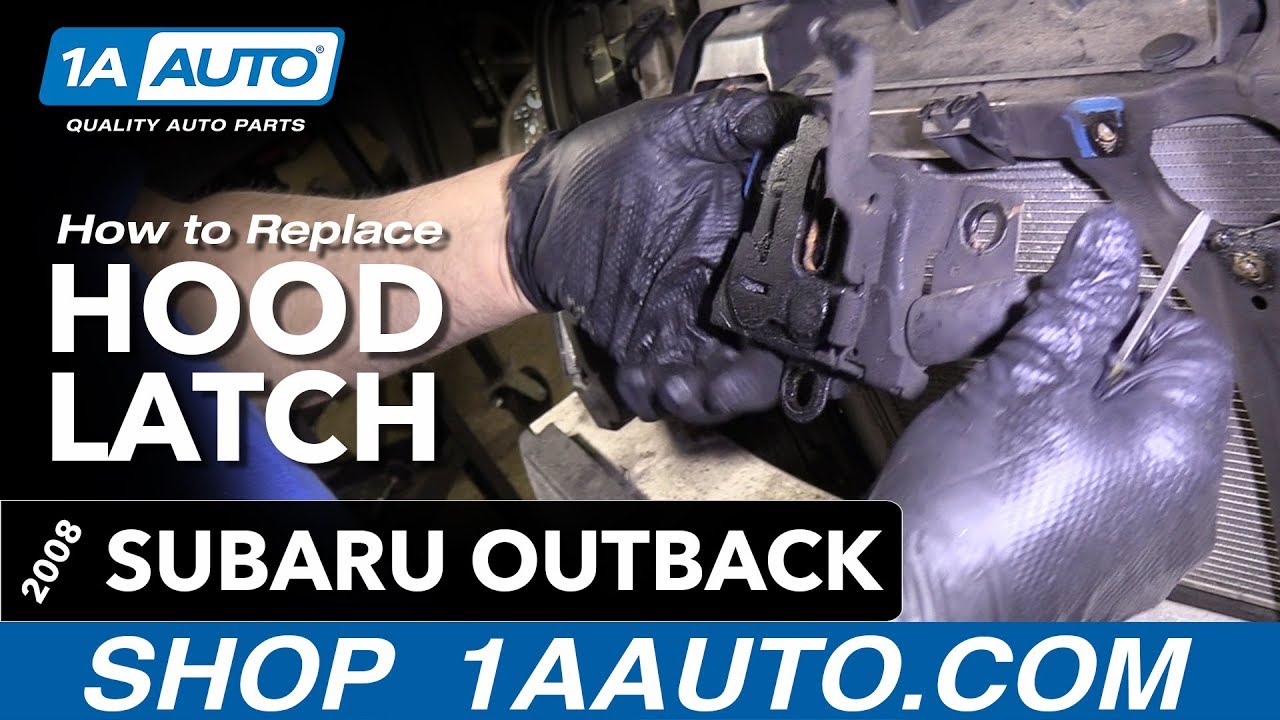
How to repair, install, fix, change or replace a broken or loose hood latch on 08 Subaru Outback
-
step 1 :Removing the Bumper Cover
- Open the hood
- Remove the lower bumper clips
- Remove the inner fender well shield
- Disconnect the fog light
- Repeat the procedure for the opposite side
- Release part of the fender flares to release the bumper
- Remove the top bumper clips
- Release the grille clips
- Pull the bumper cover off
-
step 2 :Removing the Hood Latch
- Mark the location of the latch
- Use a 12mm socket to remove the bolts holding on the latch
- Remove the hood latch cable
-
step 3 :Reinstalling the Hood Latch
- Reinstall the hood latch cable
- Line up the hood latch
- Thread on the bolts by hand
- Snug up the bolts while keeping the latch lined up
- Test the latch to make sure it functions properly
-
step 4 :Reinstall the Bumper Cover
- Line up the bumper cover
- Clip it in at the top
- Clip it in on the sides
- Reinstall the top bumper cover clips
- Reinstall the fog light connectors
- Reinstall the fender well covers
- Reinstall the lower bumper cover clips
Tools needed
-
12mm Socket
Socket Extensions
Flat Blade Screwdriver
10mm Socket
Ratchet
Trim Tool Set
Marker / Writing Utensil
Hi, I'm Mike from 1AAuto. We've been selling auto parts for over 30 years.
In this video we will be removing and reinstalling a hood latch in a 2008 Subaru Outback. If you need parts for your vehicle, click the link in the description and head over to 1AAuto.com.
Open that hood. There's a hood release right here. Pull that back. The hood latch safety is right there. Pull it to the left. Then, there's a prop rod right here. Just stick that right there. We're going to take these clips out. There's one here. I believe there should be one there, but there might be a shield missing. There's one here, here, and here.
We're going to use trim tools. We sell these at 1AAuto.com. Let's get in here. They are a bit of a struggle. We're going to use a flat blade screwdriver just to break this free. This one's a little sticky. I'm going to pull it down just a little bit. Not too far, and we should be able to get underneath and pull it out.
For the sake of the video, we took the wheel off, but if you had the car on the ground, you can always turn the wheel back and forth to gain access to this. So, you can do the same procedure for taking these clips out, for all the clips. That's all the clips. Right here is a clip. I'll pull this clip out. Pull this inner fender well shield out so we can gain access to the fog light. There's a connector right here. Then I push down on the tab and pull the connector straight out. There's the tab. Push down and pull it out.
This part of the fender is intertwined into the bumper, so we need to pull this off just a little bit. There is clips that are pushed in right here, but before we do that, we're going to pull a clip out over here. There's going to be one right there, and we're going to get in under here with our clip tool. Try to pry up a little bit. Do this at the same time. You can grab with your fingers up top. Just pull it out a little bit just to get that out of the way. See how it clips in to there? So you have to do it together.
Then you're going to grab this part of the bumper, and we're just going to pull firmly. Just like that. There's clips right there to hold it in. Don't forget to pull the clip out on this side, the same as the other side. Then we'll pull this back just a little bit. Get that unlocked, then grab the bumper and firmly pull out.
Then we're going to pull these snaps out using a flat blade tool and our trim tool. And this one too. Pull that out. Right along here is these little clips. You push these down, pull out on the grill just like that. Like that.
Now we're going to grab the bumper. The whole bumper should be loose now. Pull it right off. While we pull us out ... Before I pull it out, I want to mark the location of it. You can use a screwdriver and just scribe the paint down here on the side. Do it over here and right here, and that'll indicate where it is when I take it apart to put it together. You could also use a marker. Just mark it, just like that.
Use a 12 millimeter socket and extension and a ratchet. We'll take this bolt out. To get this cable off, there's a piece right here we're going to slide out like that. Take a flat blade tool just underneath. Pull that out. Take the ball out. We're just going to push the cable in and wrap it around. Just like that. And it should latch.
To reinstall our cable, I'm going to take the ball, stick it down in there and wrap the cable around that hook, and it's lined it. And then, I'm going to put this part in the slot right there. Push it down, and then this, we're gonna wrap that around the cable there.
Now, we're going to get our bolts. Start our bolts. So, I'm going to start all three. While we're tightening it down, you want to make sure it's lined up with where you had it. Once we get them all down, then we'll snug them up a little more. Snug those. That's good.
Before we put the bumper back on, we're going to want to test it just in case something does not unhook. So, it all matches, so that's good, and then release the lock, and you're good. Put the prop rod back.
Now, we can reinstall the bumper, and you'll be all set. I'm going to slide this back in. Be careful on the sides. You get the front up here. Just push these in. We're not going to push them all the way down yet. Just like that, and then get it lined up over here.
I'm gonna line it up with the headlight, and then push it in, and on the side, and right there. Lock that in. Same with the other side, line it up with the headlight here. Push it in. We're going to line those tabs up there. Push that there. And push those on. Now, I can push down on these. Lock these in, these lock retainers back in.
Now I'm going to install the push clip right here on the sides first. Just push it in and then lock it in. Just like that. Same for the other side. Pull this back. Push that in there, and then lock it in.
Then I'm going to connect our fog light. Connect that to the bulb. Plug the connector in, and do the same for the other side. Plug the connector in. Lock it in, and we can slide these inner fender wells back in place.
And this is going to slide in under here just like that, and the other side too. Slide this in. Underneath here, that's going to slide. It goes on the outside. Then push these push clips in right there. Another one right there. Another one right here. Another one right here. And two more right here. And the last one.
Thanks for watching. Visit us at 1AAuto.com for quality auto parts, fast and free shipping, and the best customer service in the industry.

How to Diagnose Broken Power WindowDoor LocksMemory Functions Switches
Window switches triggering the wrong functions? This video will show how to fix a common problem on these Explorers and Mountaineers
