
How to Replace Idle Air Control Valve 1994-2002 Dodge Ram 1500
Created on: 2019-09-20
This video from 1A Auto shows you how to replace the idle air control valve on your 94-02 Dodge Ram. Check it out to learn how to DIY!
-
step 1 :Removing the Air Filter Box
- Disconnect the intake air tube from the air filter box
- Loosen the intake clamp with an 8 mm socket
- Disconnect the breather hose from the air filter box
- Pull the air filter box up to remove it
-
step 2 :Removing the Idle Air Control Valve
- Locate the idle air control valve at the rear of the intake
- Disconnect the valve electrical connector
- Remove the two T25 screws
- Remove the idle air control valve
-
step 3 :Installing the Idle Air Control Valve
- Insert the idle air control valve into position
- Install the two T25 screws
- Connect the valve electrical connector
-
step 4 :Installing the Air Filter Box
- Ensure the intake gasket is in place
- Lower the air filter box onto the intake
- Tighten the air filter box clamp with an 8 mm socket
- Connect the breather hose to the air filter box
- Connect the intake air tube to the air filter box
Tools needed
-
Socket Extensions
8mm Socket
Ratchet
T25 Torx Socket
Hey friends, it's Len here at 1A Auto. Today we're going to be working on our 1996 Dodge Ram 1500 and I'm going to be showing you something very simple. We're going to be replacing the idle air control valve. Be very easy, I can do it and you can do it too. As always, if you need this or any other part, you can always check us out at 1AAuto.com. Thanks.
Okay, so now that we've got the hood up, we're just going to come over here. I'm going to grab this tube, give it a nice little tug and we'll set this out of the way. Now I'm going to go over to the other side. Over here, you'll notice there's a clamp right there. You can either use an eight millimeter socket or you can use a flat head screwdriver. You do you Booboo. I'm going to grab my socket. I'm going to see if I can get it off of there. Got a socket, nice little extension here. Let's give this a try.
Now when I loosen this clamp, I'm not going to try to loosen it all the way to the point that it comes apart. These clamps are not the hardest to put back together, but it's just kind of a pain in the butt that you don't really need to deal with because essentially this only has to be loose enough to get this up. I'll show you what the clamp looks like once I get it off here. Let's see if that's far enough. Give this a little wiggle. Oh yeah. All right, so now right here in the center, there's a little piton that goes down into a rubber, a little rubber bushing. I'm just going to grab this, give it a little lift. I'm going to bring it up like this. On this side over here, there's a hose that runs to your breather. Just grab that, pull it off. That's where it connects to. Your air filter is located right in here, inside this clamshell, you just pop this, this, and this. Comes right out easy peasy. Now would be a great time to do it.
This is what the clamp looks like. It's got a lip. Basically it looks like this. A C, goes over this part of the box and then it goes underneath this part of the intake. All right, so we'll just get our gasket out of the way here. We don't want to destroy that. Right back here there's an electrical connector with a little pull tab there. Just grab that, give it a nice little tug. We always check our electrical connectors, make sure there's no funny colors. If you see any rainbow colors in there or rust, dirt, debris of any sort, you need to go ahead and service this. This one actually looks really great, especially since it's a 96. We'll set that aside and we can continue.
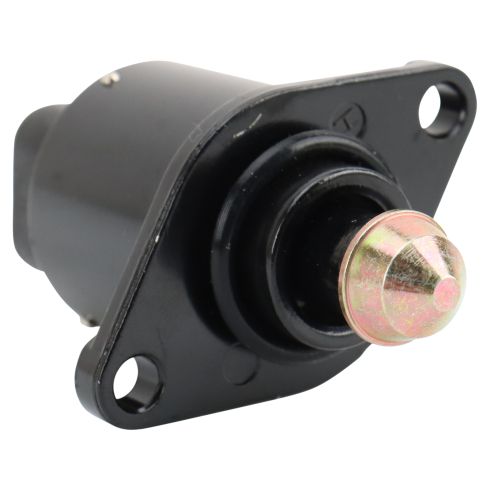
This is it right here. We're going to be replacing it. You can see there's a mounting screw over here. It's a T25 and then there's one down there, also a T25. After we remove those we can draw the unit right out. We've got our T25, going to start up here with this one. A Torx bit looks a lot like a star. I didn't show you that, so I will real quick. Looks like that. It's not a Phillips head or anything like that. It's a star bit, but it's also called a Torx bit.
We moved onto the second bolt here. The sensor's getting nice and loose so that's nice. See if I can get that bolt out of there. Too hard to reach just by hand. See if I can grab it with just the socket. There we go. Oh yeah, almost. Come on baby. Don't play no games. There we go. Awesome. There's our other bolt. It's the same as the first. Nut right there. That's our IAC valve.
All right, so we have our IAC valve or idle air control valve, call it what you want. If you want to, you could put a little bit of lubricant along the rubber seal right there. That's just going to help keep moisture out. Super important. It's good to remember when you remove the IAC valve from the truck, the electrical harness was facing down and towards the driver's side. That's the way we're going to reinstall it. We're not going to put it this way and then the electrical harness has to come up and around and go the wrong way. In all honesty, I don't know if it really makes a difference for the sensor itself, but the way you take it out should be the way you put it back in, so facing down and towards the driver's side.
Come in here, slide it into the hole in the back there. Just like this. Grab one of our screws. You can pick whichever hole you'd like to start with. I'm going to go with this upper one because it's closer to me. I'm not going to tighten this down fully until I get the other bolts started as well. That's super important in case I need to move the sensor around or the valve. I don't know why I said sensor. Let's see if I can get this other one started.
I'm using the same tools that I used to remove it so there's nothing special that I need to explain about that. We have both the screws started in. Pick which one you want to start tightening first and snug it right up. There we are. They're both bottomed out. At this point I'm just going to give it just a teeny bit more, just one finger on it. That's probably pretty good. Come over here to this lower one, same thing. Not very much pressure. I don't need to break it or anything. Nice and tight. I love it. We'll grab our wire. Here it is. I'll get in right here. Just like that. Give it a nice tug. Make sure it doesn't fall out. That's how you get that installed. Let's move along.
Okay, friends, so it's time to get this put back together. We're going to take our gasket. You definitely do not want to forget your gasket. If you did, you'd more than likely be having dirty air getting sucked in past the air filter and having dirty air sucked right into the engine, which would be very bad. Gasket's on, we'll take this, we have our little rubber. We've got our piton over here. Going to slide right onto there. It's going to come right over like this. Line that up with the way it's going to go on there. Just like that. Very nice. All right, so now that we have this down, it's nice and flush, we're going to tighten up the clamp. To do that, you can use your eight millimeter or your flat head. Go with the eight millimeter here again. Just get it on there. Before I go too far, I'm just going to give it a little wiggle. I want to make sure that the clamp's down all the way around. It feels like it is for sure. Continue tightening it up.
We want this to be nice and snug. It's very important. If it's loose, like I said before, you might have dirty getting sucked past the air filter and that'll be very bad for the engine. Give this a nice little wiggle. It doesn't want to lift up. It looks like we're doing all right. We'll grab this hose. This just goes right on the back, right here. Slides on. There it is. That's the breather hose. Bonk, bonk. All right, so we're going to connect this back in. Give it a little push here. There we are, give it a nice little tug. There we are, easy peasy. Down the road we go.
Thanks for watching. Visit 1AAuto.com, your place for DIY auto repairs, for great parts, great service, and more content.
Shop Products

How to Replace Idle Air Control Valve 1996-99 GMC K1500
How to remove, install, and replace a stuck or leaking idle air control (IAC) valve on to the 96, 97, 98, 99 GMC K1500 5.7L V8
